Mounting the Table
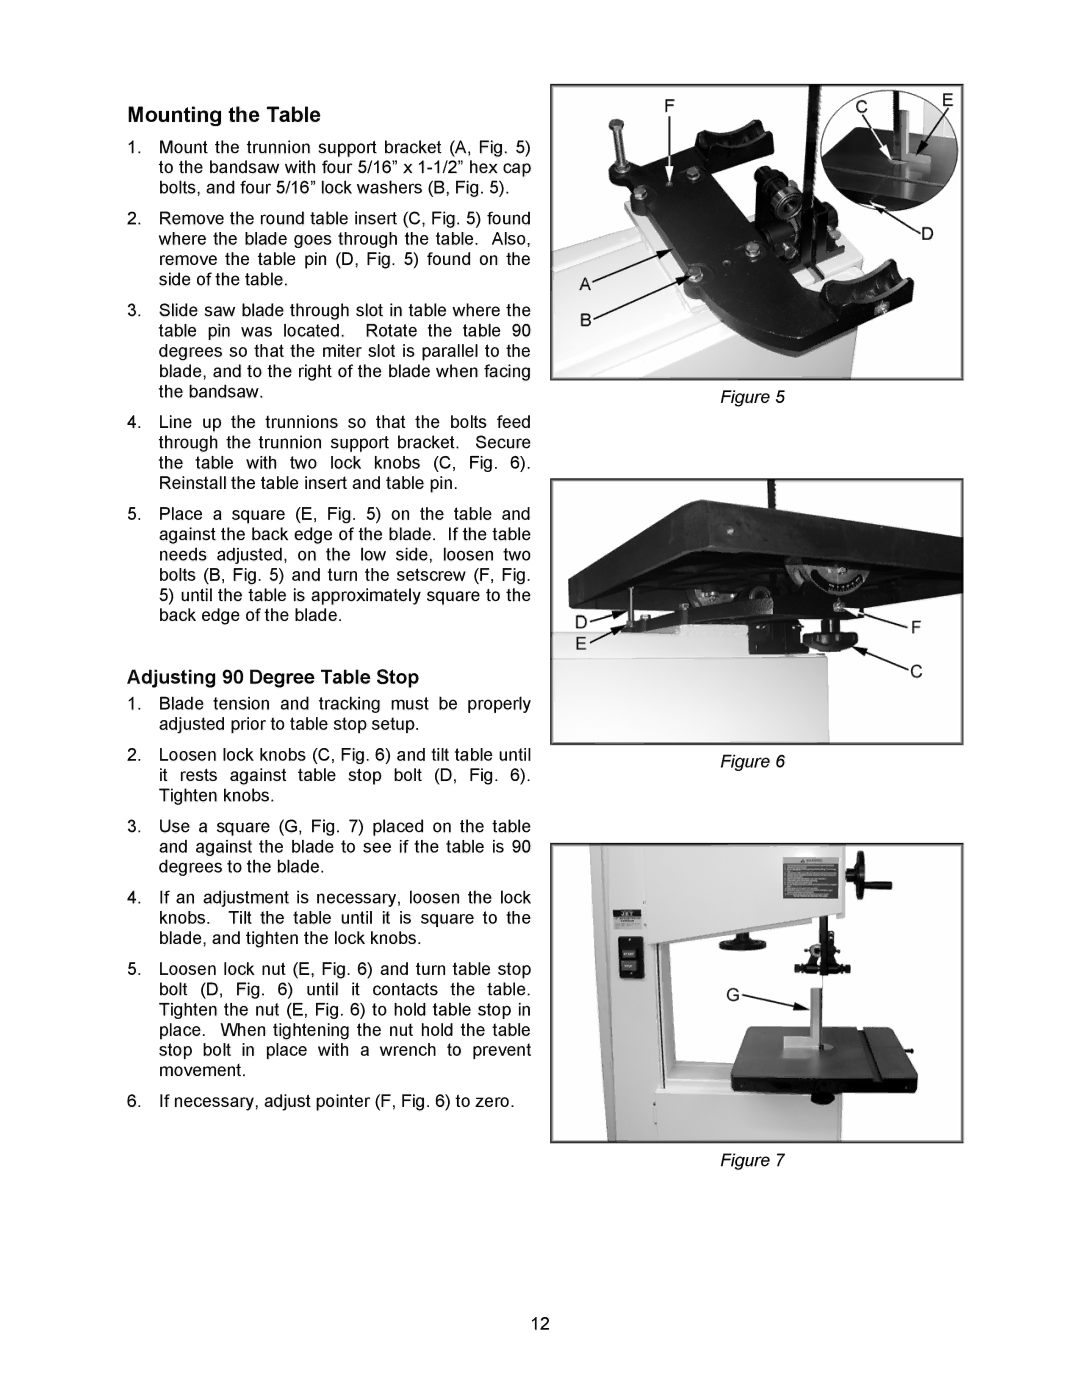
1.Mount the trunnion support bracket (A, Fig. 5) to the bandsaw with four 5/16” x
2.Remove the round table insert (C, Fig. 5) found where the blade goes through the table. Also, remove the table pin (D, Fig. 5) found on the side of the table.
3.Slide saw blade through slot in table where the table pin was located. Rotate the table 90 degrees so that the miter slot is parallel to the blade, and to the right of the blade when facing the bandsaw.
4.Line up the trunnions so that the bolts feed through the trunnion support bracket. Secure the table with two lock knobs (C, Fig. 6). Reinstall the table insert and table pin.
5.Place a square (E, Fig. 5) on the table and against the back edge of the blade. If the table needs adjusted, on the low side, loosen two bolts (B, Fig. 5) and turn the setscrew (F, Fig.
5)until the table is approximately square to the back edge of the blade.
Adjusting 90 Degree Table Stop
1.Blade tension and tracking must be properly adjusted prior to table stop setup.
2.Loosen lock knobs (C, Fig. 6) and tilt table until it rests against table stop bolt (D, Fig. 6). Tighten knobs.
3.Use a square (G, Fig. 7) placed on the table and against the blade to see if the table is 90 degrees to the blade.
4.If an adjustment is necessary, loosen the lock knobs. Tilt the table until it is square to the blade, and tighten the lock knobs.
5.Loosen lock nut (E, Fig. 6) and turn table stop bolt (D, Fig. 6) until it contacts the table. Tighten the nut (E, Fig. 6) to hold table stop in place. When tightening the nut hold the table stop bolt in place with a wrench to prevent movement.
6.If necessary, adjust pointer (F, Fig. 6) to zero.
12
Figure 5
Figure 6
Figure 7