STEP 3. Attach the
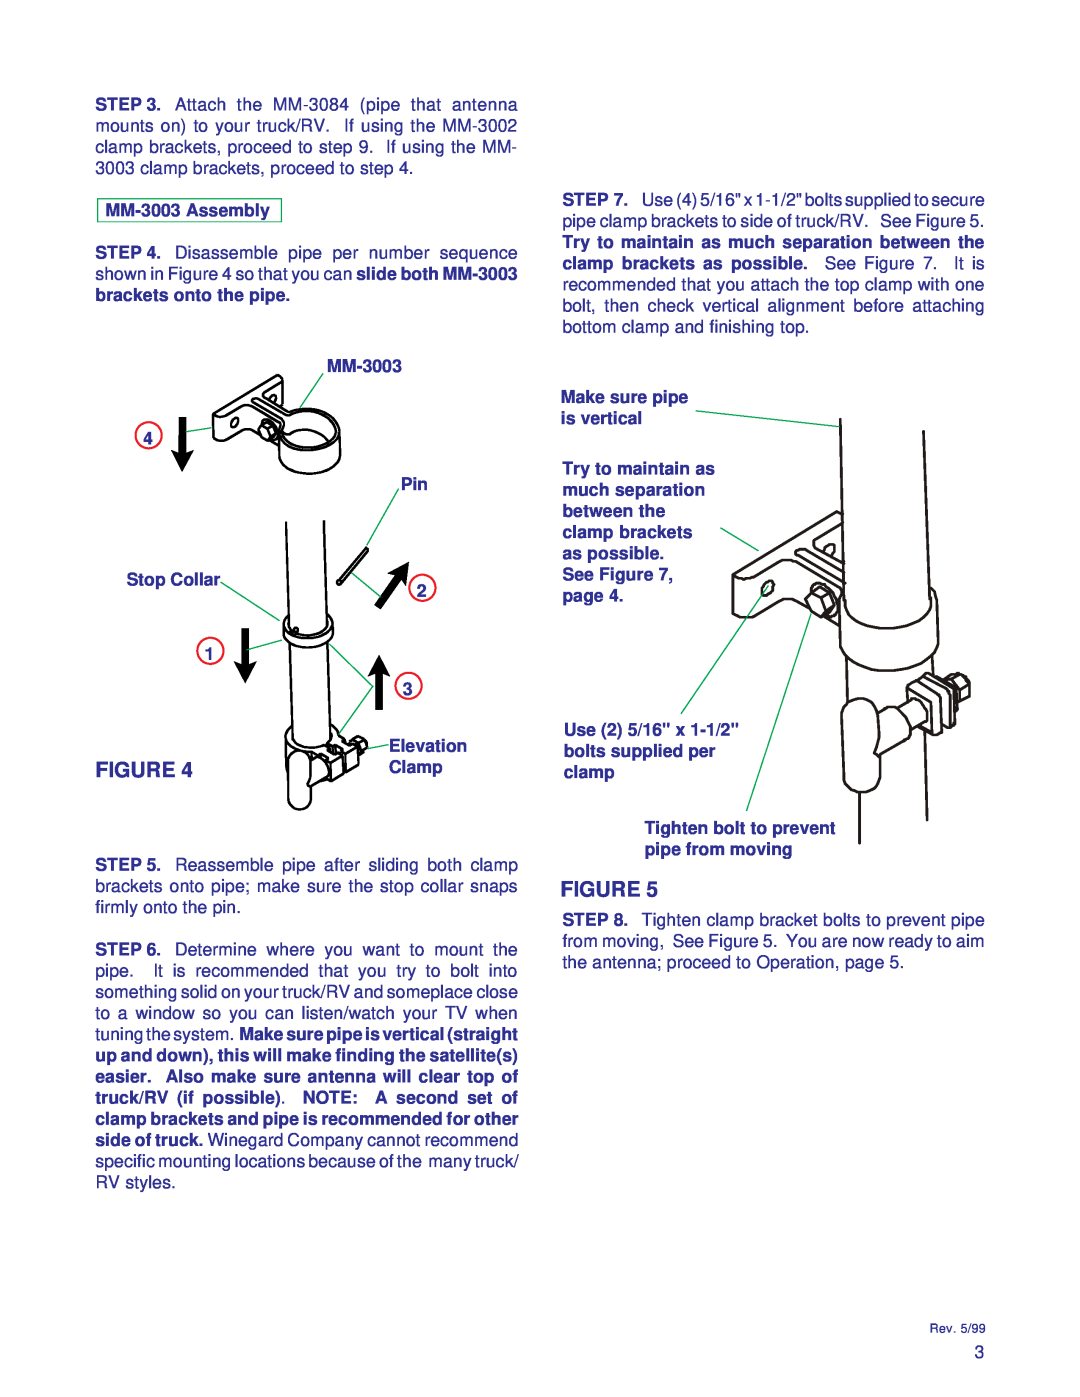
MM-3003 Assembly
STEP 4. Disassemble pipe per number sequence shown in Figure 4 so that you can slide both
4
Pin
Stop Collar | 2 |
| |
1 |
|
| 3 |
| Elevation |
FIGURE 4 | Clamp |
STEP 5. Reassemble pipe after sliding both clamp brackets onto pipe; make sure the stop collar snaps firmly onto the pin.
STEP 6. Determine where you want to mount the pipe. It is recommended that you try to bolt into something solid on your truck/RV and someplace close to a window so you can listen/watch your TV when tuning the system. Make sure pipe is vertical (straight up and down), this will make finding the satellite(s) easier. Also make sure antenna will clear top of truck/RV (if possible). NOTE: A second set of clamp brackets and pipe is recommended for other side of truck. Winegard Company cannot recommend specific mounting locations because of the many truck/ RV styles.
STEP 7. Use (4) 5/16" x
Try to maintain as much separation between the clamp brackets as possible. See Figure 7. It is recommended that you attach the top clamp with one bolt, then check vertical alignment before attaching bottom clamp and finishing top.
Make sure pipe is vertical
Try to maintain as much separation between the clamp brackets as possible.
See Figure 7, page 4.
Use (2) 5/16" x
Tighten bolt to prevent pipe from moving
FIGURE 5
STEP 8. Tighten clamp bracket bolts to prevent pipe from moving, See Figure 5. You are now ready to aim the antenna; proceed to Operation, page 5.
Rev. 5/99
3