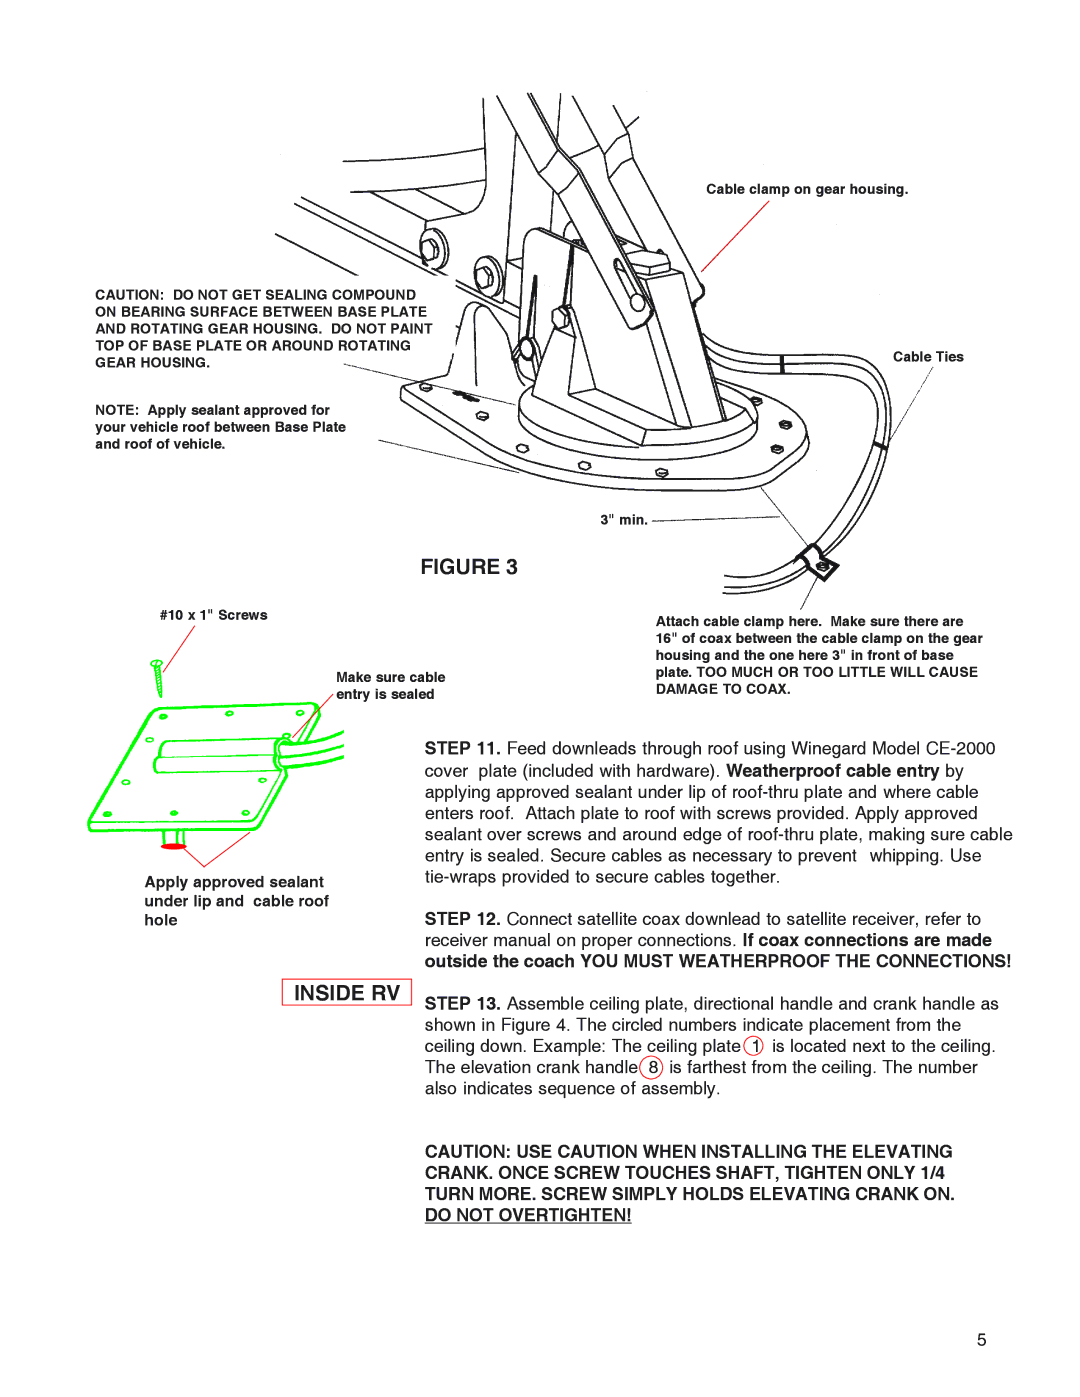
CAUTION: DO NOT GET SEALING COMPOUND ON BEARING SURFACE BETWEEN BASE PLATE AND ROTATING GEAR HOUSING. DO NOT PAINT TOP OF BASE PLATE OR AROUND ROTATING GEAR HOUSING.
NOTE: Apply sealant approved for your vehicle roof between Base Plate and roof of vehicle.
Cable clamp on gear housing.
Cable Ties
FIGURE 3
#10 x 1" Screws
Make sure cable entry is sealed
3" min.
Attach cable clamp here. Make sure there are 16" of coax between the cable clamp on the gear housing and the one here 3" in front of base plate. TOO MUCH OR TOO LITTLE WILL CAUSE DAMAGE TO COAX.
Apply approved sealant under lip and cable roof hole
STEP 11. Feed downleads through roof using Winegard Model
STEP 12. Connect satellite coax downlead to satellite receiver, refer to receiver manual on proper connections. If coax connections are made outside the coach YOU MUST WEATHERPROOF THE CONNECTIONS!
INSIDE RV
STEP 13. Assemble ceiling plate, directional handle and crank handle as shown in Figure 4. The circled numbers indicate placement from the ceiling down. Example: The ceiling plate 1 is located next to the ceiling. The elevation crank handle 8 is farthest from the ceiling. The number also indicates sequence of assembly.
CAUTION: USE CAUTION WHEN INSTALLING THE ELEVATING CRANK. ONCE SCREW TOUCHES SHAFT, TIGHTEN ONLY 1/4 TURN MORE. SCREW SIMPLY HOLDS ELEVATING CRANK ON. DO NOT OVERTIGHTEN!
5