3.The unit must be within 5° of level for best operation.
4.Make sure that the location offers enough support to attach the TRAV’LER antenna securely.
5.Find a well ventilated location with a 110 V outlet for the TRAV’LER Interface inside the vehicle.
Make sure to clean the installation area before you begin.
You will want to decide where the wires will enter the vehicle. One coax cable per receiver and a control cable will need to be run into the vehicle.
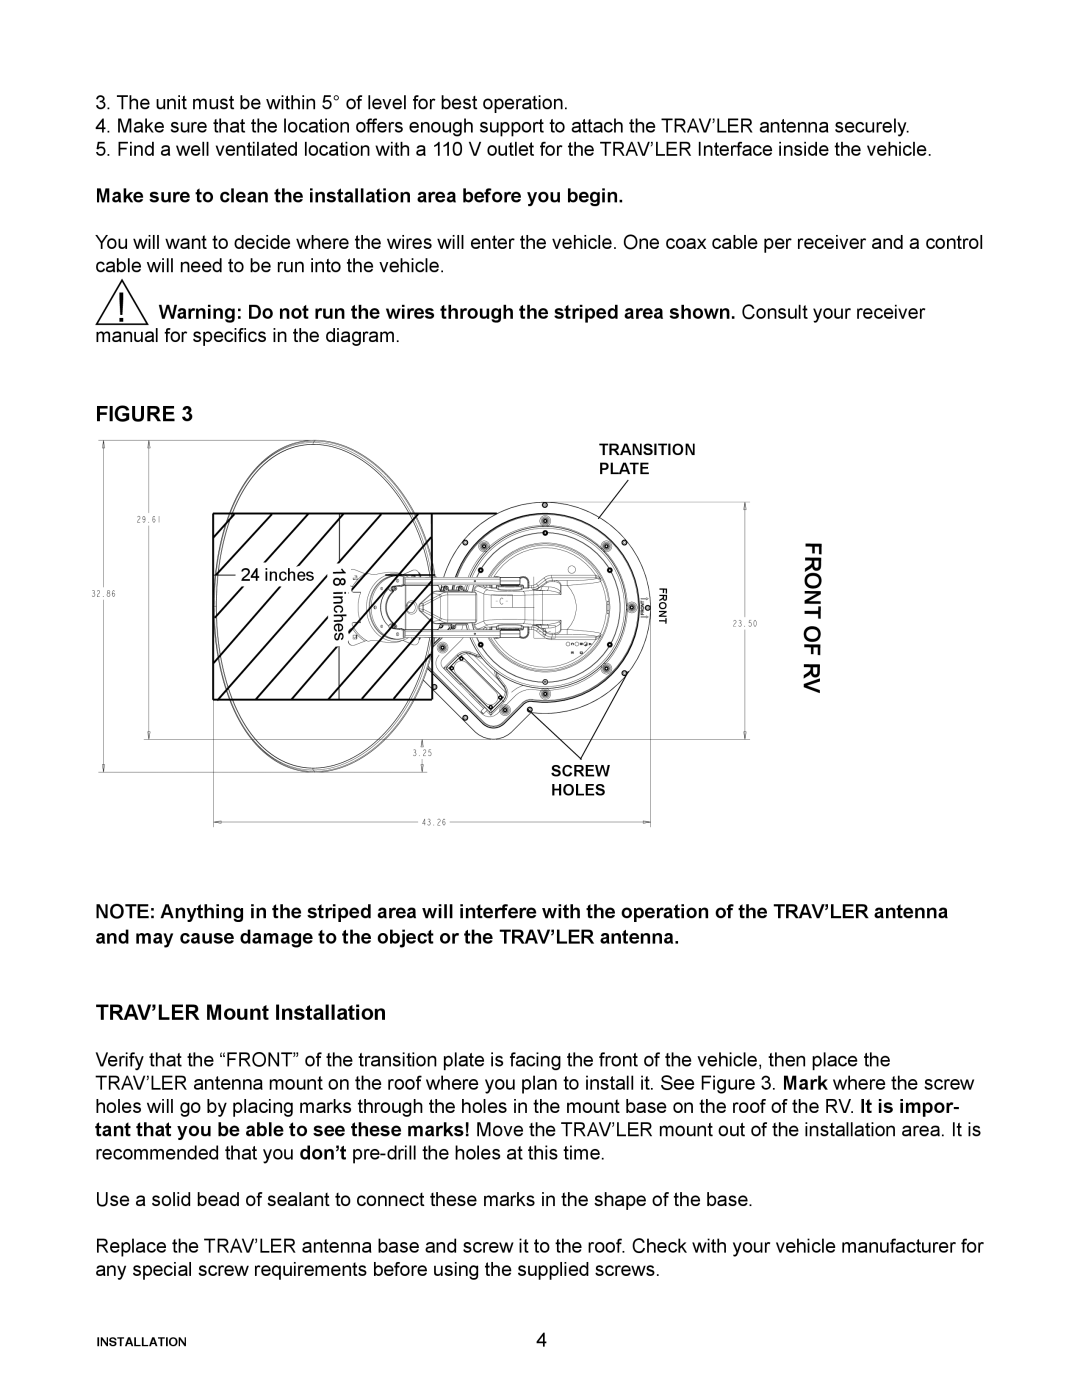
!Warning: Do not run the wires through the striped area shown. Consult your receiver manual for specifics in the diagram.
FIGURE 3
TRANSITION
PLATE
24 inches |
FRONT
FRONTOFRV
SCREW
HOLES
NOTE: Anything in the striped area will interfere with the operation of the TRAV’LER antenna and may cause damage to the object or the TRAV’LER antenna.
TRAV’LER Mount Installation
Verify that the “FRONT” of the transition plate is facing the front of the vehicle, then place the TRAV’LER antenna mount on the roof where you plan to install it. See Figure 3. Mark where the screw holes will go by placing marks through the holes in the mount base on the roof of the RV. It is impor- tant that you be able to see these marks! Move the TRAV’LER mount out of the installation area. It is recommended that you don’t
Use a solid bead of sealant to connect these marks in the shape of the base.
Replace the TRAV’LER antenna base and screw it to the roof. Check with your vehicle manufacturer for any special screw requirements before using the supplied screws.
INSTALLATION | 4 |