W1760
Assembly
To assemble the parts washer, do these steps:
1.Layout the parts and use Figure 1 to inventory them.
2.Using a #2 screwdriver and a 10mm wrench, secure the legs to the storage shelf with eight
3.With the help of an assistant, place the tub onto the legs and secure it in place with the remaining 16 screws, lock washers, and hex nuts.
4.Use a 19mm wrench to install the spout and tube onto the pump outlet (Figure 1).
5.Using a #2 screwdriver and a 7mm wrench, loosely mount the switch box to the side of the pump box with the two
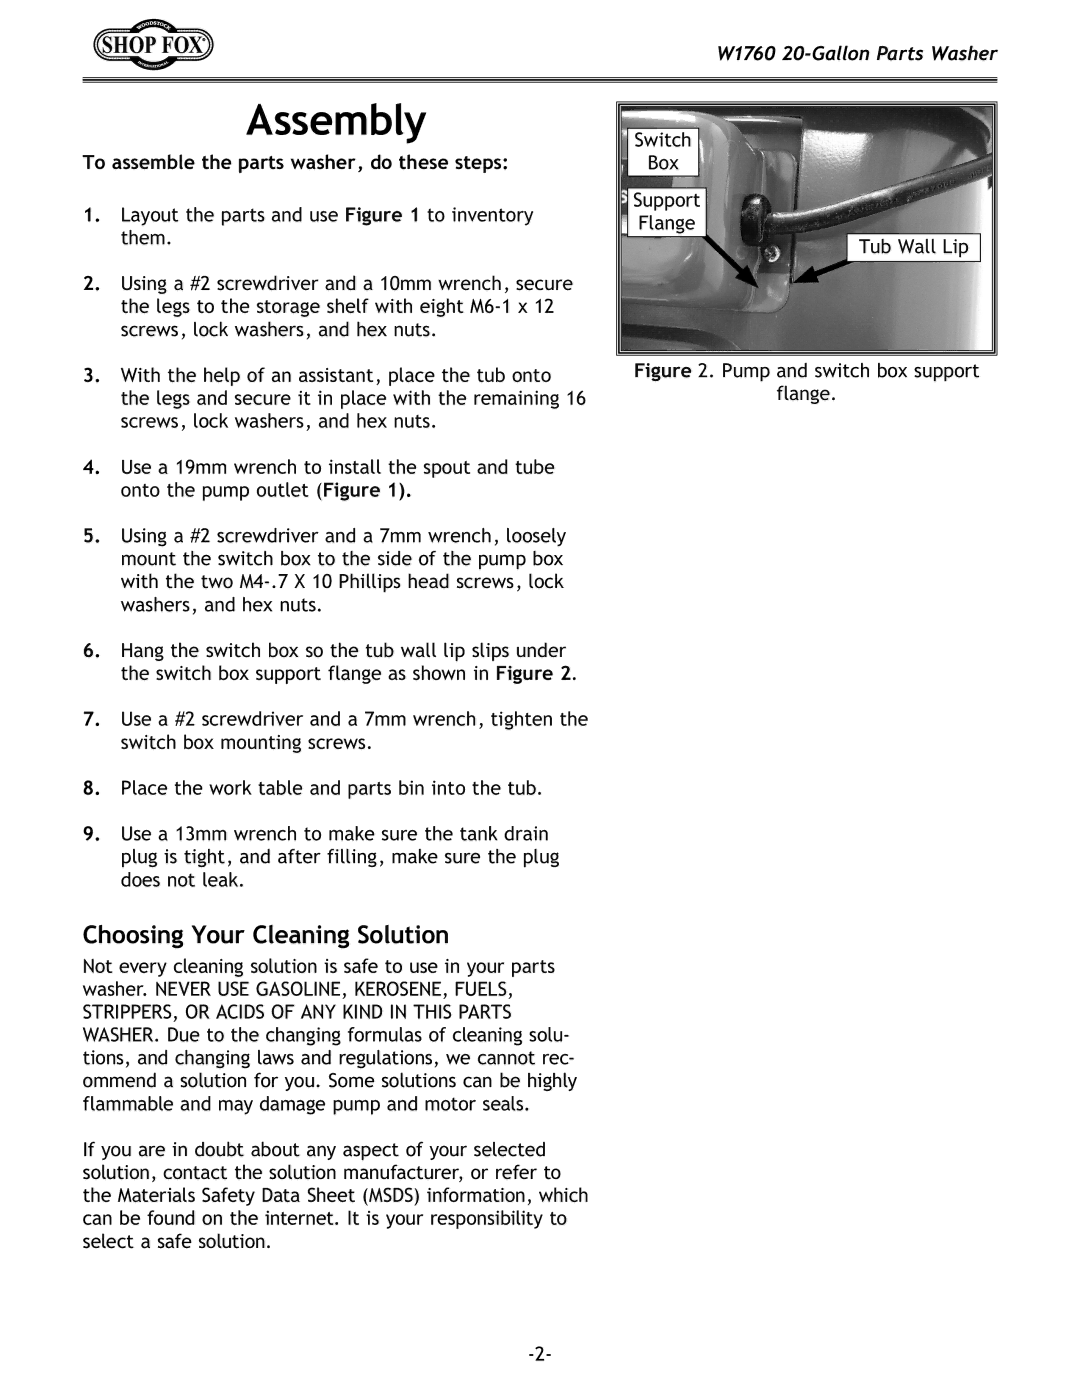
6.Hang the switch box so the tub wall lip slips under the switch box support flange as shown in Figure 2.
7.Use a #2 screwdriver and a 7mm wrench, tighten the switch box mounting screws.
8.Place the work table and parts bin into the tub.
9.Use a 13mm wrench to make sure the tank drain plug is tight, and after filling, make sure the plug does not leak.
Choosing Your Cleaning Solution
Not every cleaning solution is safe to use in your parts washer. NEVER USE GASOLINE, KEROSENE, FUELS, STRIPPERS, OR ACIDS OF ANY KIND IN THIS PARTS WASHER. Due to the changing formulas of cleaning solu- tions, and changing laws and regulations, we cannot rec- ommend a solution for you. Some solutions can be highly flammable and may damage pump and motor seals.
If you are in doubt about any aspect of your selected solution, contact the solution manufacturer, or refer to the Materials Safety Data Sheet (MSDS) information, which can be found on the internet. It is your responsibility to select a safe solution.
Switch |
Box |
Support |
Flange |
Tub Wall Lip |