Model W1784 (Mfg. Since 2/07)
NOTICE
DO NOT use the stapler to position the flooring strip. Doing so will damage the stapler and possibly the flooring strip.
Note: If you are using
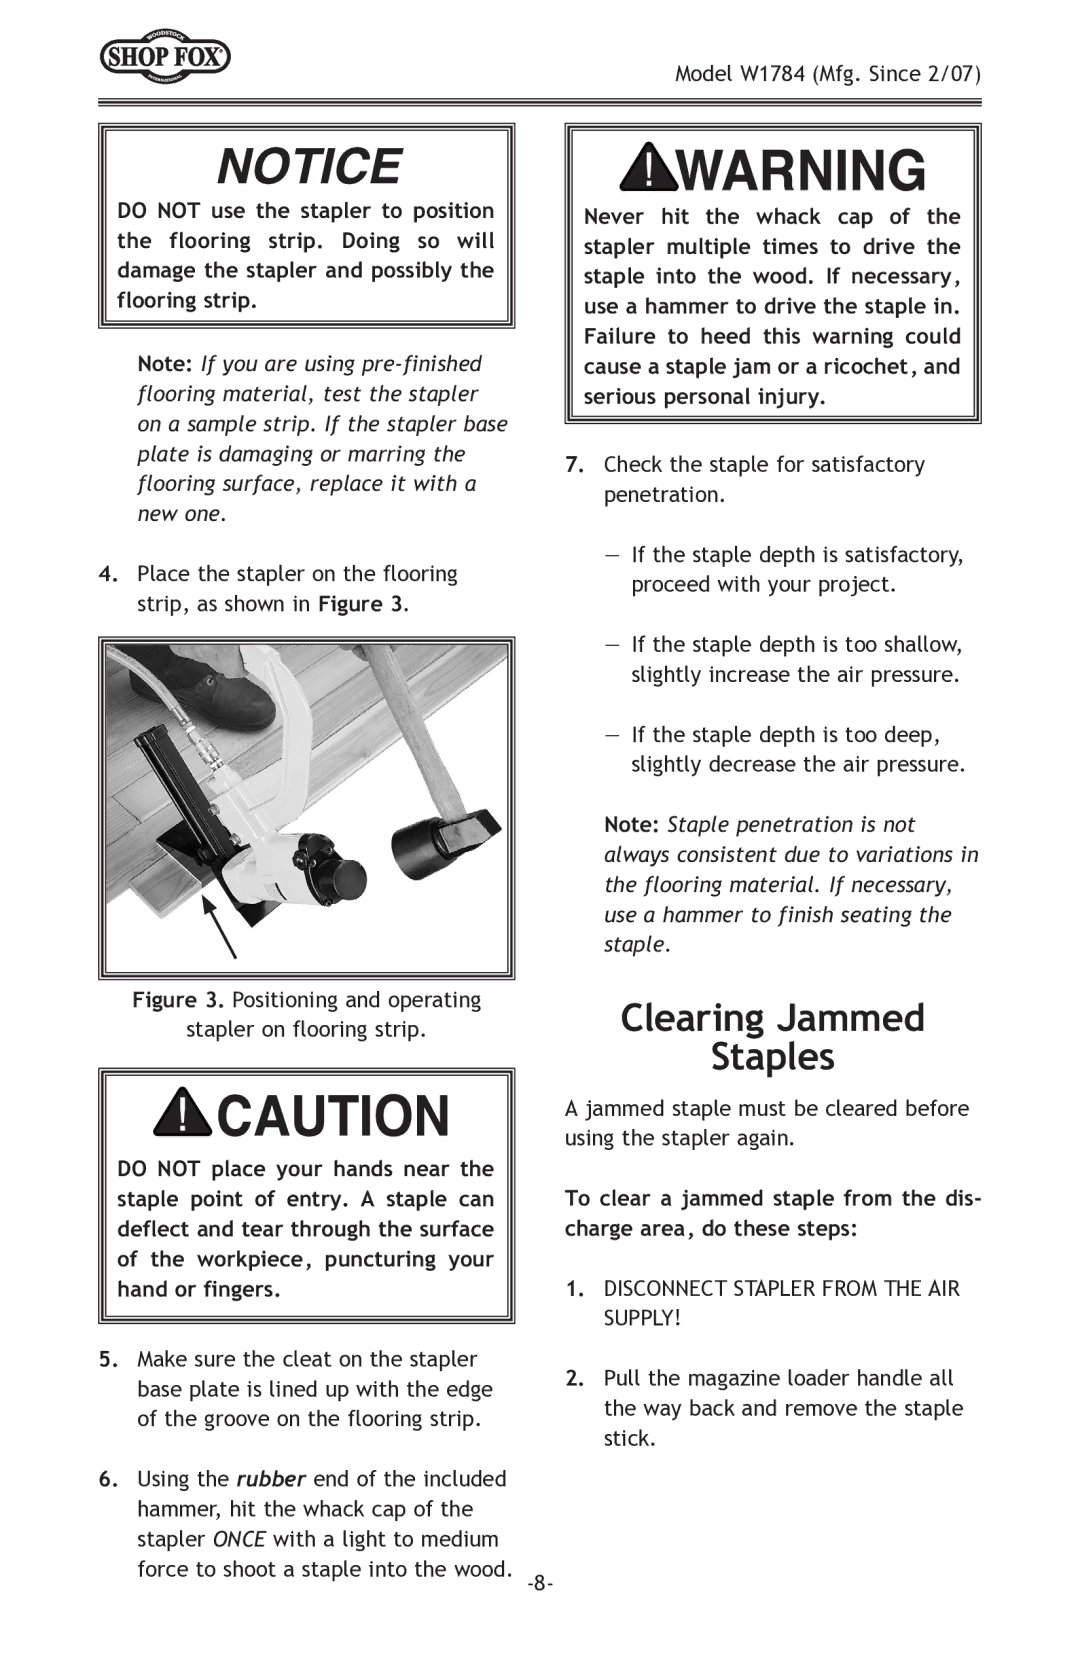
4.Place the stapler on the flooring strip, as shown in Figure 3.
Figure 3. Positioning and operating
stapler on flooring strip.
DO NOT place your hands near the staple point of entry. A staple can deflect and tear through the surface of the workpiece, puncturing your hand or fingers.
Never hit the whack cap of the stapler multiple times to drive the staple into the wood. If necessary, use a hammer to drive the staple in. Failure to heed this warning could cause a staple jam or a ricochet, and serious personal injury.
7.Check the staple for satisfactory penetration.
—If the staple depth is satisfactory, proceed with your project.
—If the staple depth is too shallow, slightly increase the air pressure.
—If the staple depth is too deep, slightly decrease the air pressure.
Note: Staple penetration is not always consistent due to variations in the flooring material. If necessary, use a hammer to finish seating the staple.
Clearing Jammed
Staples
A jammed staple must be cleared before using the stapler again.
To clear a jammed staple from the dis- charge area, do these steps:
1.DISCONNECT STAPLER FROM THE AIR SUPPLY!
5.Make sure the cleat on the stapler base plate is lined up with the edge of the groove on the flooring strip.
6.Using the rubber end of the included hammer, hit the whack cap of the stapler ONCE with a light to medium force to shoot a staple into the wood.
2.Pull the magazine loader handle all the way back and remove the staple stick.
