Manuals
/
Xerox
/
Computer Equipment
/
Computer Monitor
Xerox
XA7-19i
manual
Installation, Connecting Your LCD Monitor to a Computer, English
Models:
XA7-19i
1
12
23
23
Download
23 pages
5.41 Kb
9
10
11
12
13
14
15
16
Troubleshooting
Install
Preset Mode Timing Chart
Reset
DVI Connector PIN Assignment
Phase
Safety
Power
Features
Using Your LCD Monitor
Page 12
Image 12
Page 11
Page 13
Page 12
Image 12
Page 11
Page 13
Contents
Page
2004 by Xerox Corporation. All rights reserved
Table of Contents
Installation
Federal Communications Commission FCC Statement
Introduction
Federal Communications Commission FCC Statement
ENGLISH
Important Safety Instructions
Warnings
Do not touch the power cord and antenna cable during lightning
a. The power cord or plug is damaged
b. Liquid is spilled into the product
c. An object falls onto or into the product
d. The product has been dropped or damaged
Features
1 Introduction
Package Contents
Power cord specification H05 VV-F 3G 0.75mm2
5 POWER
Front View and Controls
1 MENU
2 DOWN/UP
Installing Your LCD Monitor
2 Installation
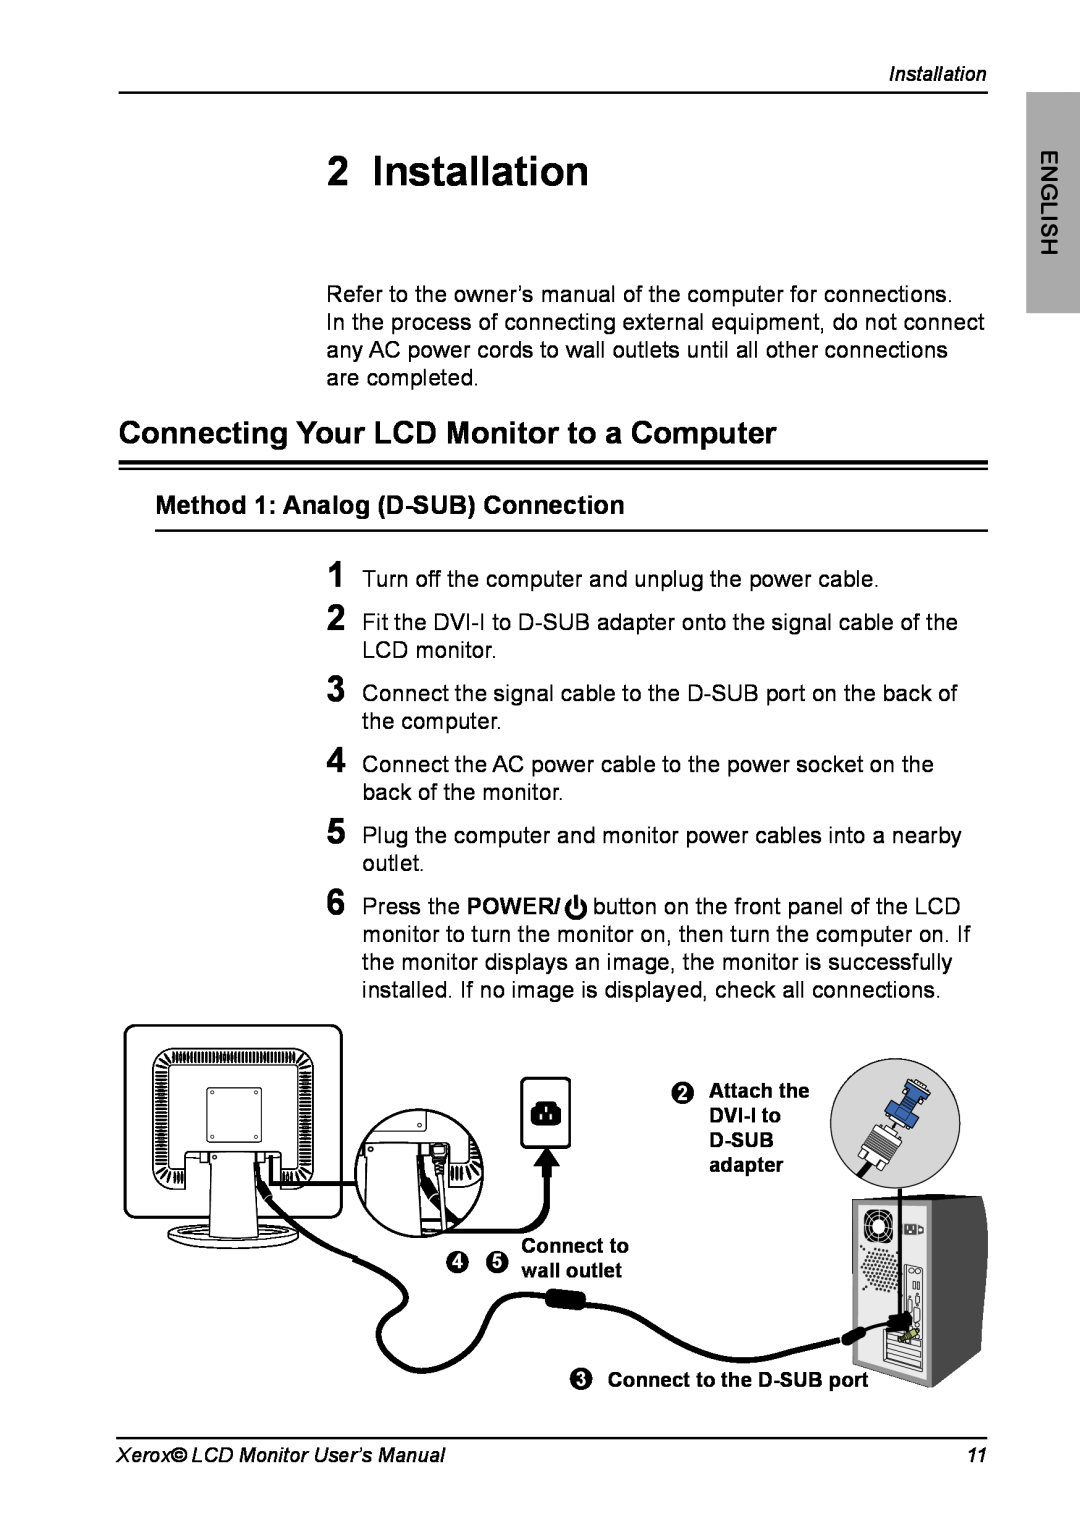
Connecting Your LCD Monitor to a Computer
Method 1 Analog D-SUB Connection
Method 2 DigitalDVI Connection
2 Connect to the DVI port
Using Your LCD Monitor
5o 20o
POWER/ button
Using the OSD Menu
3 OSD MENU
EXIT
Phase
The OSD Options
Brightness
Contrast
Color
Select User Mode
COOL
WARM
Reset
Language
Preset Mode Timing Chart
Video signal IBM PC/AT
4 Technical Information
Dot X Line
DVI Connector PIN Assignment
DESCRIPTION
D-SUB Connector PIN Assignment
DESCRIPTION Red Green Blue Ground Self Test Red Ground Green Ground
Blue Ground 5 VDC Ground Ground SDA FOR DDC H. Sync V. Sync
SCL FOR DDC
Plug and Play
Visual Inspection
Permanently unlit or lit pixels
Example
Troubleshooting
Monitor will not turn on
No picture
Poor picture or abnormal picture
Top
Page
Image
Contents