INSPECTIONS
1.Preparation
To inspect the main unit, the following jigs are required.
CD player Headphones
Before turning the power on, set all the knobs on the panel to "0".
Raise the Input Level Select Switch to select [PASSIVE] position.
2.Power supply
Connect the power cord to the suitable power supply socket for each version.
(UC-120V, E&BS-220V)
3.Inspection procedure
3-1 Input the audio signal of CD player to the [AUX IN] jack.
3-2 Make sure that rotating the [VOLUME] knob to the right (or left) makes the sound gradually larger (or smaller).
3-3 Make sure that rotating the [TREBLE] knob to the right (or left) boosts (or cuts) the high frequency.
3-4 Make sure that rotating the [HIGH MID] knob to the right (or left) boosts (or cuts) the upper-middle frequency.
3-5 Make sure that rotating the [LOW MID] knob to the right (or left) boosts (or cuts) the lower-middle frequency.
3-6 Make sure that rotating the [BASS] knob to the right (or left) boosts (or cuts) the low frequency.
3-7 Make sure that the sound becomes smaller when you depress the Input Level Select Switch to select [ACTIVE] position.
3-8 Raise the Input Level Select Switch again to select [PASSIVE] position. Make sure that the audio signal sounds over the speaker.
3-9 Connect the headphones to the [PHONES] jack. Make sure that the speaker produces no sound and the audio signal sounds over the headphones.
3-10 Set all the knobs on the panel to "0" and finish the inspection.

 IC BLOCK DIAGRAM
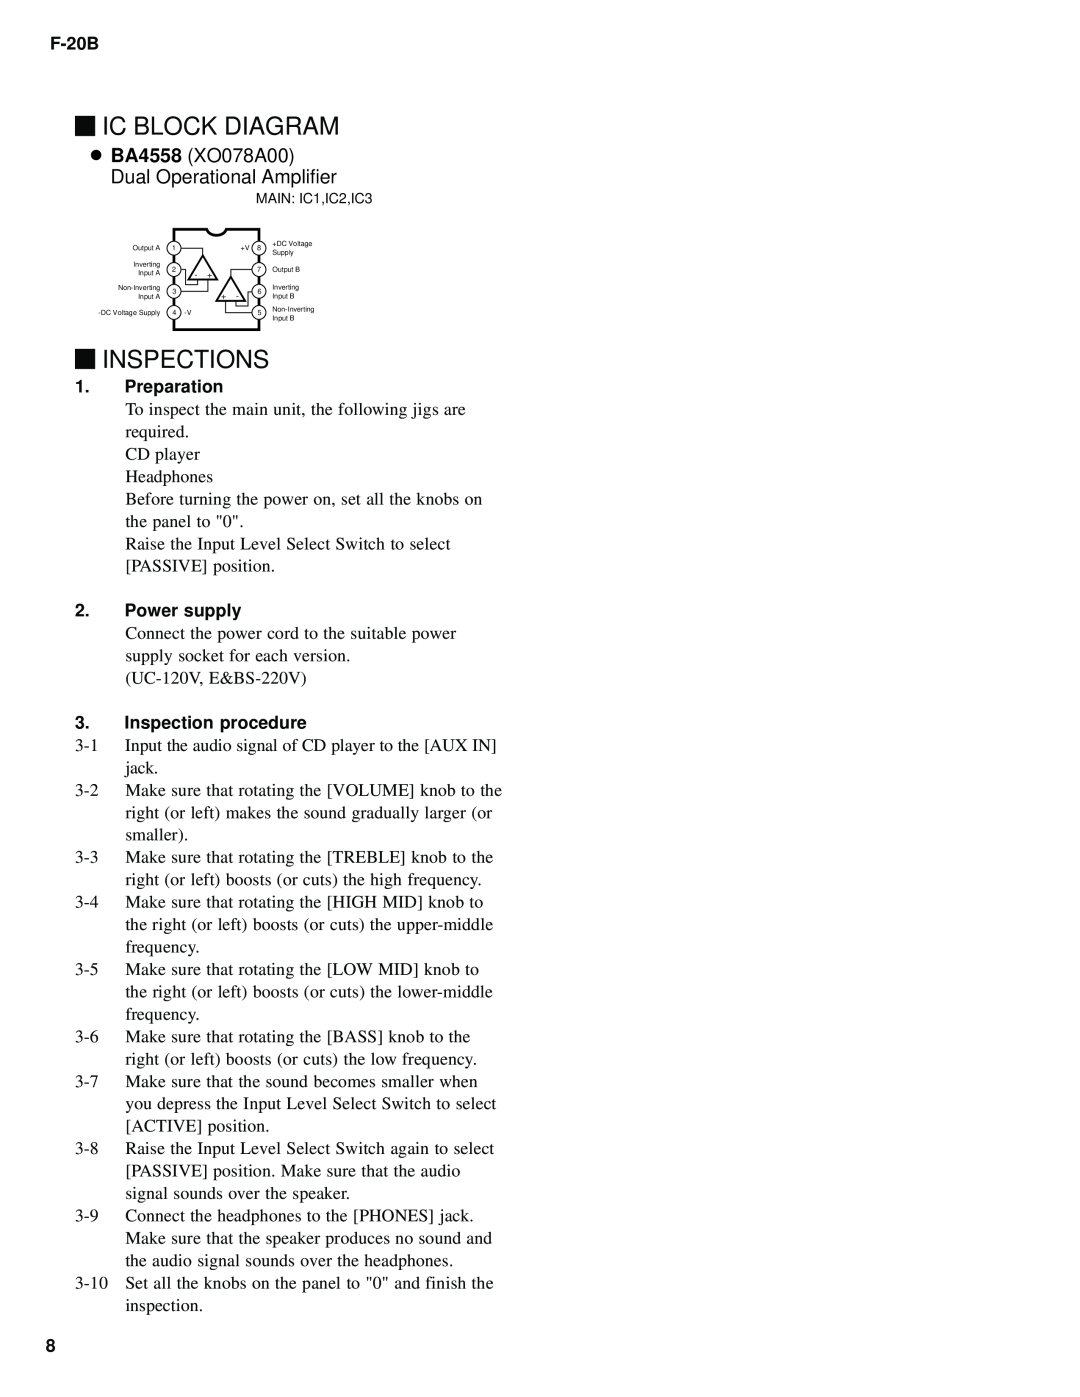
 BA4558 (XO078A00) Dual Operational Amplifier