DISASSEMBLY PROCEDURE
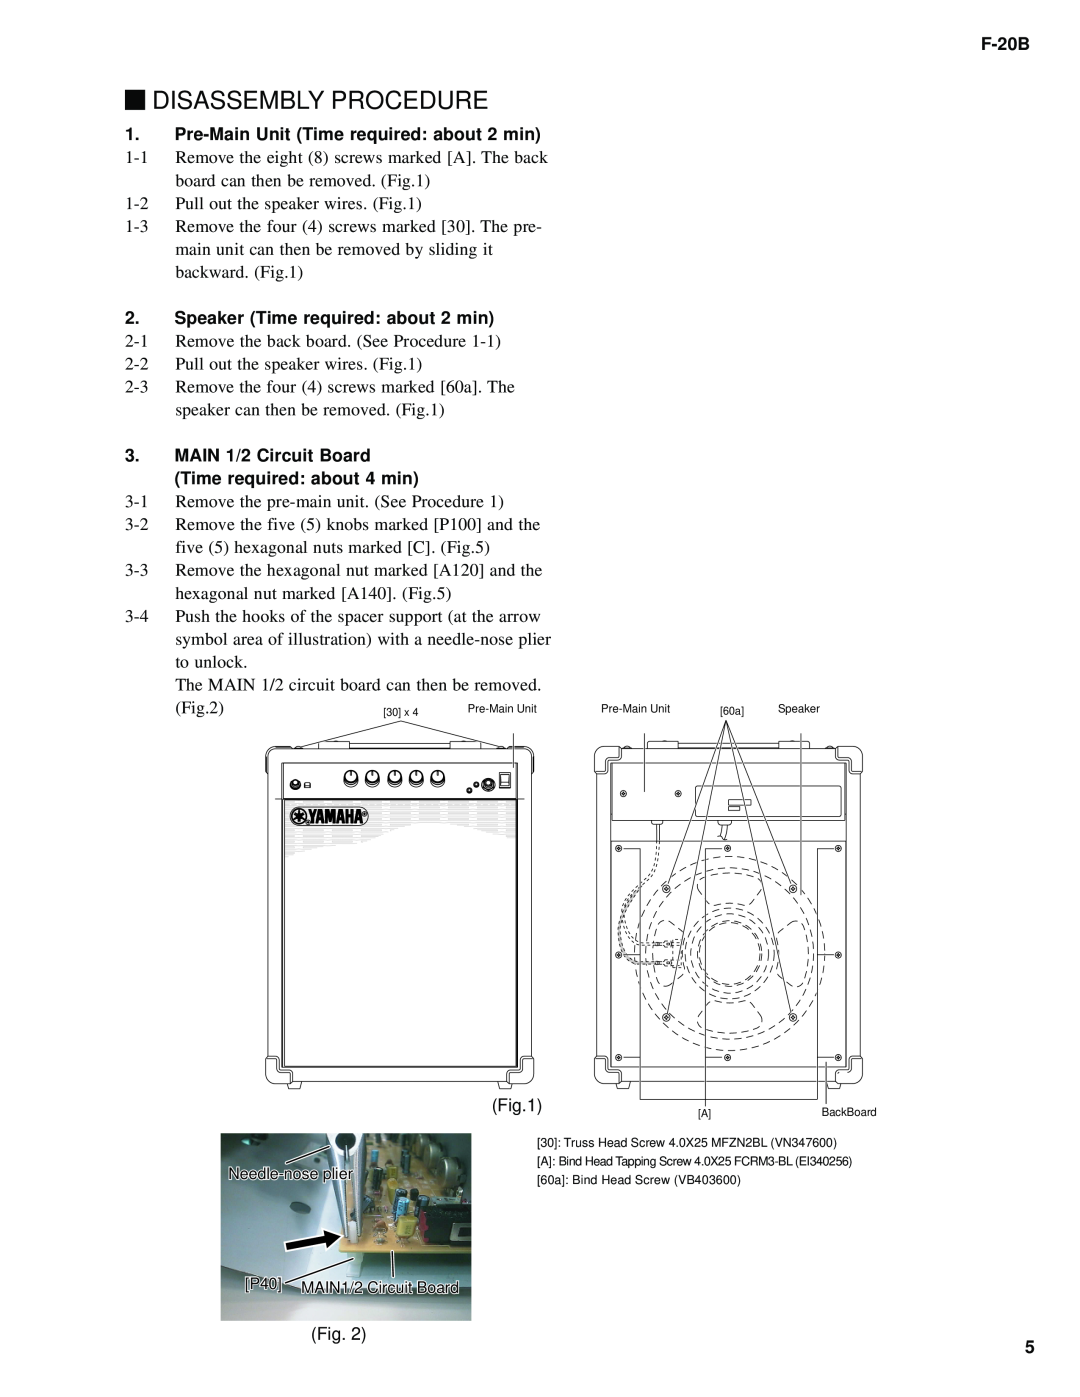
1.Pre-Main Unit (Time required: about 2 min)
main unit can then be removed by sliding it backward. (Fig.1)
2.Speaker (Time required: about 2 min)
3.MAIN 1/2 Circuit Board (Time required: about 4 min)
Remove the | |||
Remove the five (5) knobs marked [P100] and the | |||
| five (5) hexagonal nuts marked [C]. (Fig.5) | ||
Remove the hexagonal nut marked [A120] and the | |||
| hexagonal nut marked [A140]. (Fig.5) |
| |
Push the hooks of the spacer support (at the arrow | |||
| symbol area of illustration) with a | ||
| to unlock. |
|
|
| The MAIN 1/2 circuit board can then be removed. | ||
| (Fig.2) | [30] x 4 | |
[60a] | Speaker |
(Fig.1) |
[A] | BackBoard |
[30]: Truss Head Screw 4.0X25 MFZN2BL (VN347600)
[A]: Bind Head Tapping Screw 4.0X25
[60a]: Bind Head Screw (VB403600)
[P40] MAIN1/2 Circuit Board
(Fig. 2)
5