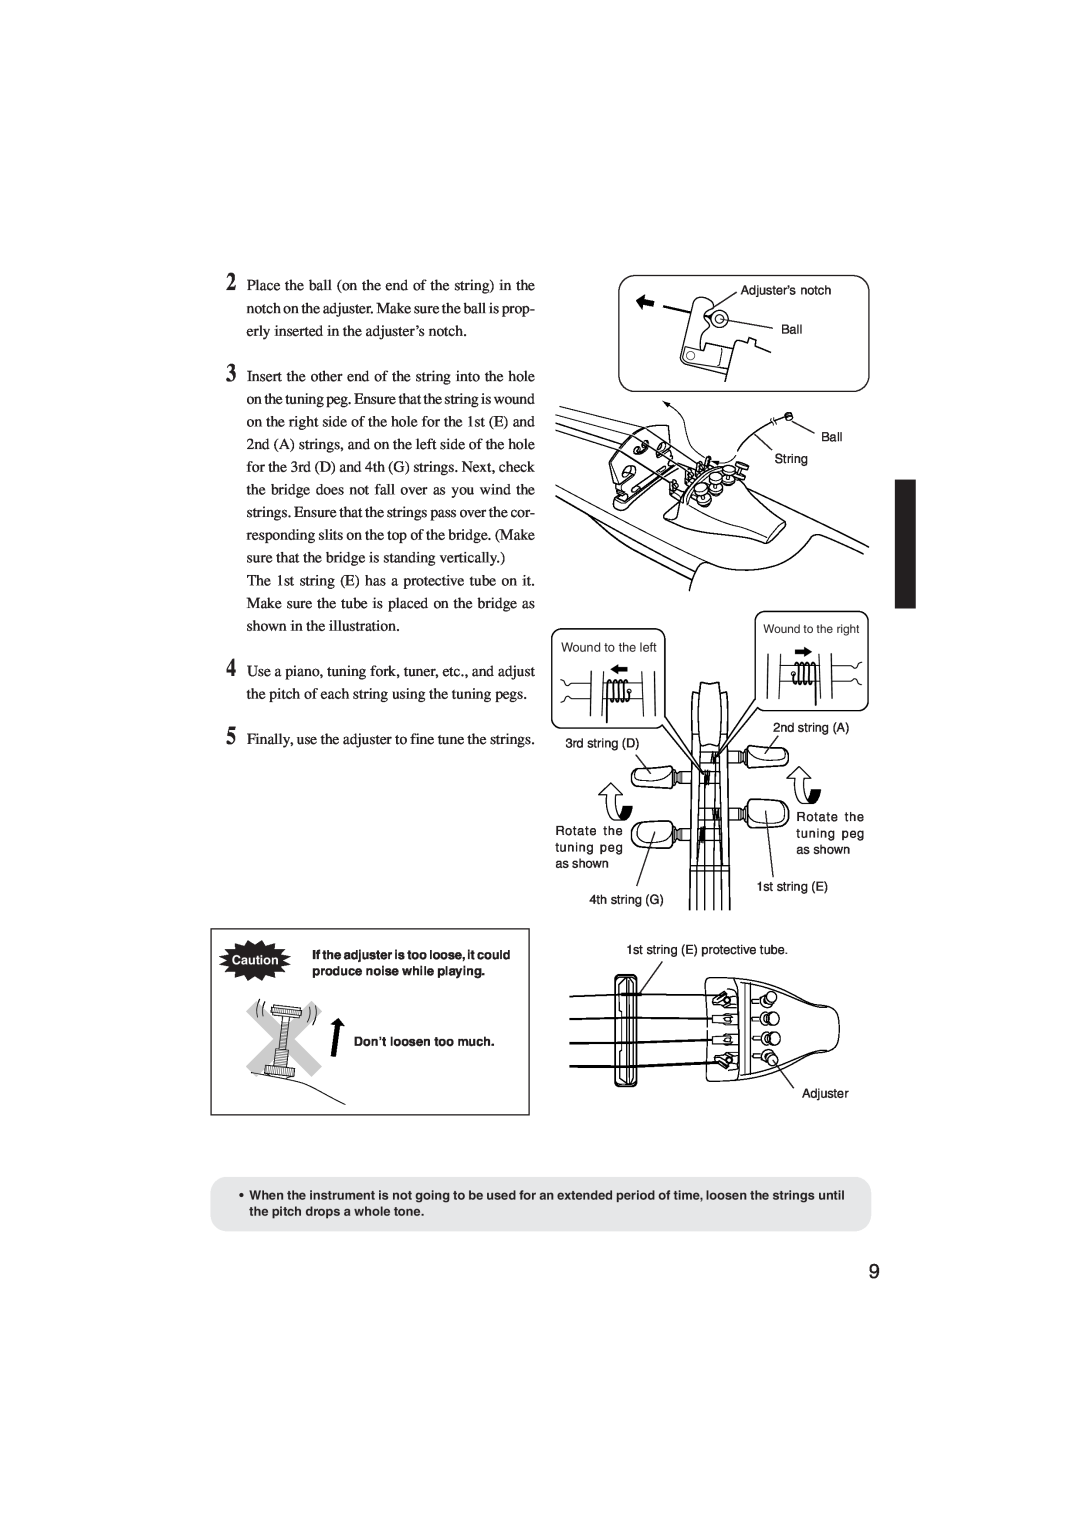
2 Place the ball (on the end of the string) in the notch on the adjuster. Make sure the ball is prop- erly inserted in the adjuster’s notch.
3 Insert the other end of the string into the hole on the tuning peg. Ensure that the string is wound on the right side of the hole for the 1st (E) and 2nd (A) strings, and on the left side of the hole for the 3rd (D) and 4th (G) strings. Next, check the bridge does not fall over as you wind the strings. Ensure that the strings pass over the cor- responding slits on the top of the bridge. (Make sure that the bridge is standing vertically.)
The 1st string (E) has a protective tube on it. Make sure the tube is placed on the bridge as shown in the illustration.
4 Use a piano, tuning fork, tuner, etc., and adjust the pitch of each string using the tuning pegs.
5 Finally, use the adjuster to fine tune the strings.
Wound to the left
3rd string (D)
Rotate the tuning peg as shown
4th string (G)
Adjuster’s notch
Ball
Ball
String
Wound to the right
2nd string (A)
Rotate the tuning peg as shown
1st string (E)
Caution | If the adjuster is too loose, it could | |
produce noise while playing. | ||
| ||
| Don’t loosen too much. |
1st string (E) protective tube.
Adjuster
•When the instrument is not going to be used for an extended period of time, loosen the strings until the pitch drops a whole tone.
9