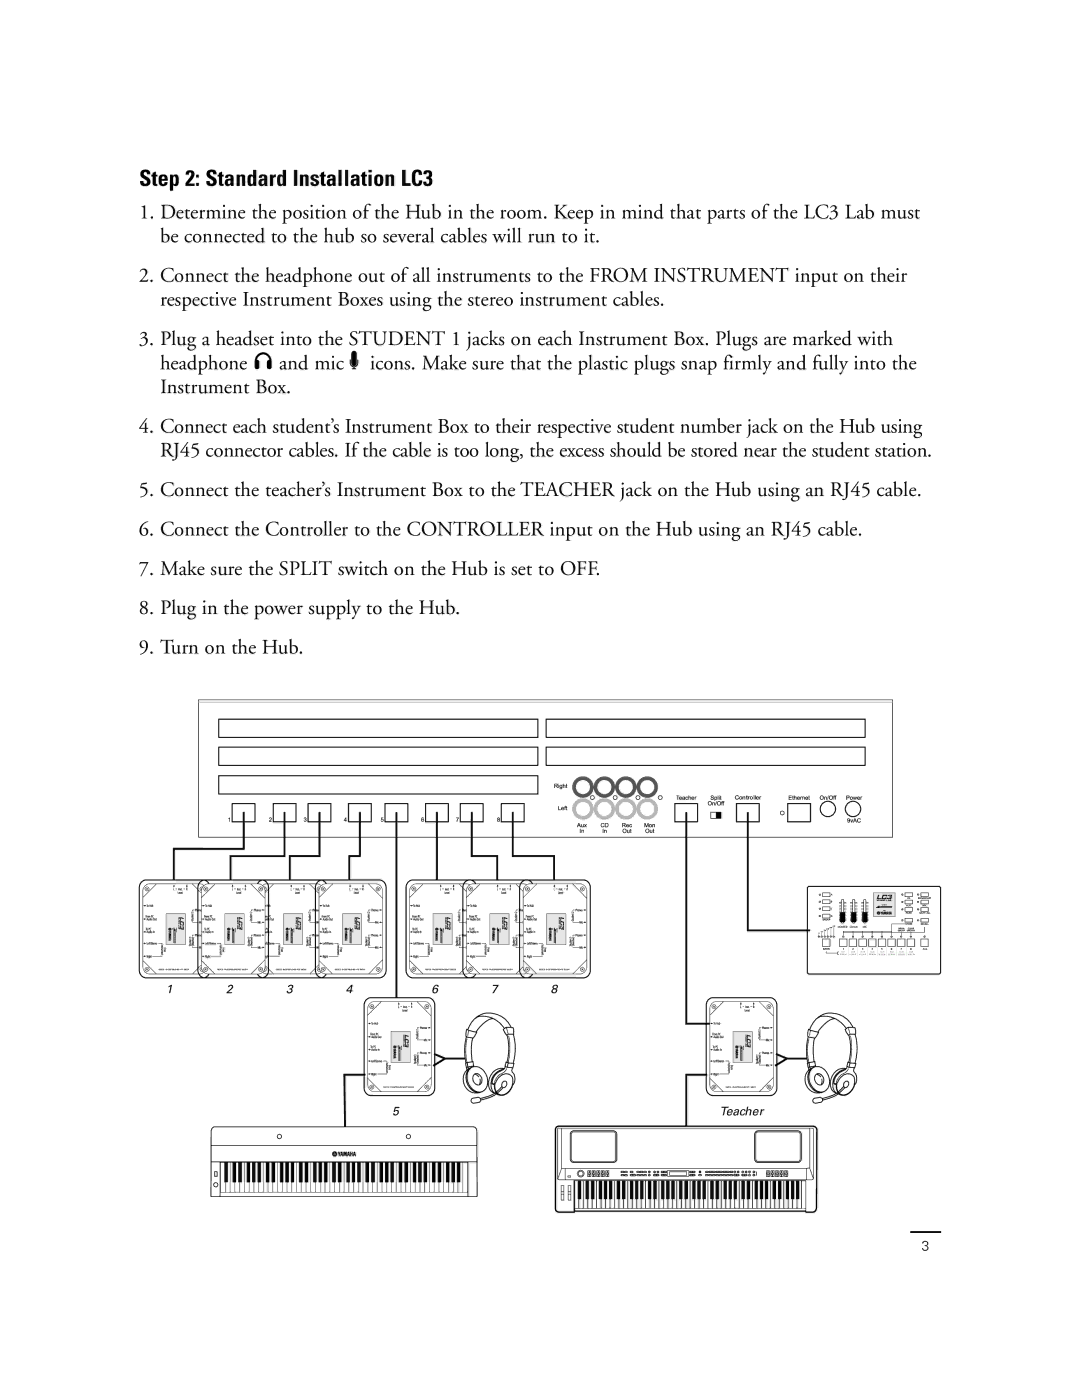
Step 2: Standard Installation LC3
1.Determine the position of the Hub in the room. Keep in mind that parts of the LC3 Lab must be connected to the hub so several cables will run to it.
2.Connect the headphone out of all instruments to the FROM INSTRUMENT input on their respective Instrument Boxes using the stereo instrument cables.
3.Plug a headset into the STUDENT 1 jacks on each Instrument Box. Plugs are marked with headphone ![]()
![]() and mic
and mic ![]() icons. Make sure that the plastic plugs snap firmly and fully into the Instrument Box.
icons. Make sure that the plastic plugs snap firmly and fully into the Instrument Box.
4.Connect each student’s Instrument Box to their respective student number jack on the Hub using RJ45 connector cables. If the cable is too long, the excess should be stored near the student station.
5.Connect the teacher’s Instrument Box to the TEACHER jack on the Hub using an RJ45 cable.
6.Connect the Controller to the CONTROLLER input on the Hub using an RJ45 cable.
7.Make sure the SPLIT switch on the Hub is set to OFF.
8.Plug in the power supply to the Hub.
9.Turn on the Hub.
|
|
|
|
|
| Controller |
IBX3 INSTRUMENT BOX | IBX3 INSTRUMENT BOX | IBX3 INSTRUMENT BOX | IBX3 INSTRUMENTBOX | IBX3 INSTRUMENTBOX | IBX3 INSTRUMENT BOX | IBX3 INSTRUMENT BOX |
1 | 2 | 3 | 4 | 6 | 7 | 8 |
IBX3 INSTRUMENTBOX
5
IBX3 INSTRUMENT BOX
Teacher
3