SECTION 3: UNPACKING & ASSEMBLING YOUR RIDER MOWER
•Remove all screws and staples from crate.
•Holding the sides of the crate firmly, lift the top of the crate up and keep it aside. Avoid tire punctures.
•Remove and discard plastic bag covering the unit.
•Lift the rear of the mower and clear the bottom of the crate. Repeat for the front.
•Be sure parking brake is disengaged; roll unit out of the crate’s way.
Loose Parts
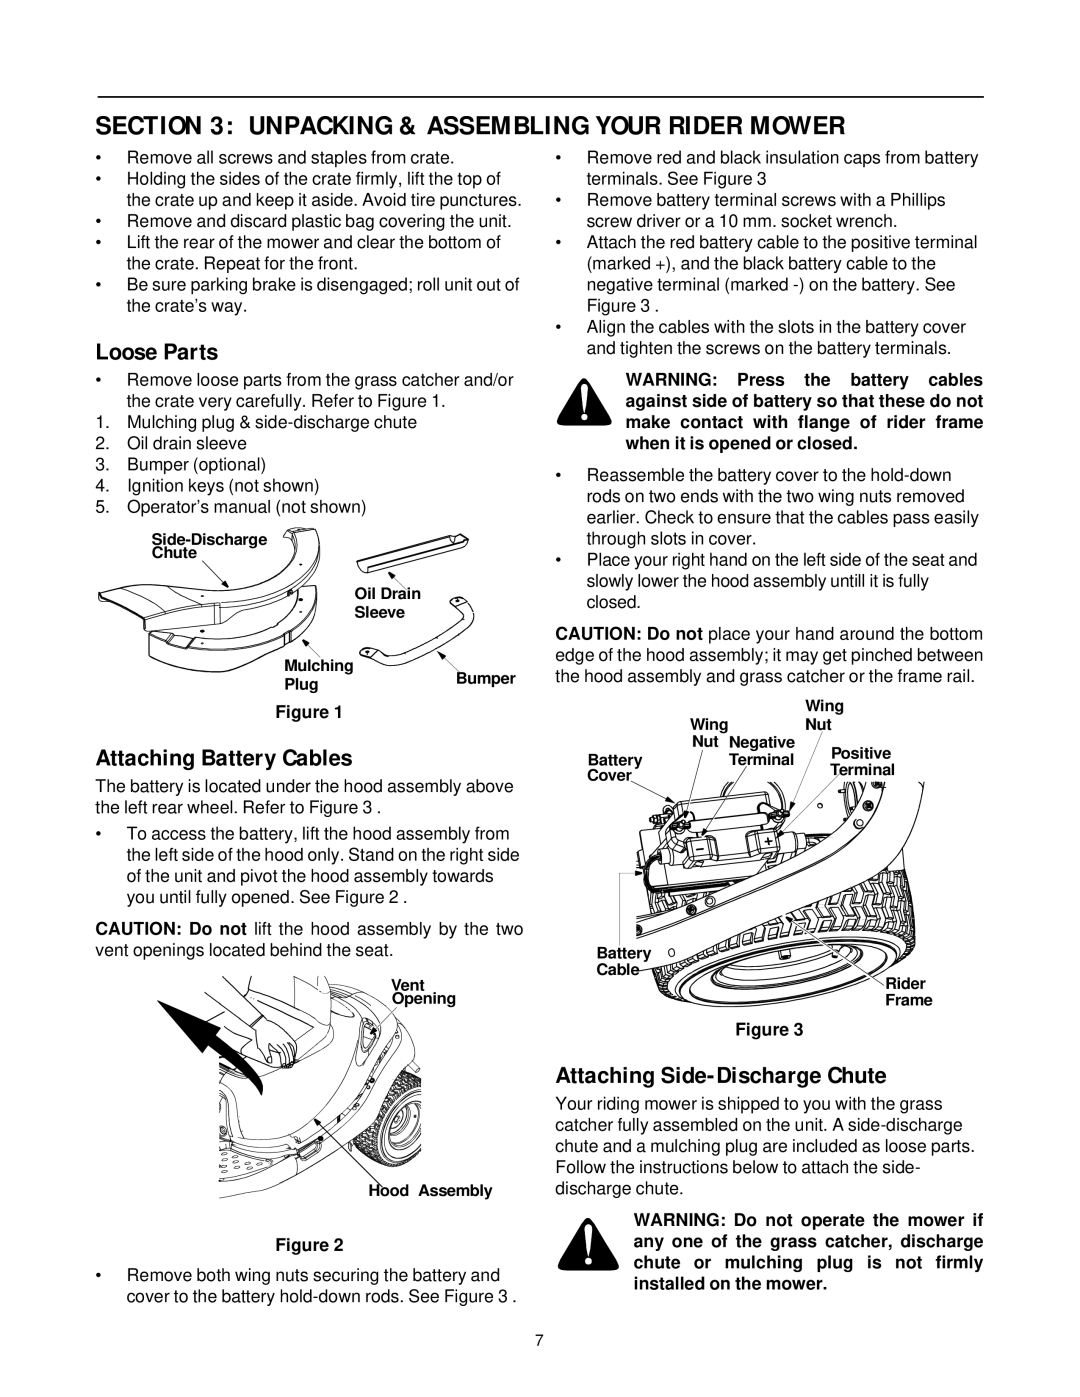
•Remove loose parts from the grass catcher and/or the crate very carefully. Refer to Figure 1.
1.Mulching plug &
2.Oil drain sleeve
3.Bumper (optional)
4.Ignition keys (not shown)
5.Operator’s manual (not shown)
Chute
Oil Drain
Sleeve
Mulching | Bumper | |
Plug | ||
|
Figure 1
Attaching Battery Cables
The battery is located under the hood assembly above the left rear wheel. Refer to Figure 3 .
•To access the battery, lift the hood assembly from the left side of the hood only. Stand on the right side of the unit and pivot the hood assembly towards you until fully opened. See Figure 2 .
CAUTION: Do not lift the hood assembly by the two vent openings located behind the seat.
Vent
![]()
![]()
![]()
![]()
![]()
![]() Opening
Opening
Hood Assembly
Figure 2
•Remove both wing nuts securing the battery and cover to the battery
•Remove red and black insulation caps from battery terminals. See Figure 3
•Remove battery terminal screws with a Phillips screw driver or a 10 mm. socket wrench.
•Attach the red battery cable to the positive terminal (marked +), and the black battery cable to the negative terminal (marked
•Align the cables with the slots in the battery cover and tighten the screws on the battery terminals.
WARNING: Press the battery cables against side of battery so that these do not make contact with flange of rider frame when it is opened or closed.
•Reassemble the battery cover to the
•Place your right hand on the left side of the seat and slowly lower the hood assembly untill it is fully closed.
CAUTION: Do not place your hand around the bottom edge of the hood assembly; it may get pinched between the hood assembly and grass catcher or the frame rail.
|
|
| Wing |
|
|
| Wing | |||||||||||||||
|
|
|
|
|
| Nut | ||||||||||||||||
|
|
|
| Nut | Negative |
|
| Positive | ||||||||||||||
Battery | Terminal |
|
| |||||||||||||||||||
|
| Terminal | ||||||||||||||||||||
Cover |
|
|
|
|
| |||||||||||||||||
|
|
|
|
|
|
|
|
|
|
|
|
|
|
|
|
|
| |||||
|
|
|
|
|
|
|
|
|
|
|
|
|
|
|
|
|
|
|
|
|
|
|
|
|
|
|
|
|
|
|
|
|
|
|
|
|
|
|
|
|
|
|
|
|
|
|
|
|
|
|
|
|
|
|
|
|
|
|
|
|
|
|
|
|
|
|
|
|
|
|
|
|
|
|
|
|
|
|
|
|
|
|
|
|
|
|
|
|
|
|
|
|
|
|
|
|
|
|
|
|
|
|
|
|
|
|
|
|
|
|
|
|
|
|
|
|
|
|
|
|
|
|
|
|
|
|
|
|
|
|
|
|
|
|
|
|
|
|
|
|
|
|
|
|
|
|
|
|
|
|
|
|
|
|
|
|
|
|
|
|
|
|
|
|
|
|
|
|
|
|
|
|
|
|
|
|
|
|
|
|
|
|
|
Battery
Cable
Rider
Frame
Figure 3
Attaching Side-Discharge Chute
Your riding mower is shipped to you with the grass catcher fully assembled on the unit. A
WARNING: Do not operate the mower if any one of the grass catcher, discharge chute or mulching plug is not firmly installed on the mower.
7