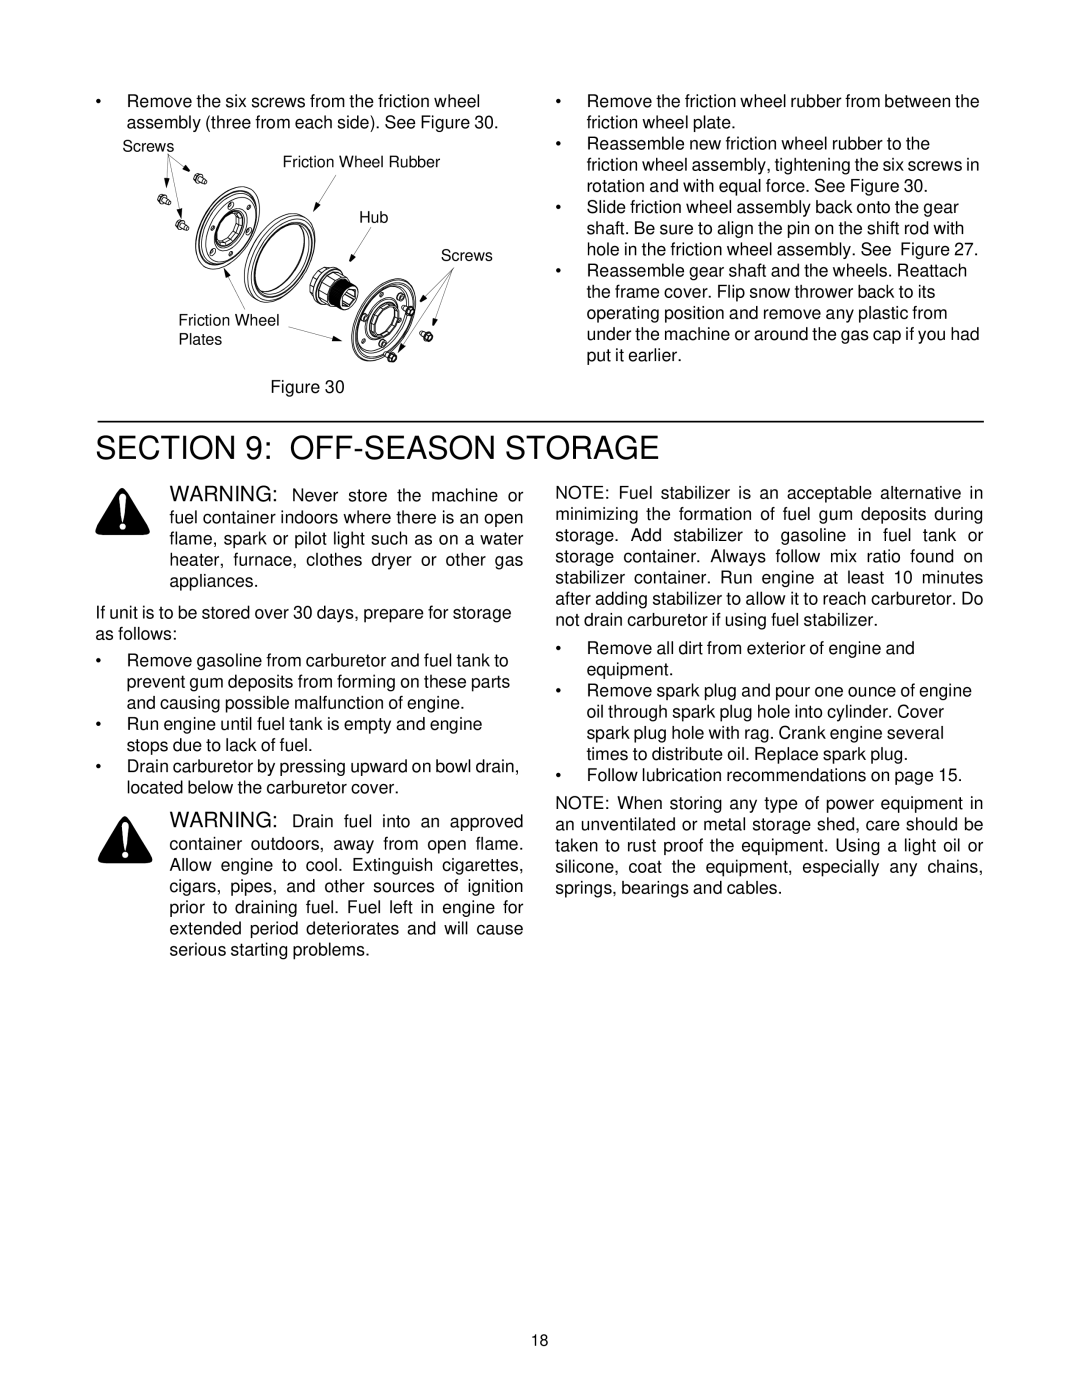
•Remove the six screws from the friction wheel assembly (three from each side). See Figure 30.
Screws
Friction Wheel Rubber
Hub
Screws
Friction Wheel
Plates
Figure 30
•Remove the friction wheel rubber from between the friction wheel plate.
•Reassemble new friction wheel rubber to the friction wheel assembly, tightening the six screws in rotation and with equal force. See Figure 30.
•Slide friction wheel assembly back onto the gear shaft. Be sure to align the pin on the shift rod with hole in the friction wheel assembly. See Figure 27.
•Reassemble gear shaft and the wheels. Reattach the frame cover. Flip snow thrower back to its operating position and remove any plastic from under the machine or around the gas cap if you had put it earlier.
SECTION 9: OFF-SEASON STORAGE
WARNING: Never store the machine or fuel container indoors where there is an open flame, spark or pilot light such as on a water heater, furnace, clothes dryer or other gas appliances.
If unit is to be stored over 30 days, prepare for storage as follows:
•Remove gasoline from carburetor and fuel tank to prevent gum deposits from forming on these parts and causing possible malfunction of engine.
•Run engine until fuel tank is empty and engine stops due to lack of fuel.
•Drain carburetor by pressing upward on bowl drain, located below the carburetor cover.
WARNING: Drain fuel into an approved container outdoors, away from open flame. Allow engine to cool. Extinguish cigarettes, cigars, pipes, and other sources of ignition prior to draining fuel. Fuel left in engine for extended period deteriorates and will cause serious starting problems.
NOTE: Fuel stabilizer is an acceptable alternative in minimizing the formation of fuel gum deposits during storage. Add stabilizer to gasoline in fuel tank or storage container. Always follow mix ratio found on stabilizer container. Run engine at least 10 minutes after adding stabilizer to allow it to reach carburetor. Do not drain carburetor if using fuel stabilizer.
•Remove all dirt from exterior of engine and equipment.
•Remove spark plug and pour one ounce of engine oil through spark plug hole into cylinder. Cover spark plug hole with rag. Crank engine several times to distribute oil. Replace spark plug.
•Follow lubrication recommendations on page 15.
NOTE: When storing any type of power equipment in an unventilated or metal storage shed, care should be taken to rust proof the equipment. Using a light oil or silicone, coat the equipment, especially any chains, springs, bearings and cables.
18
