PROGRAMMING THE OVEN
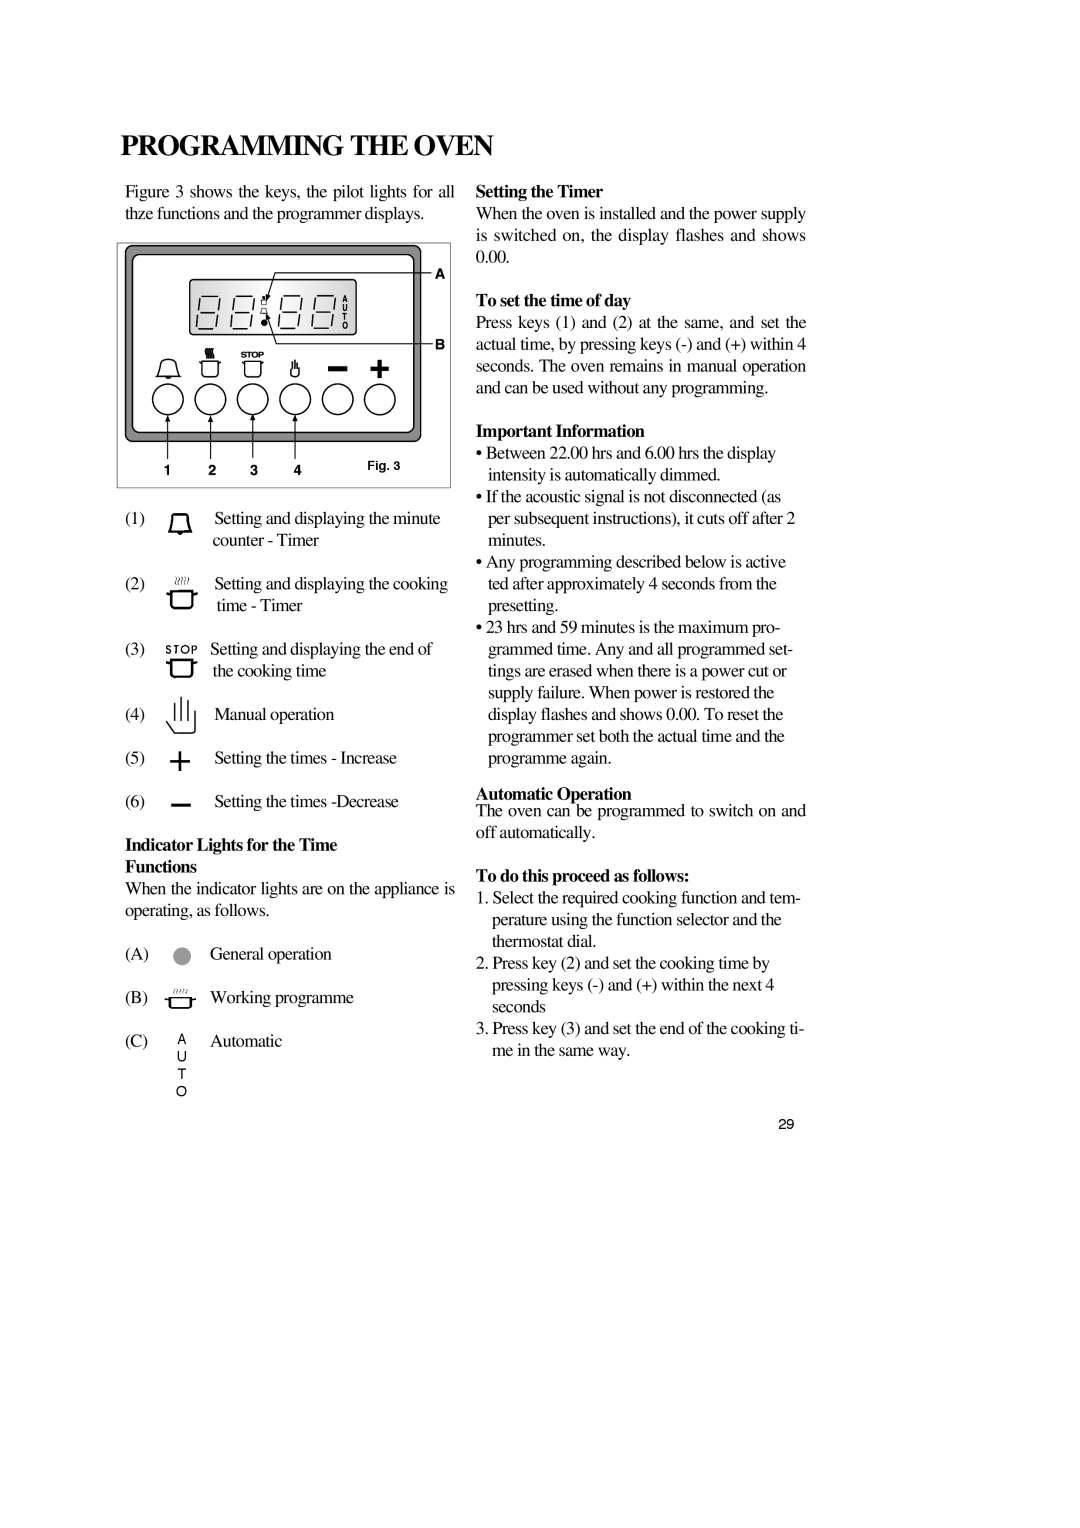
Figure 3 shows the keys, the pilot lights for all thze functions and the programmer displays.
Fig. 3 |
(1)Setting and displaying the minute counter - Timer
(2)Setting and displaying the cooking time - Timer
(3)Setting and displaying the end of the cooking time
(4)![]() Manual operation
Manual operation
(5)![]() Setting the times - Increase
Setting the times - Increase
(6)![]() Setting the times
Setting the times
Indicator Lights for the Time
Functions
When the indicator lights are on the appliance is operating, as follows.
(A) | General operation |
(B)![]() Working programme
Working programme
(C)A Automatic
U
T
O
Setting the Timer
When the oven is installed and the power supply is switched on, the display flashes and shows 0.00.
To set the time of day
Press keys (1) and (2) at the same, and set the actual time, by pressing keys
Important Information
•Between 22.00 hrs and 6.00 hrs the display intensity is automatically dimmed.
•If the acoustic signal is not disconnected (as per subsequent instructions), it cuts off after 2 minutes.
•Any programming described below is active ted after approximately 4 seconds from the presetting.
•23 hrs and 59 minutes is the maximum pro- grammed time. Any and all programmed set- tings are erased when there is a power cut or supply failure. When power is restored the display flashes and shows 0.00. To reset the programmer set both the actual time and the programme again.
Automatic Operation
The oven can be programmed to switch on and off automatically.
To do this proceed as follows:
1.Select the required cooking function and tem- perature using the function selector and the thermostat dial.
2.Press key (2) and set the cooking time by pressing keys
3.Press key (3) and set the end of the cooking ti- me in the same way.
29
