Cleaning and Maintenance
Before carrying out any maintenance or cleaning disconnect the appliance from the supply.
For safety reasons cleaning the applian- ce with a steam jet cleaner or
Cleaning Materials
Check that the use of cleaning products are recommended by the manufacturer on various finishes e.g. vitreous enamel and stainless steel.
Cleaners that contain bleach or are abrasive should NOT be used on this appliance.
General Cleaning
Wash enamelled parts after each use. Let the oven cool and remove fat deposits using a sponge cloth with soapy water or a mild detergent.
Rinse stainless steel parts with water and wipe them with a soft cloth. For hard stains use specific products for stainless steel or some arm vinegar. Do not use abrasive clea- ning products.
Oven Shelves
To clean the oven shelves, soak in warm soapy water and remove subborn marks with a well wetted, soap impregnated pad. Rinse well and dry with a soft cloth.
Cleaning the Oven Door
The internal glass of the oven door can be removed and cleaned. To do so follow these instructions:
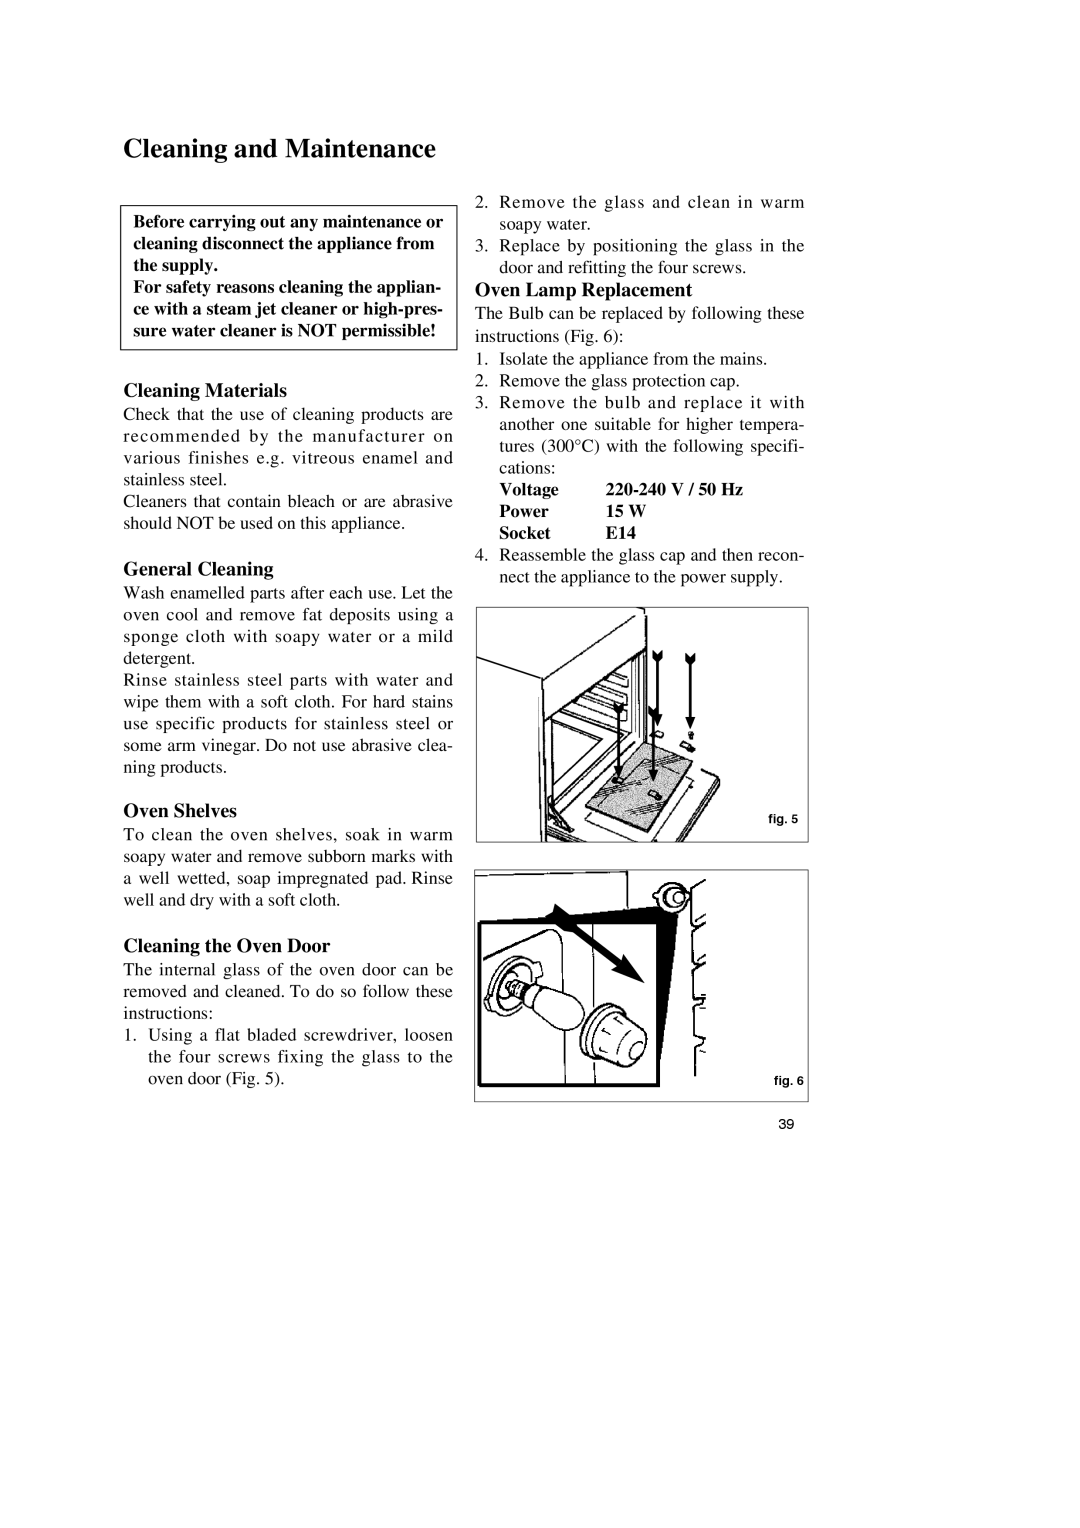
1.Using a flat bladed screwdriver, loosen the four screws fixing the glass to the oven door (Fig. 5).
2.Remove the glass and clean in warm soapy water.
3.Replace by positioning the glass in the door and refitting the four screws.
Oven Lamp Replacement
The Bulb can be replaced by following these instructions (Fig. 6):
1.Isolate the appliance from the mains.
2.Remove the glass protection cap.
3.Remove the bulb and replace it with another one suitable for higher tempera- tures (300°C) with the following specifi- cations:
Voltage | |
Power | 15 W |
Socket | E14 |
4.Reassemble the glass cap and then recon- nect the appliance to the power supply.
fig. 5
fig. 6
39