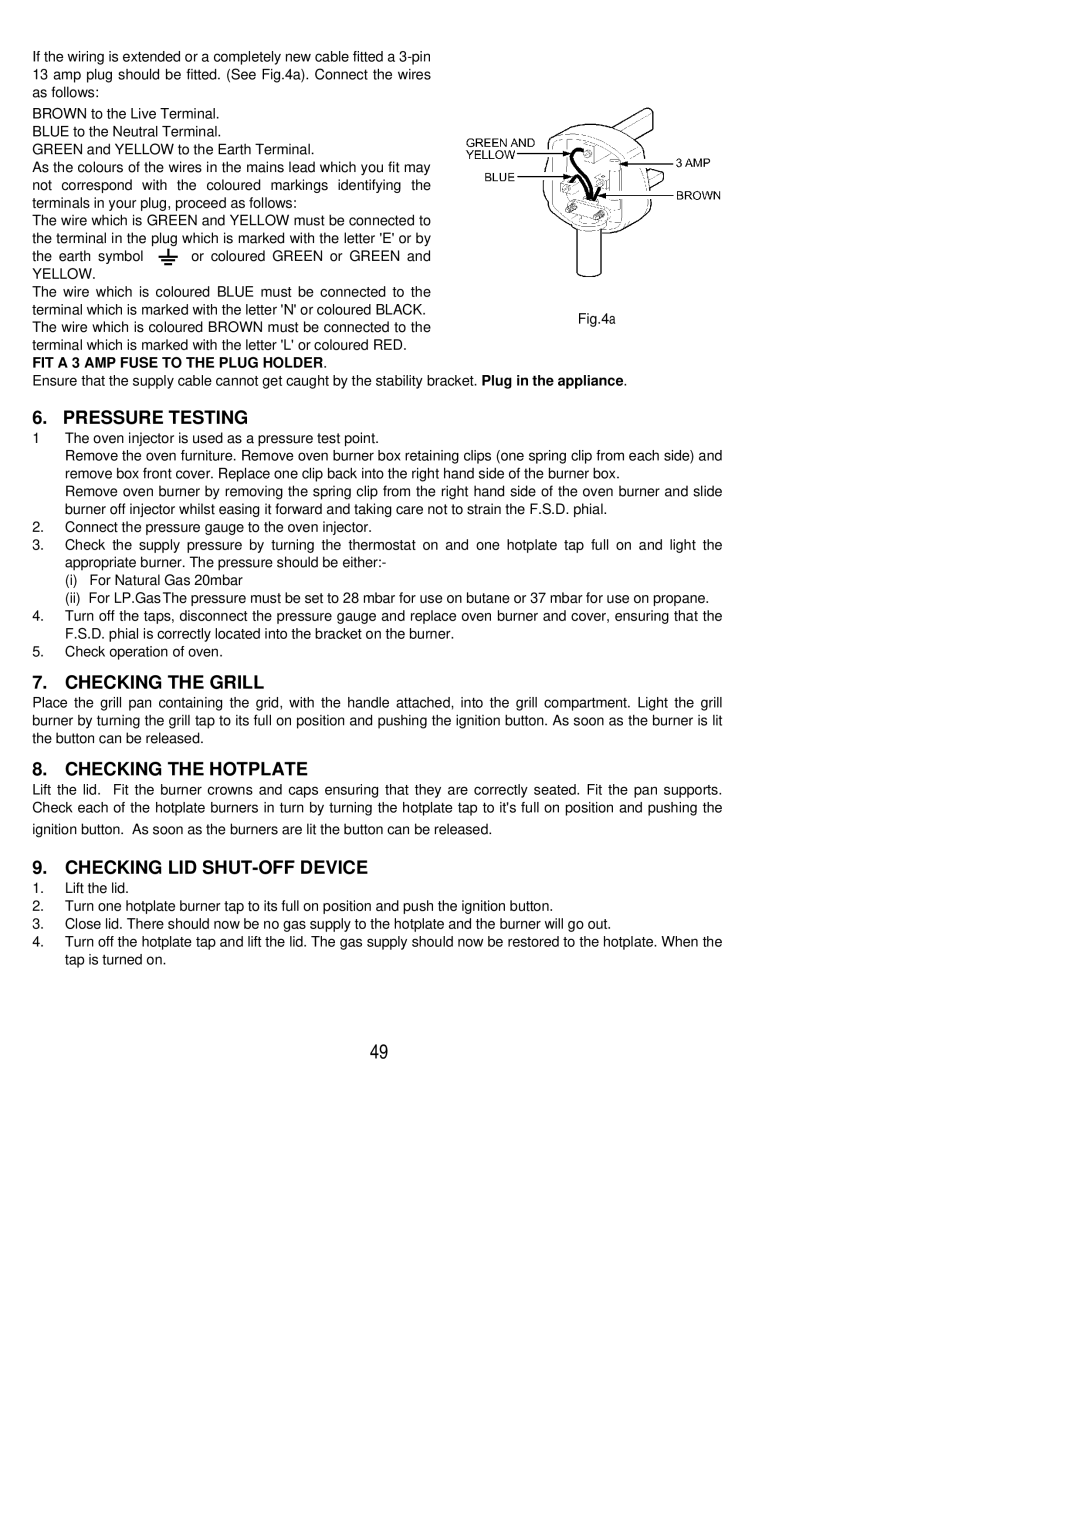
If the wiring is extended or a completely new cable fitted a 3-pin 13 amp plug should be fitted. (See Fig.4a). Connect the wires as follows:

BROWN to the Live Terminal. BLUE to the Neutral Terminal.

GREEN and YELLOW to the Earth Terminal.

As the colours of the wires in the mains lead which you fit may not correspond with the coloured markings identifying the terminals in your plug, proceed as follows:

The wire which is GREEN and YELLOW must be connected to the terminal in the plug which is marked with the letter 'E' or by

the earth symbol or coloured GREEN or GREEN and

YELLOW.

The wire which is coloured BLUE must be connected to the terminal which is marked with the letter 'N' or coloured BLACK. The wire which is coloured BROWN must be connected to the terminal which is marked with the letter 'L' or coloured RED.

FIT A 3 AMP FUSE TO THE PLUG HOLDER.

Ensure that the supply cable cannot get caught by the stability bracket.

Fig.4a

Plug in the appliance.

6. PRESSURE TESTING

1The oven injector is used as a pressure test point.

Remove the oven furniture. Remove oven burner box retaining clips (one spring clip from each side) and remove box front cover. Replace one clip back into the right hand side of the burner box.

Remove oven burner by removing the spring clip from the right hand side of the oven burner and slide burner off injector whilst easing it forward and taking care not to strain the F.S.D. phial.

2.Connect the pressure gauge to the oven injector.

3.Check the supply pressure by turning the thermostat on and one hotplate tap full on and light the appropriate burner. The pressure should be either:-

(i)For Natural Gas 20mbar

(ii)For LP.GasThe pressure must be set to 28 mbar for use on butane or 37 mbar for use on propane.

4.Turn off the taps, disconnect the pressure gauge and replace oven burner and cover, ensuring that the F.S.D. phial is correctly located into the bracket on the burner.

5.Check operation of oven.

7. CHECKING THE GRILL

Place the grill pan containing the grid, with the handle attached, into the grill compartment. Light the grill burner by turning the grill tap to its full on position and pushing the ignition button. As soon as the burner is lit the button can be released.

8. CHECKING THE HOTPLATE

Lift the lid. Fit the burner crowns and caps ensuring that they are correctly seated. Fit the pan supports. Check each of the hotplate burners in turn by turning the hotplate tap to it's full on position and pushing the

ignition button. As soon as the burners are lit the button can be released.

9. CHECKING LID SHUT-OFF DEVICE

1.Lift the lid.

2.Turn one hotplate burner tap to its full on position and push the ignition button.

3.Close lid. There should now be no gas supply to the hotplate and the burner will go out.

4.Turn off the hotplate tap and lift the lid. The gas supply should now be restored to the hotplate. When the tap is turned on.

49

Page 49
Image 49
Zanussi ZCG 7690 manual Pressure Testing, Checking the Grill, Checking the Hotplate, Checking LID SHUT-OFF Device

ZCG 7690 specifications

The Zanussi ZCG 7690 is a versatile and efficient gas cooker designed to meet the culinary needs of modern households. Renowned for its reliability and functionality, this model combines various features that enhance cooking performance while ensuring user convenience.

One of the main features of the ZCG 7690 is its powerful gas hob. The cooker is equipped with four gas burners, providing ample space for simultaneous cooking. Each burner offers a range of heat settings, allowing users to achieve precise temperature control. The burner sizes cater to different cooking requirements, from rapid boiling to gentle simmering, making it an ideal choice for various recipes.

The design of the Zanussi ZCG 7690 is user-friendly, featuring easy-to-use rotary knobs that allow for straightforward adjustment of flame strength. Additionally, the gas burners come with an automatic ignition system, which ensures that lighting the burners is quick and hassle-free. Safety is a priority; hence, the cooker includes a flame failure device that cuts off the gas supply if the flame goes out, providing peace of mind during meal preparation.

In terms of the oven compartment, the ZCG 7690 boasts a spacious capacity that can accommodate multiple dishes at once. The oven features conventional cooking technology, ensuring even heat distribution for consistent cooking results. Users can take advantage of various cooking methods, including baking, roasting, and grilling. The oven is also equipped with a timer function, helping home chefs keep track of cooking times for different dishes.

Cleaning and maintenance of the Zanussi ZCG 7690 have been simplified with its easy-to-clean enamel oven interior and removable oven shelves. The hob surface is designed to be durable and easy to wipe, ensuring that spills and splatters do not become a hassle.

Overall, the Zanussi ZCG 7690 represents a perfect blend of functionality and style. With its robust construction, efficient gas cooking technology, and user-friendly features, it is a reliable choice for any kitchen. Whether you are preparing a quick family meal or hosting a dinner gathering, this cooker adapts to your culinary needs, making cooking enjoyable and effortless. The combination of safety features, ample cooking space, and efficient performance makes the ZCG 7690 a preferred option for both novice cooks and seasoned chefs alike.