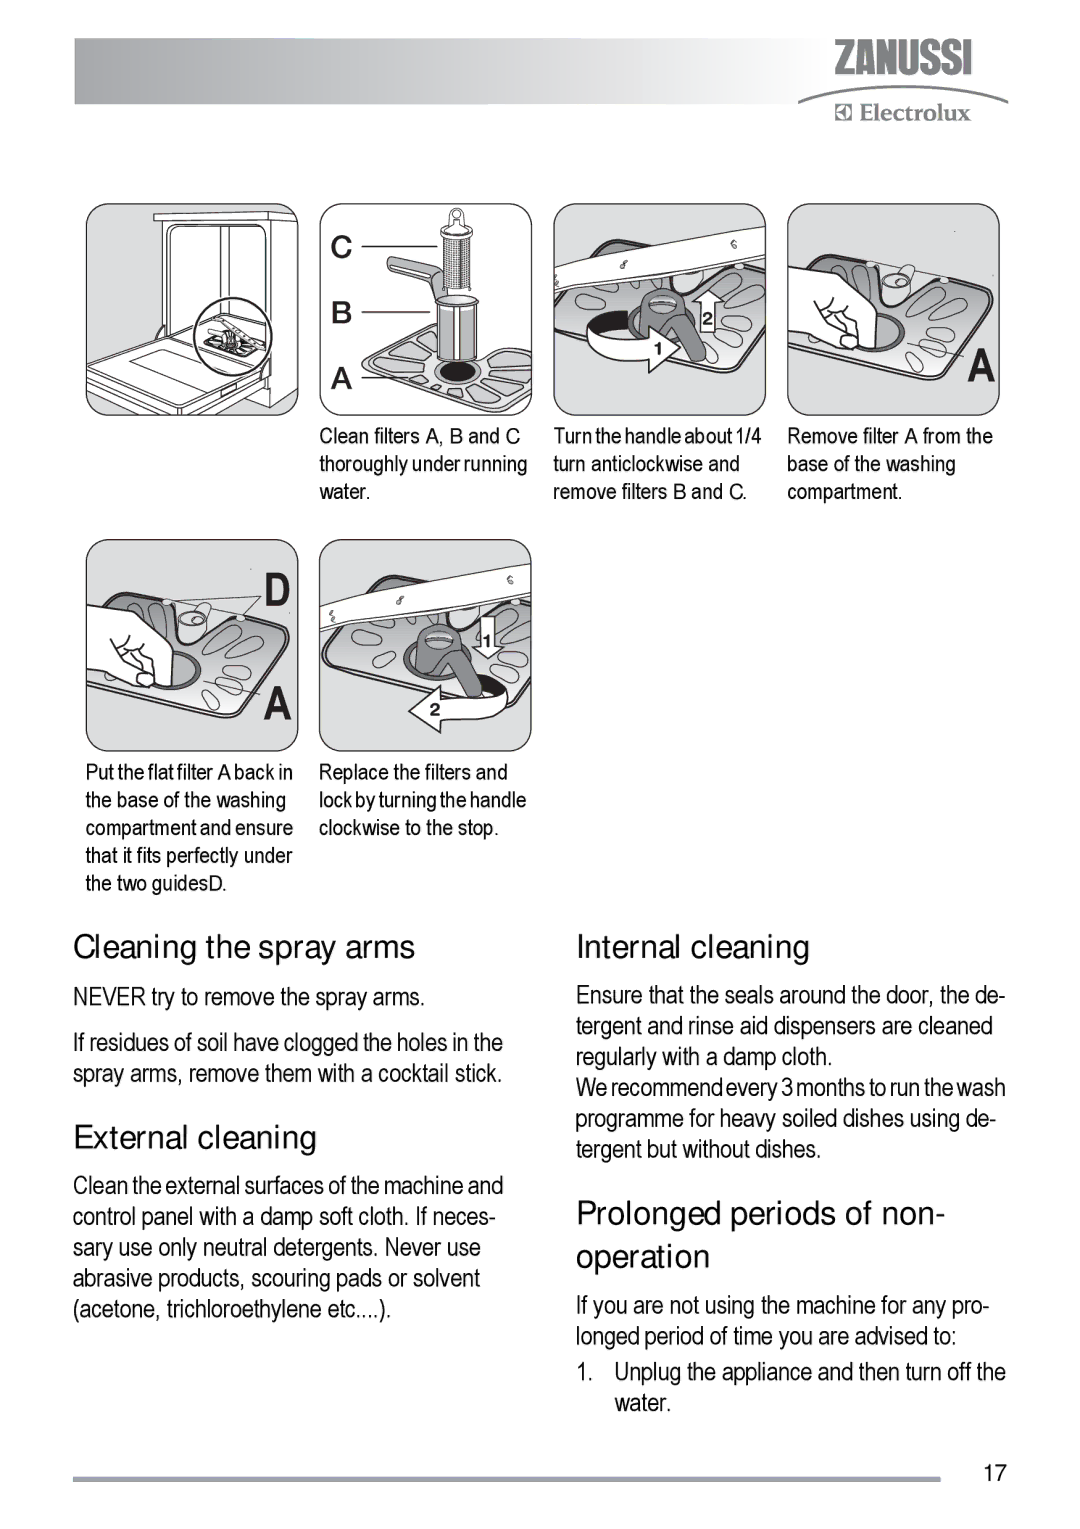
Clean filters A, B and C | Turn the handle about 1/4 | Remove filter A from the | |||
thoroughly under running | turn anticlockwise and | base of the washing | |||
water. | remove filters B and C. | compartment. | |||
|
|
|
|
|
|
|
|
|
|
|
|
|
|
|
|
|
|
|
|
|
|
|
|
|
|
|
|
|
|
|
|
|
|
|
|
|
|
|
|
|
|
|
|
|
|
|
|
Put the flat filter A back in | Replace the filters and |
the base of the washing | lock by turning the handle |
compartment and ensure | clockwise to the stop. |
that it fits perfectly under |
|
the two guidesD. |
|
Cleaning the spray arms
NEVER try to remove the spray arms.
If residues of soil have clogged the holes in the spray arms, remove them with a cocktail stick.
External cleaning
Clean the external surfaces of the machine and control panel with a damp soft cloth. If neces- sary use only neutral detergents. Never use abrasive products, scouring pads or solvent (acetone, trichloroethylene etc....).
Internal cleaning
Ensure that the seals around the door, the de- tergent and rinse aid dispensers are cleaned regularly with a damp cloth.
We recommend every 3 months to run the wash programme for heavy soiled dishes using de- tergent but without dishes.
Prolonged periods of non- operation
If you are not using the machine for any pro- longed period of time you are advised to:
1.Unplug the appliance and then turn off the water.
17
