INSTALLING THE COOKER HOOD
Fitting the Wall Brackets
•Draw a vertical line on the wall, from the centre of the cooking appliance up to the ceiling, or as high as is practical using a spirit level and marker pen. This is to ensure the correct vertical alignment of the product.
•Draw a horizontal line through the vertical at 650mm above the hob.
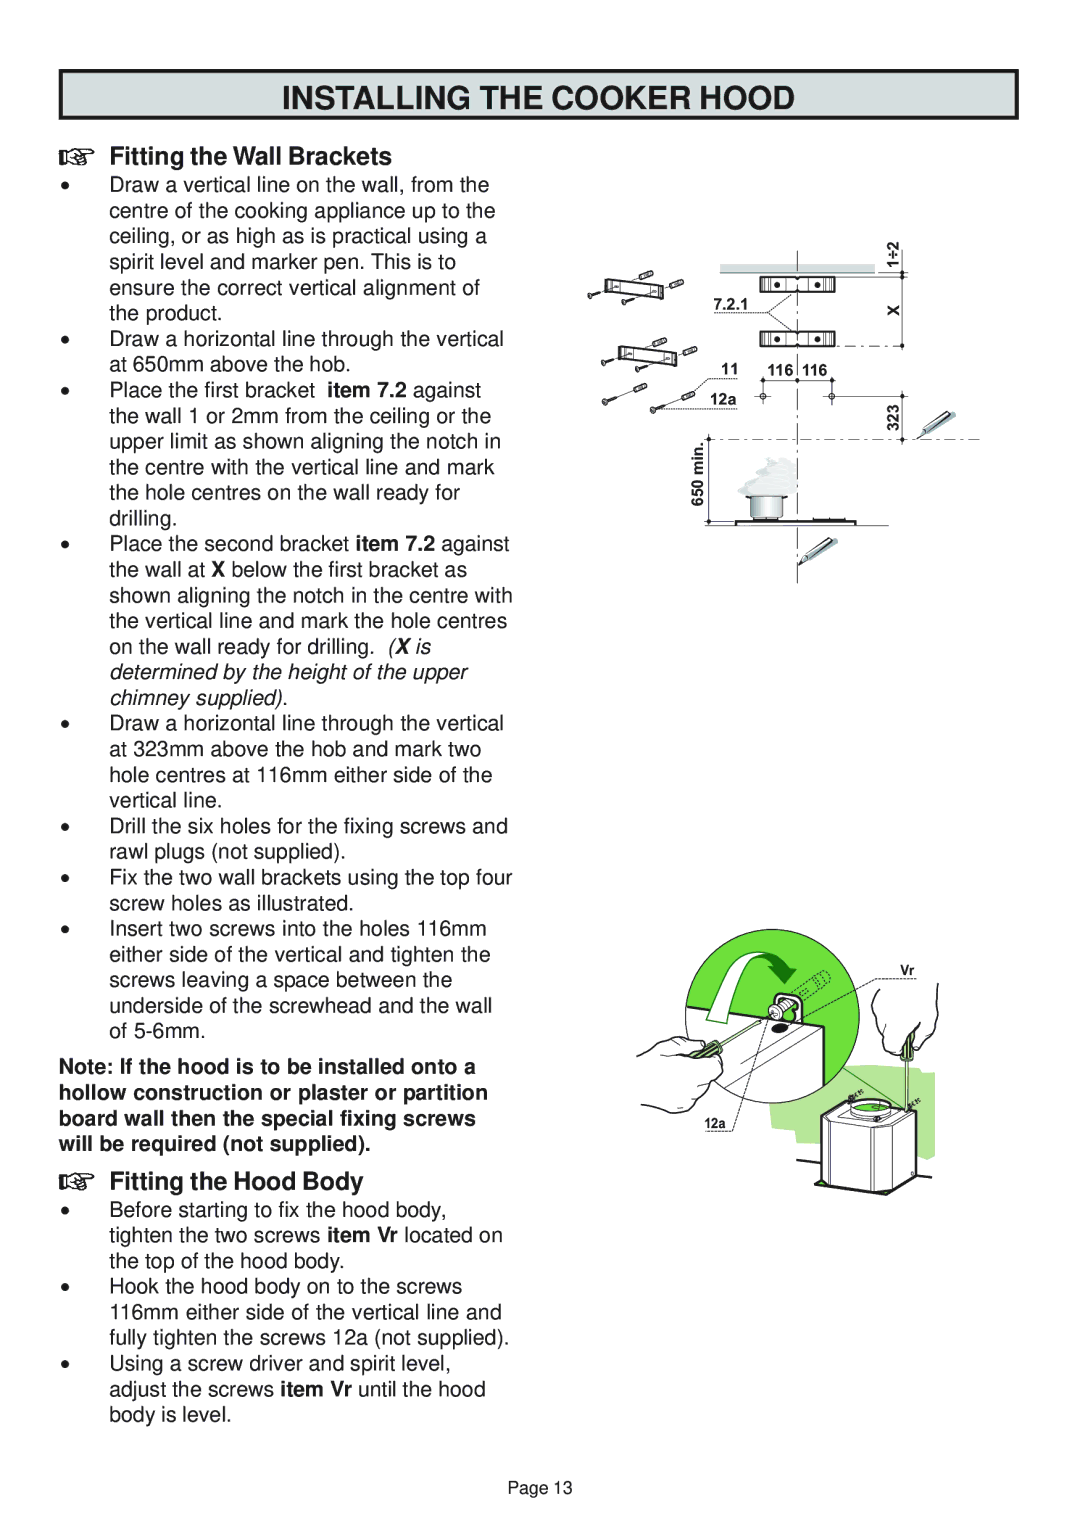
•Place the first bracket item 7.2 against the wall 1 or 2mm from the ceiling or the upper limit as shown aligning the notch in the centre with the vertical line and mark the hole centres on the wall ready for drilling.
•Place the second bracket item 7.2 against the wall at X below the first bracket as shown aligning the notch in the centre with the vertical line and mark the hole centres on the wall ready for drilling. (X is determined by the height of the upper chimney supplied).
•Draw a horizontal line through the vertical at 323mm above the hob and mark two hole centres at 116mm either side of the vertical line.
•Drill the six holes for the fixing screws and rawl plugs (not supplied).
•Fix the two wall brackets using the top four screw holes as illustrated.
•Insert two screws into the holes 116mm either side of the vertical and tighten the screws leaving a space between the underside of the screwhead and the wall of
Note: If the hood is to be installed onto a hollow construction or plaster or partition board wall then the special fixing screws will be required (not supplied).
Fitting the Hood Body
•Before starting to fix the hood body, tighten the two screws item Vr located on the top of the hood body.
•Hook the hood body on to the screws 116mm either side of the vertical line and fully tighten the screws 12a (not supplied).
•Using a screw driver and spirit level, adjust the screws item Vr until the hood body is level.
7.2.1
11 116 116
12a
650 min.
12a
323X 1÷2![]()
Vr
Page 13