SE1
SE2
SE3
SE4
4. SET UP
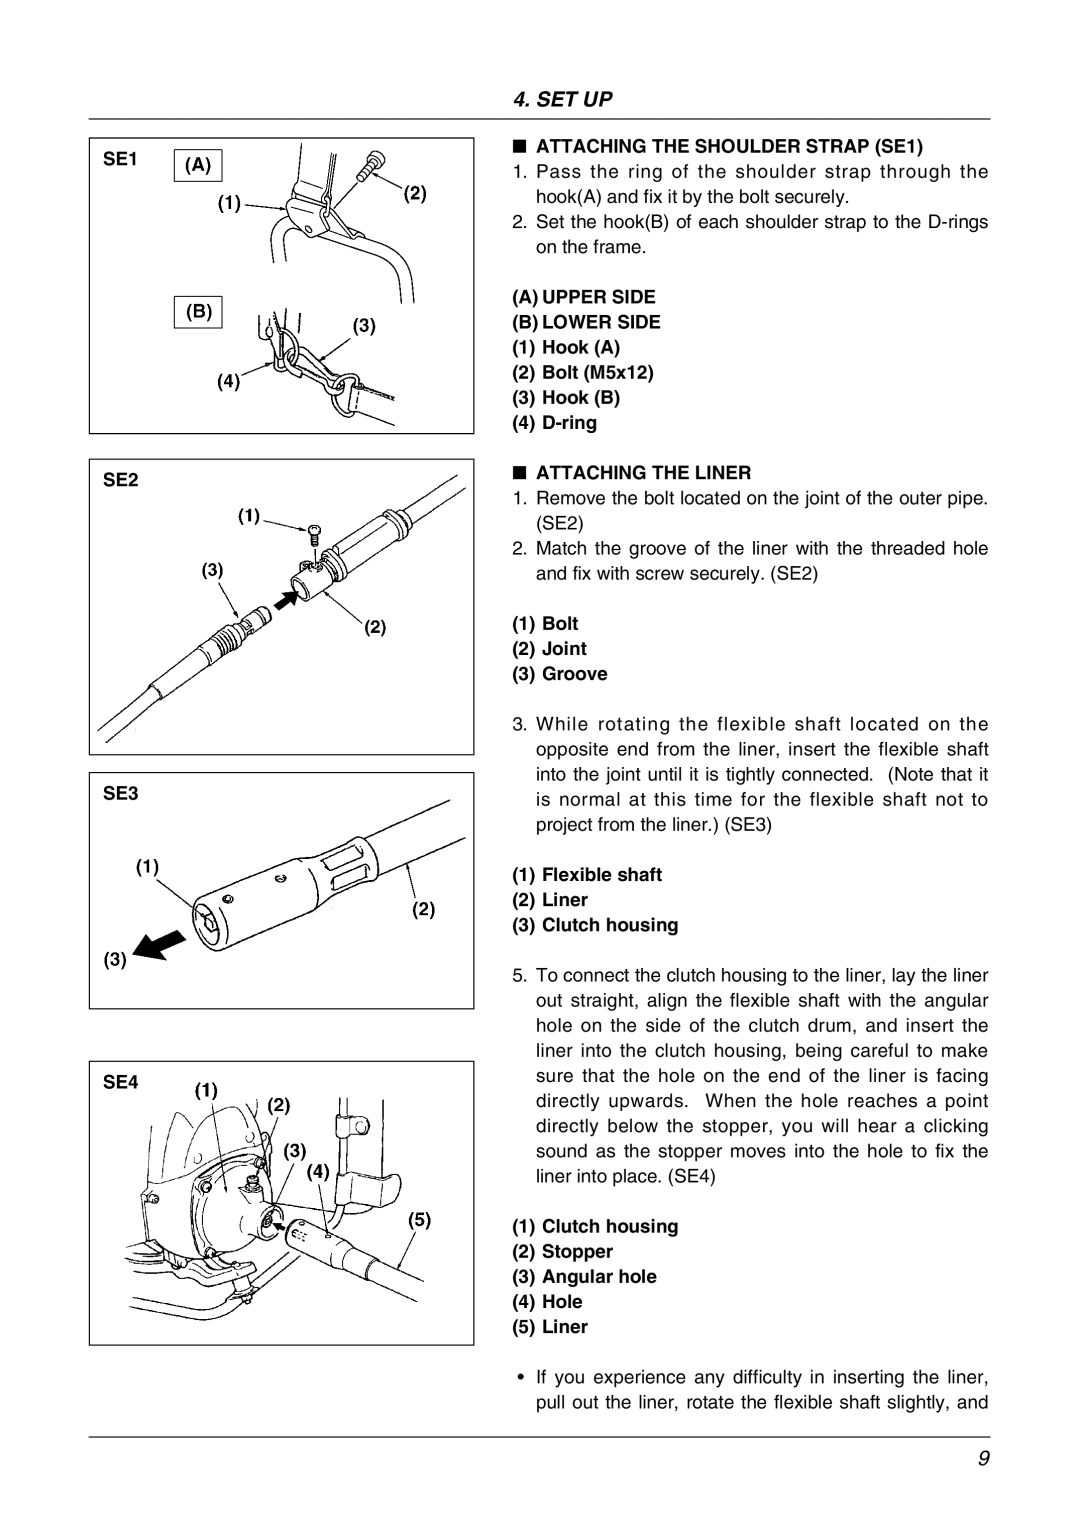
■ATTACHING THE SHOULDER STRAP (SE1)
1.Pass the ring of the shoulder strap through the hook(A) and fix it by the bolt securely.
2.Set the hook(B) of each shoulder strap to the
(A)UPPER SIDE
(B)LOWER SIDE
(1) Hook (A)
(2) Bolt (M5x12)
(3) Hook (B)
(4)
■ATTACHING THE LINER
1.Remove the bolt located on the joint of the outer pipe. (SE2)
2.Match the groove of the liner with the threaded hole and fix with screw securely. (SE2)
(1)Bolt
(2)Joint
(3)Groove
3.While rotating the flexible shaft located on the opposite end from the liner, insert the flexible shaft into the joint until it is tightly connected. (Note that it is normal at this time for the flexible shaft not to project from the liner.) (SE3)
(1)Flexible shaft
(2)Liner
(3)Clutch housing
5.To connect the clutch housing to the liner, lay the liner out straight, align the flexible shaft with the angular hole on the side of the clutch drum, and insert the liner into the clutch housing, being careful to make sure that the hole on the end of the liner is facing directly upwards. When the hole reaches a point directly below the stopper, you will hear a clicking sound as the stopper moves into the hole to fix the liner into place. (SE4)
(1)Clutch housing
(2)Stopper
(3)Angular hole
(4)Hole
(5)Liner
•If you experience any difficulty in inserting the liner, pull out the liner, rotate the flexible shaft slightly, and
9