Husqvarna 1150902-95 manual Directional cuts, Felling cut

Page 29

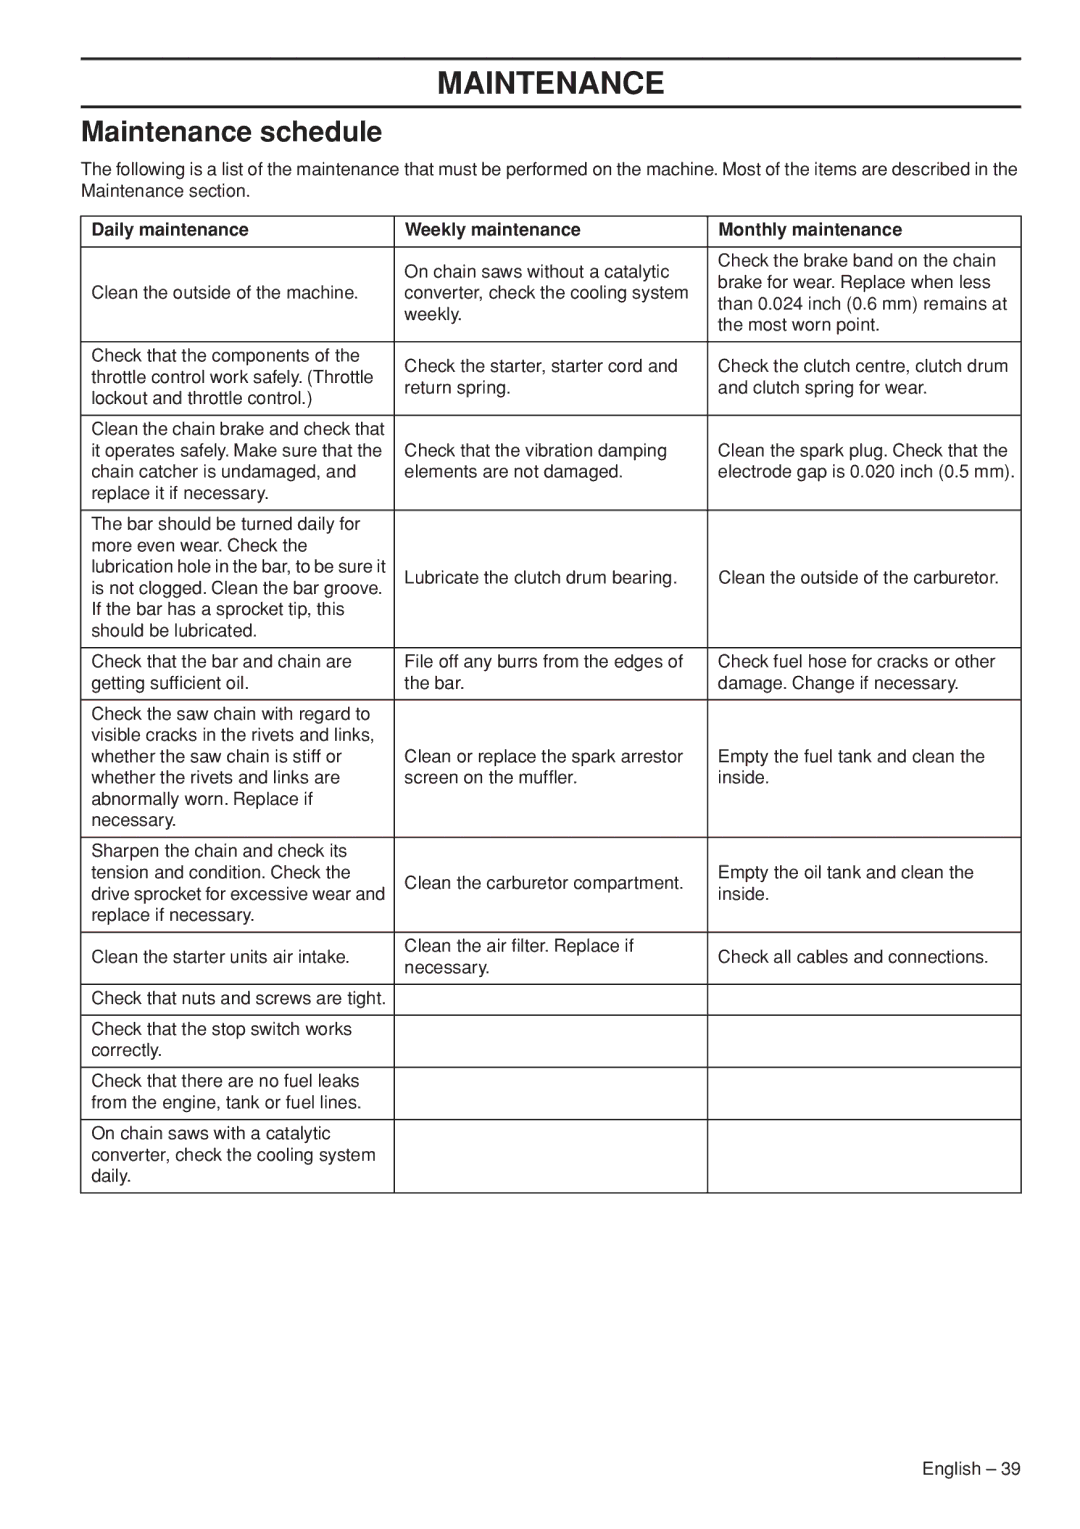
WORKING TECHNIQUES

Felling

WARNING! Unless you have special

! training we advise you not to fell trees with a diameter larger than the bar length of your saw!

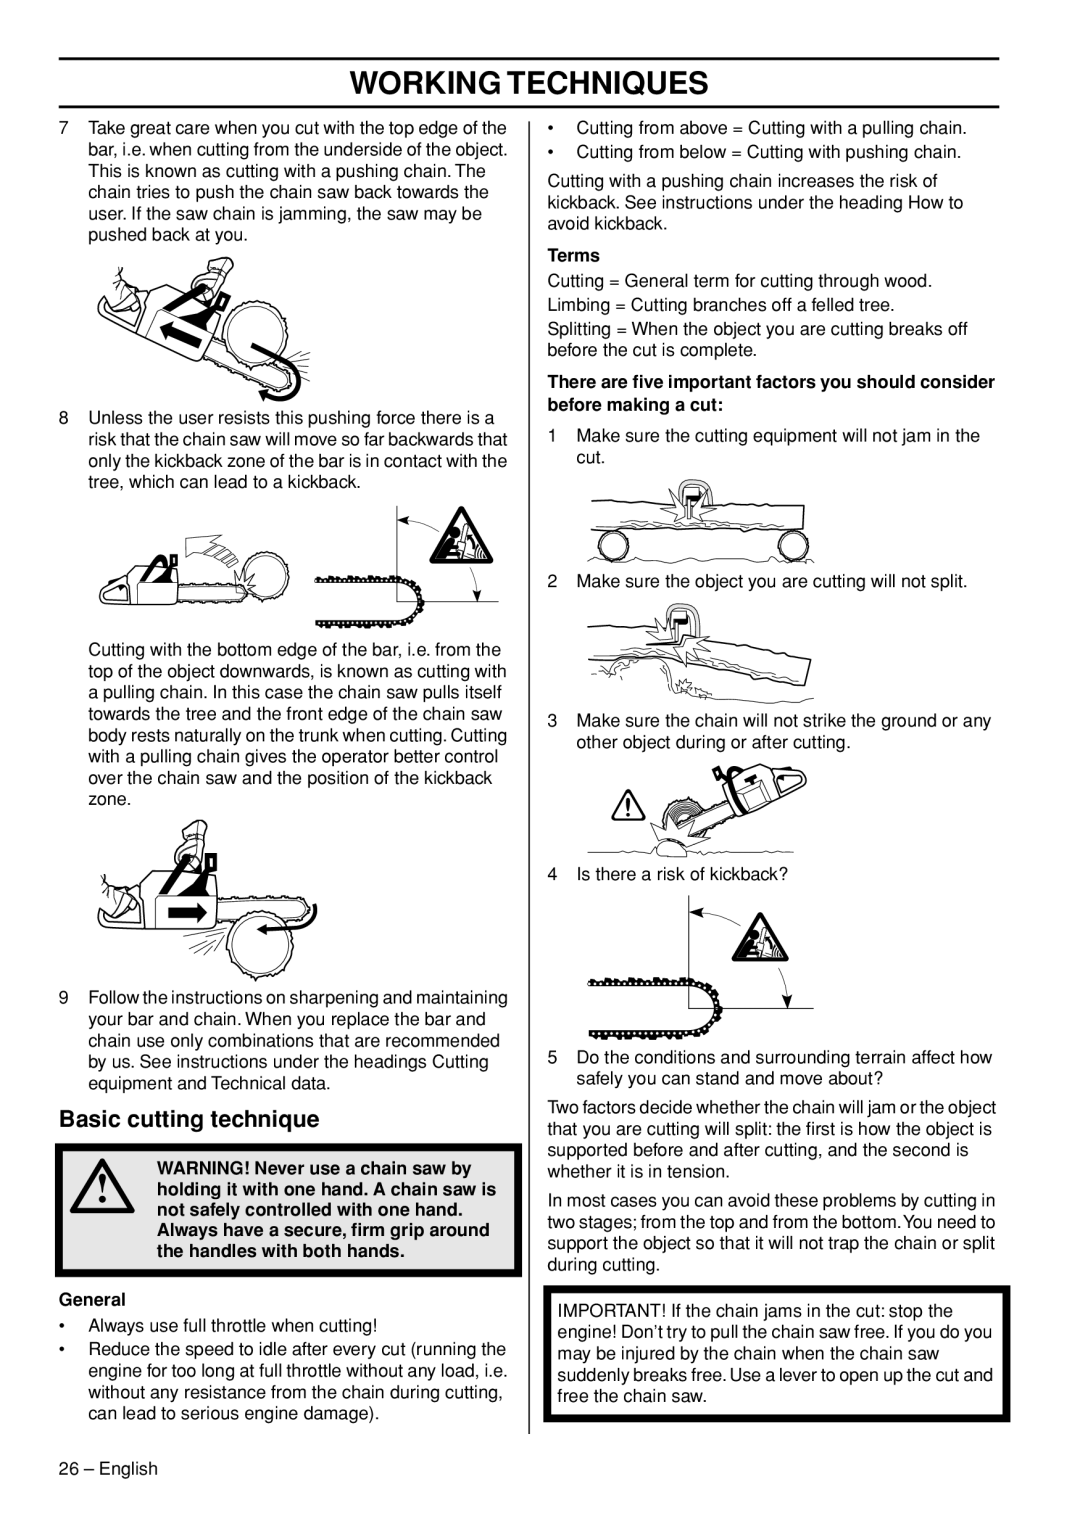
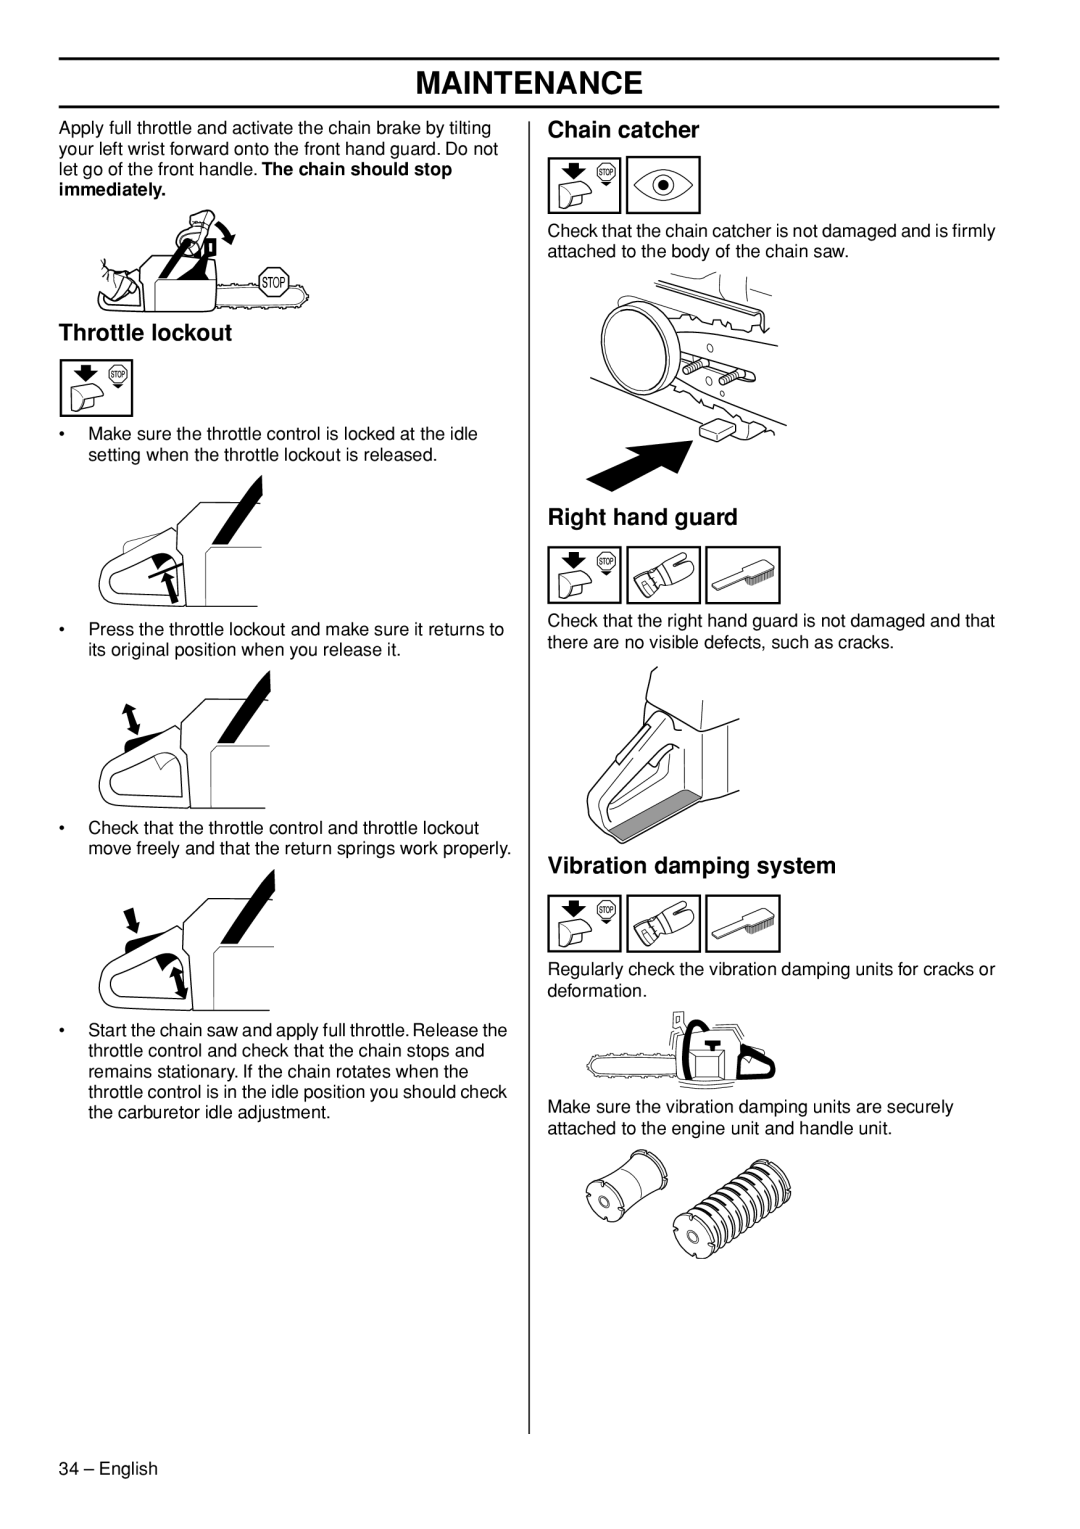
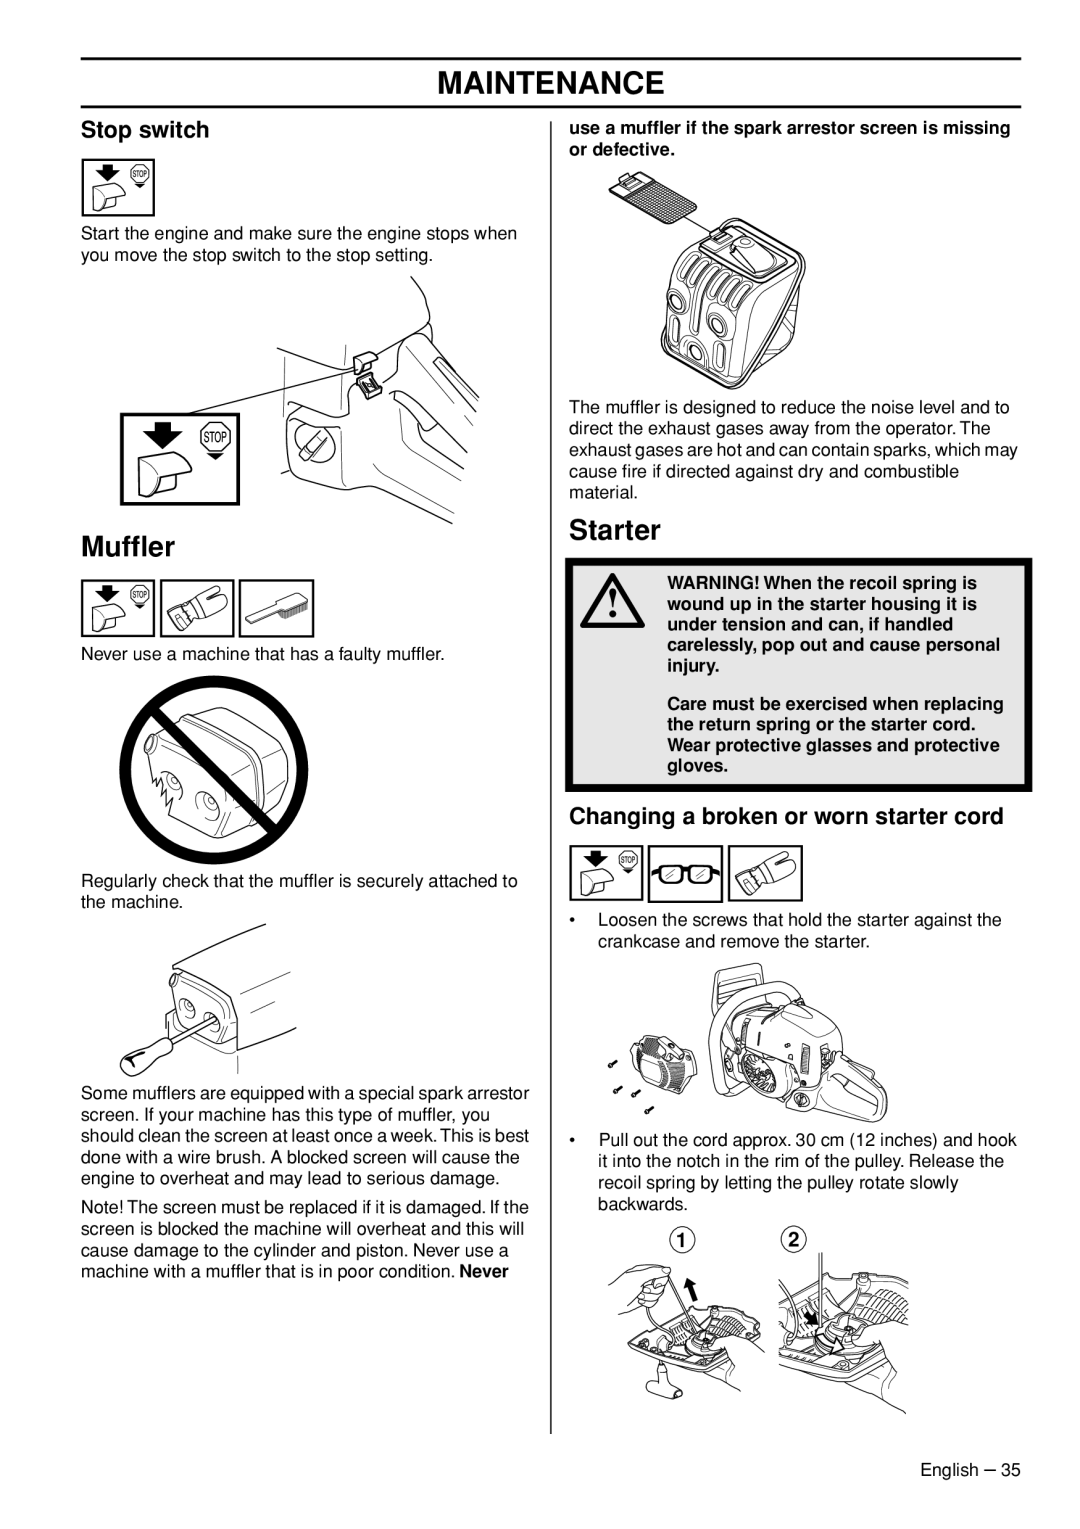
Felling is done using three cuts. First you make the directional cuts, which consist of the top cut and the bottom cut, then you finish with the felling cut. By placing these cuts correctly you can control the felling direction very accurately.

Directional cuts

To make the directional cuts you begin with the top cut. Stand to the right of the tree and cut on the pull stroke.

Next make the bottom cut so that it finishes exactly at the end of the top cut.

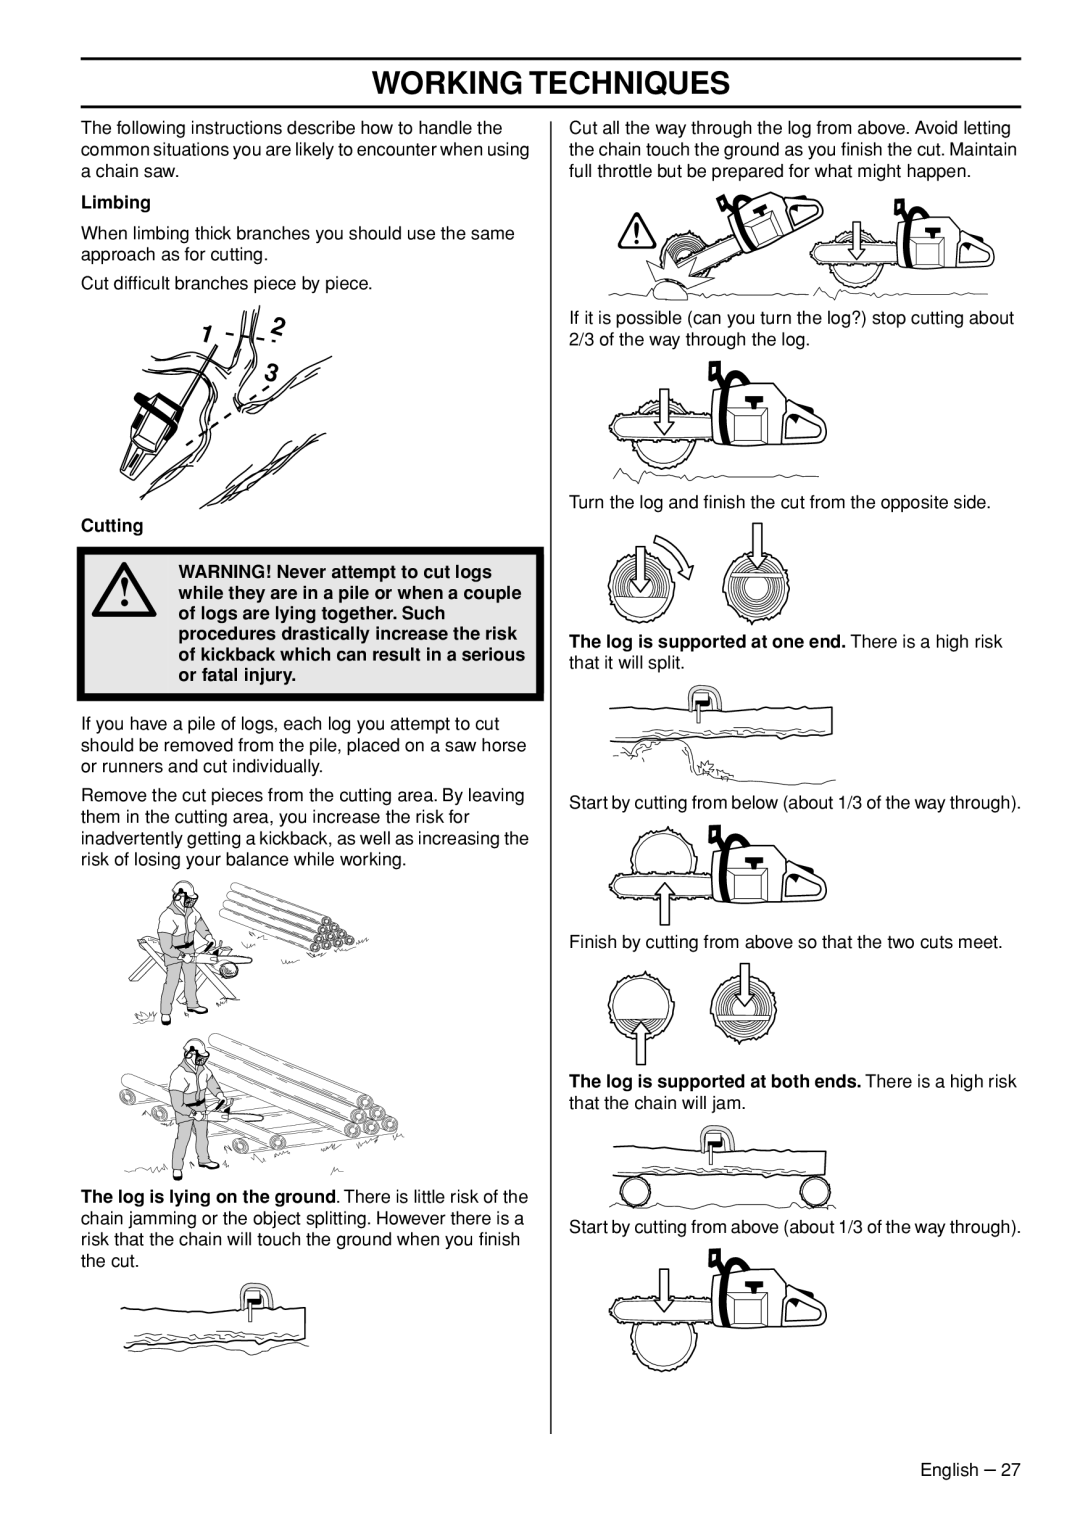
The directional cuts should run 1/4 of the diameter through the trunk and the angle between the top cut and bottom cut should be 45°.

The line where the two cuts meet is called the directional cut line. This line should be perfectly horizontal and at right angles (90°) to the chosen felling direction.

Felling cut

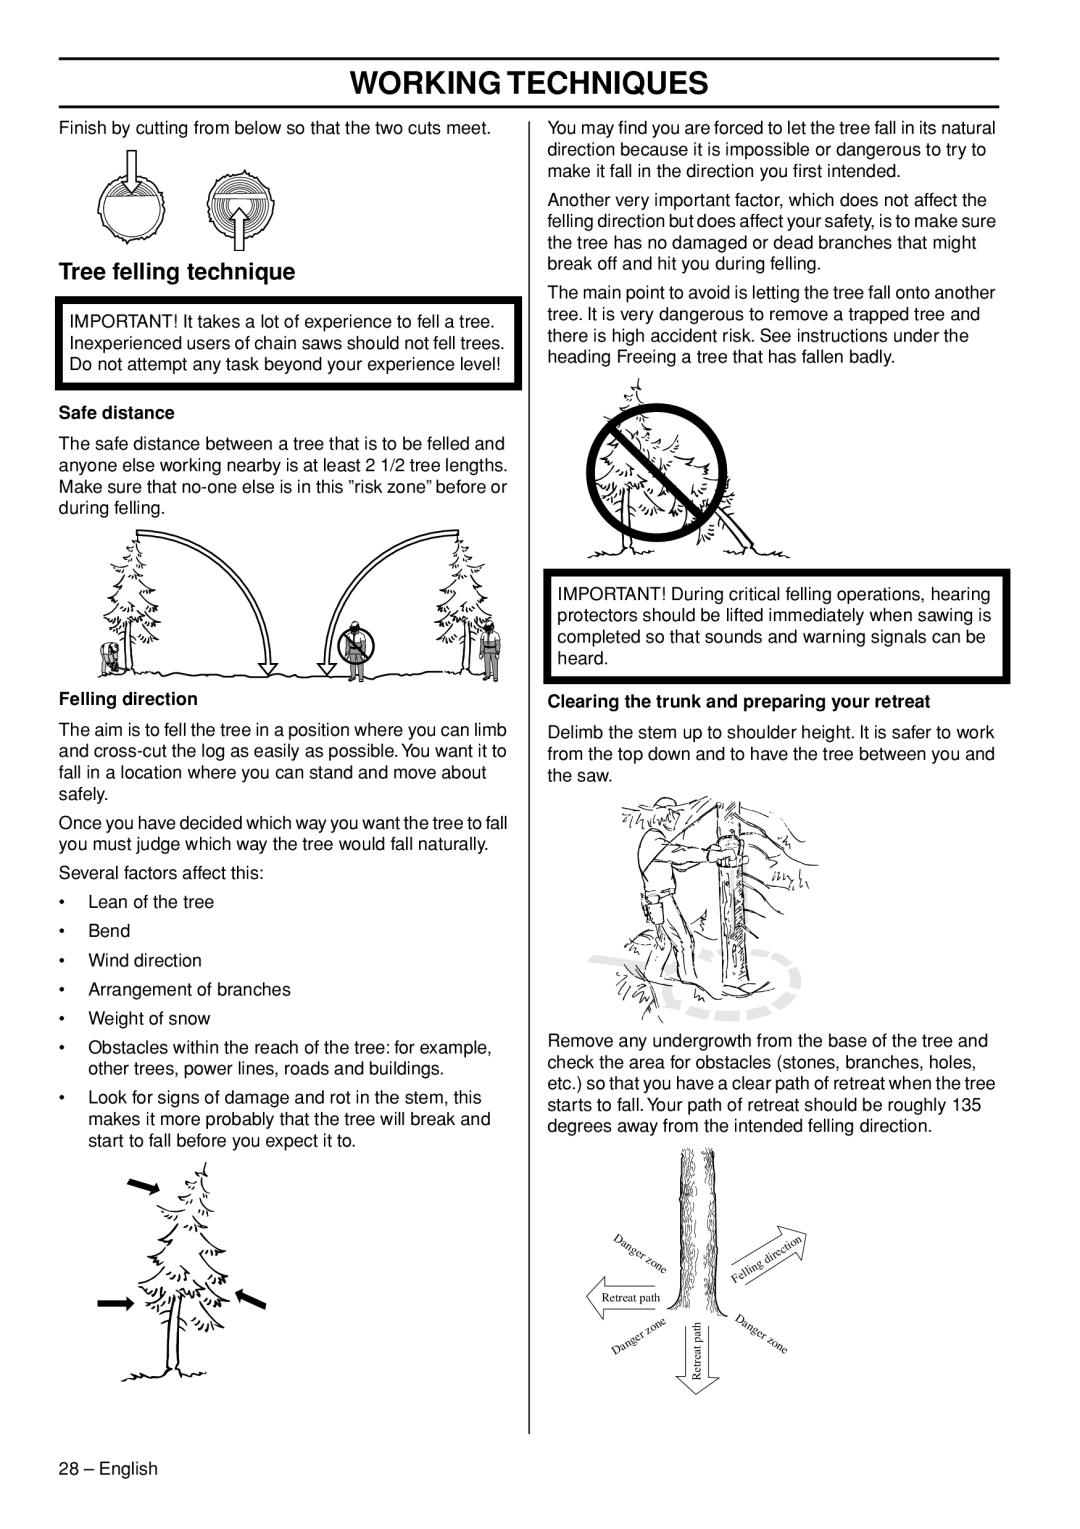
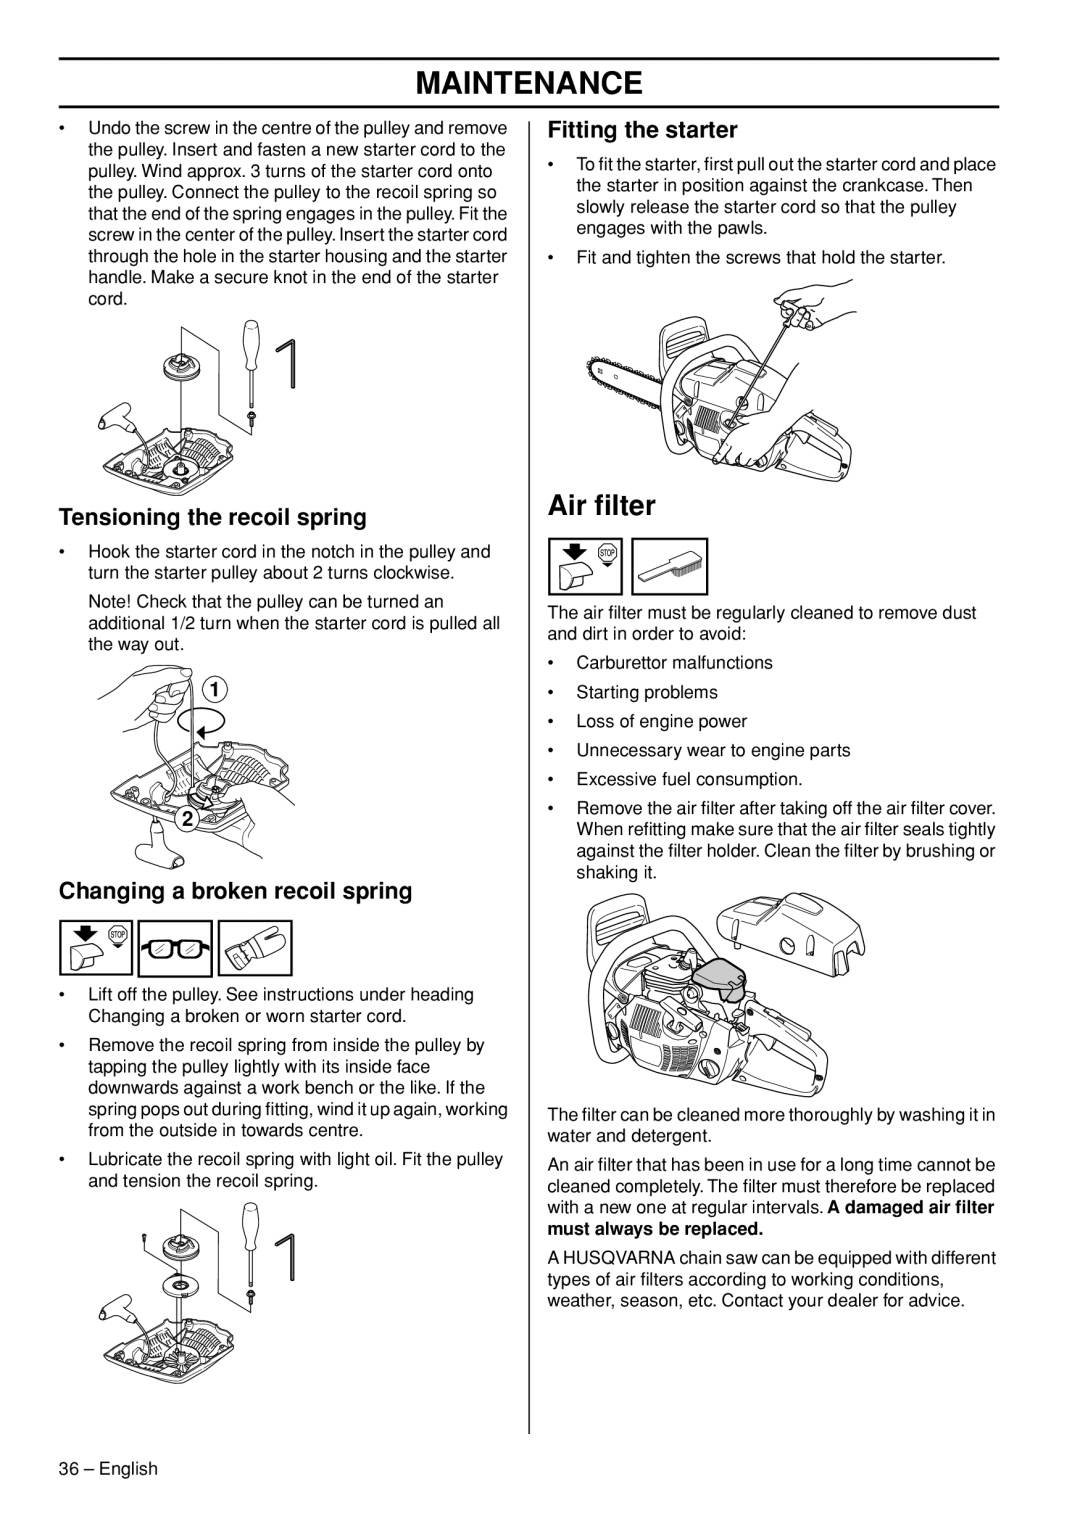
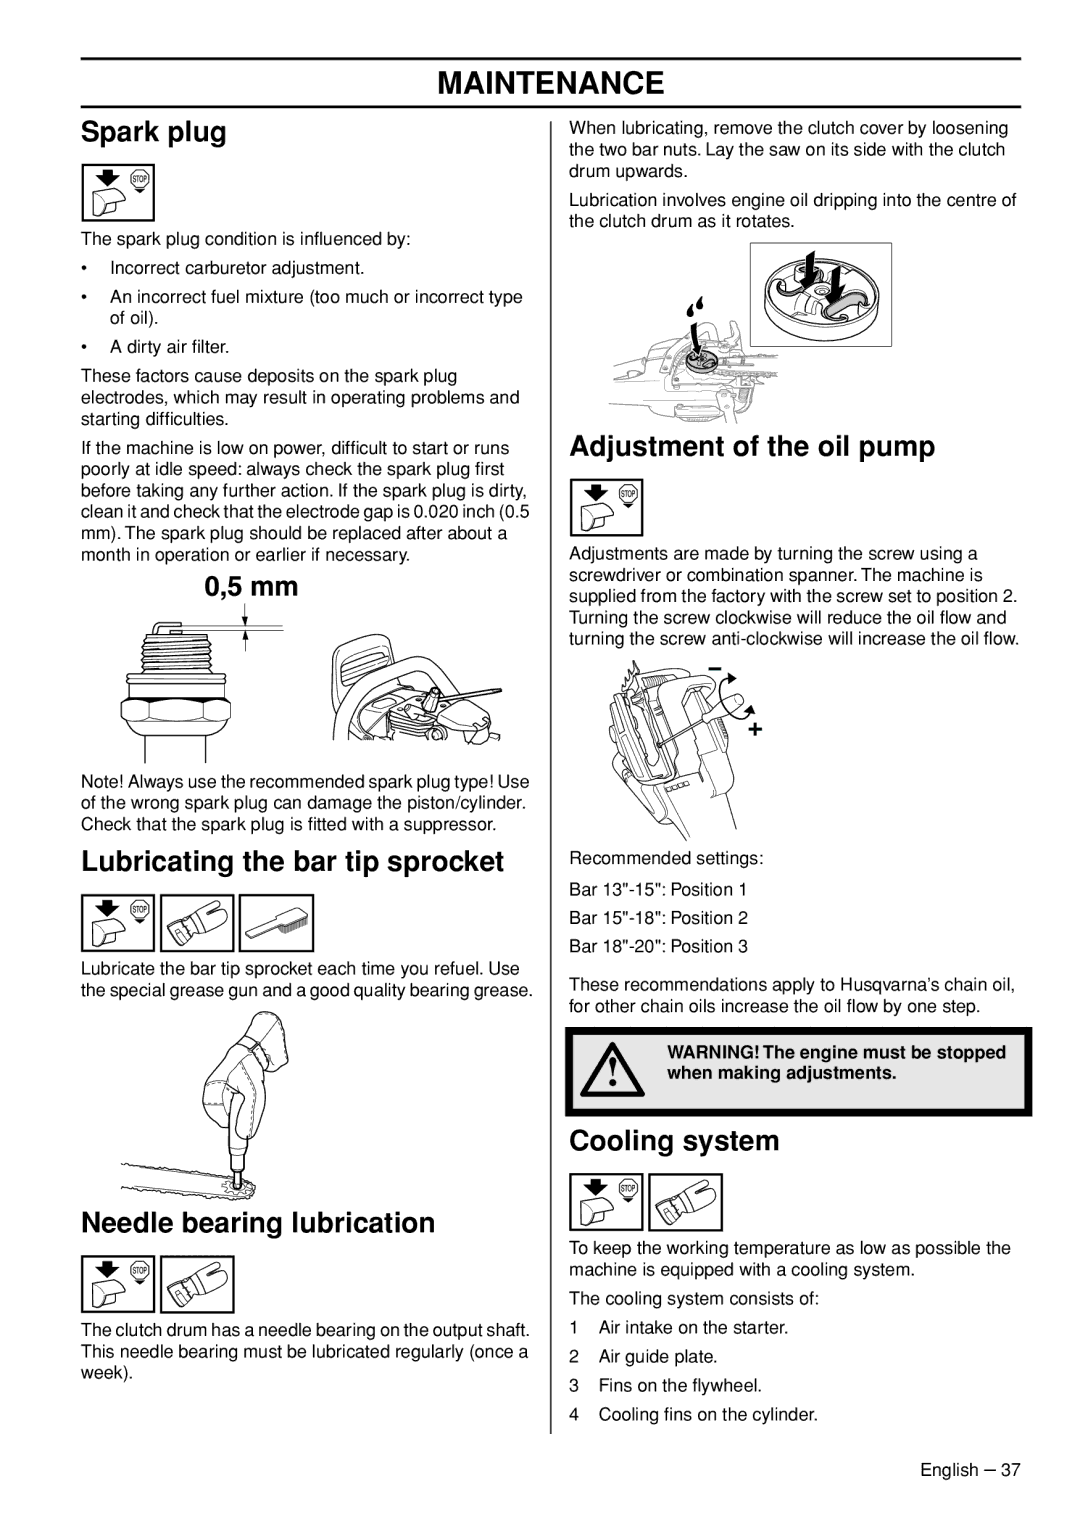
The felling cut is made from the opposite side of the tree and it must be perfectly horizontal. Stand on the left side of the tree and cut on the pull stroke.

Make the felling cut about 1.5-2 inches (3-5 cm) above the bottom directional cut.

Finish the felling cut parallel with the directional cut line so that the distance between them is at least 1/10 of the trunk diameter. The uncut section of the trunk is called the felling hinge.

The felling hinge controls the direction that the tree falls in.

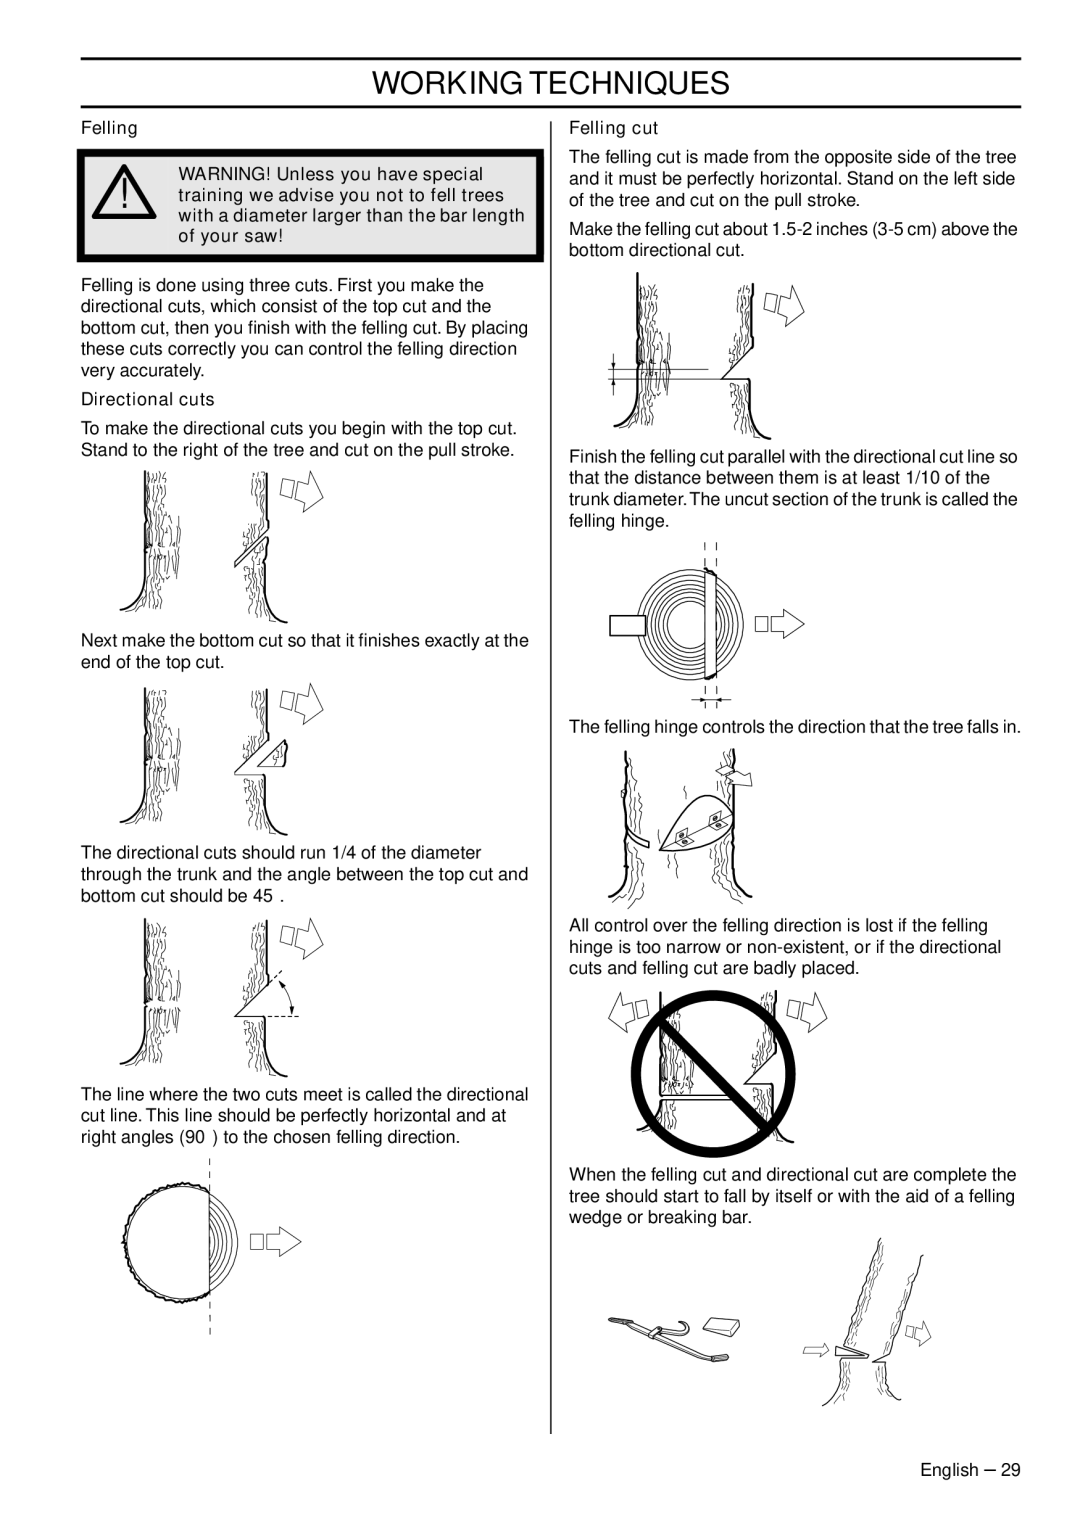
All control over the felling direction is lost if the felling hinge is too narrow or non-existent, or if the directional cuts and felling cut are badly placed.

When the felling cut and directional cut are complete the tree should start to fall by itself or with the aid of a felling wedge or breaking bar.

English 29

Image 29
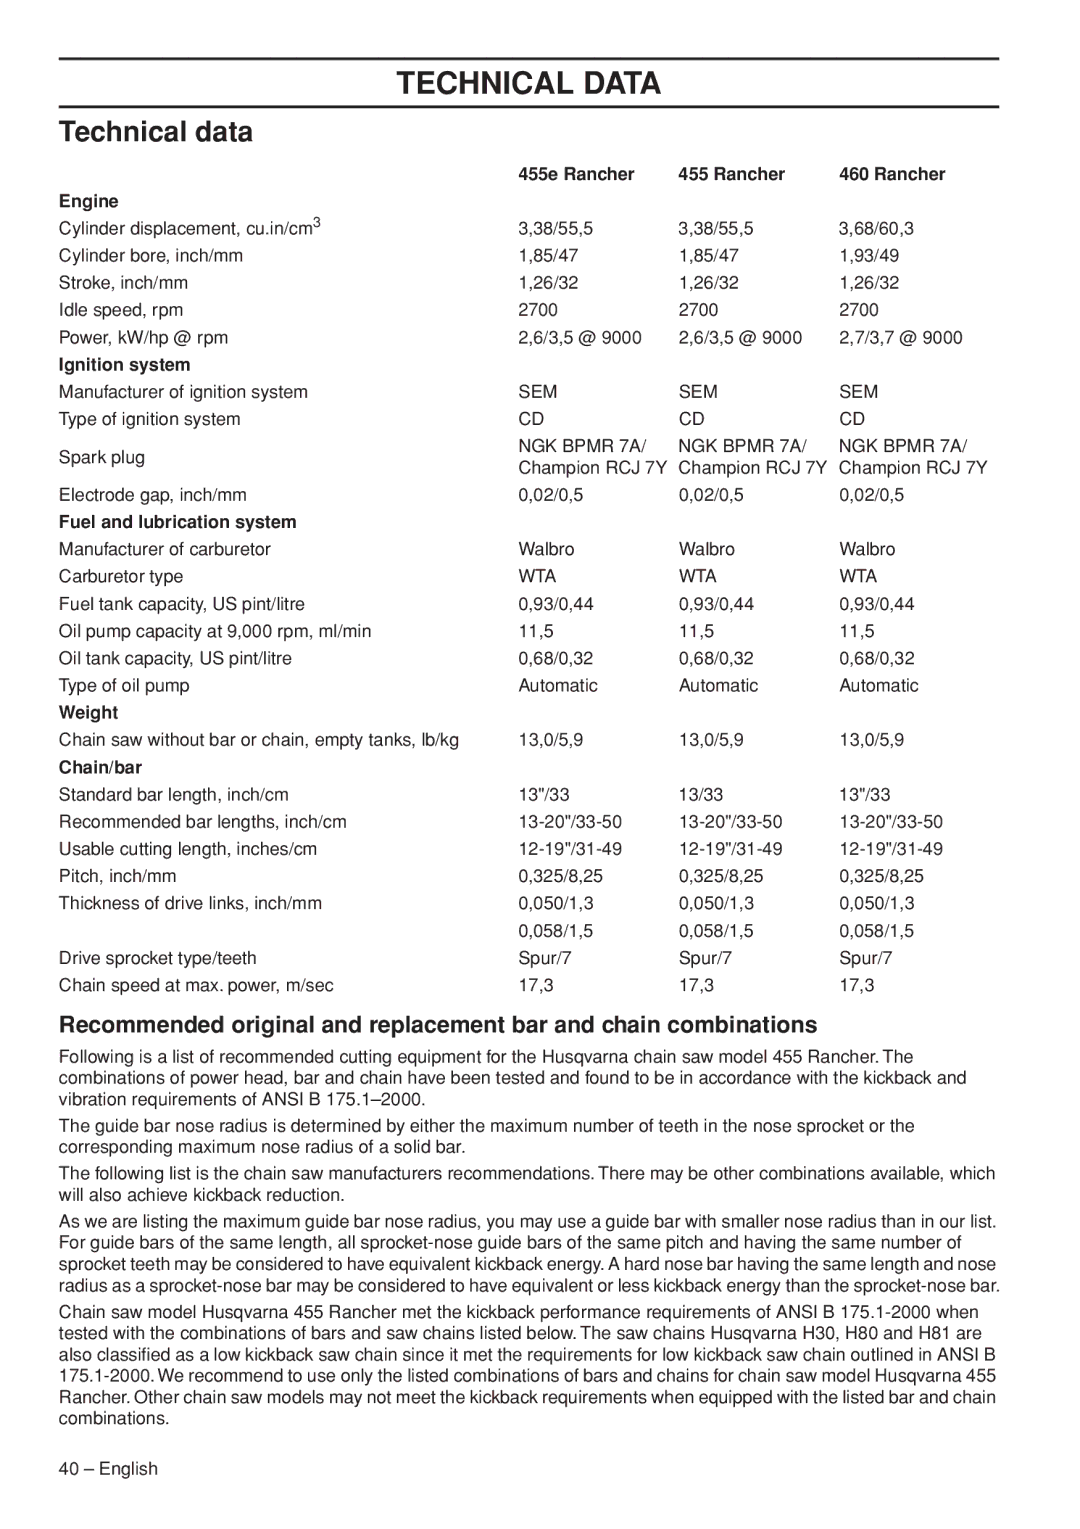
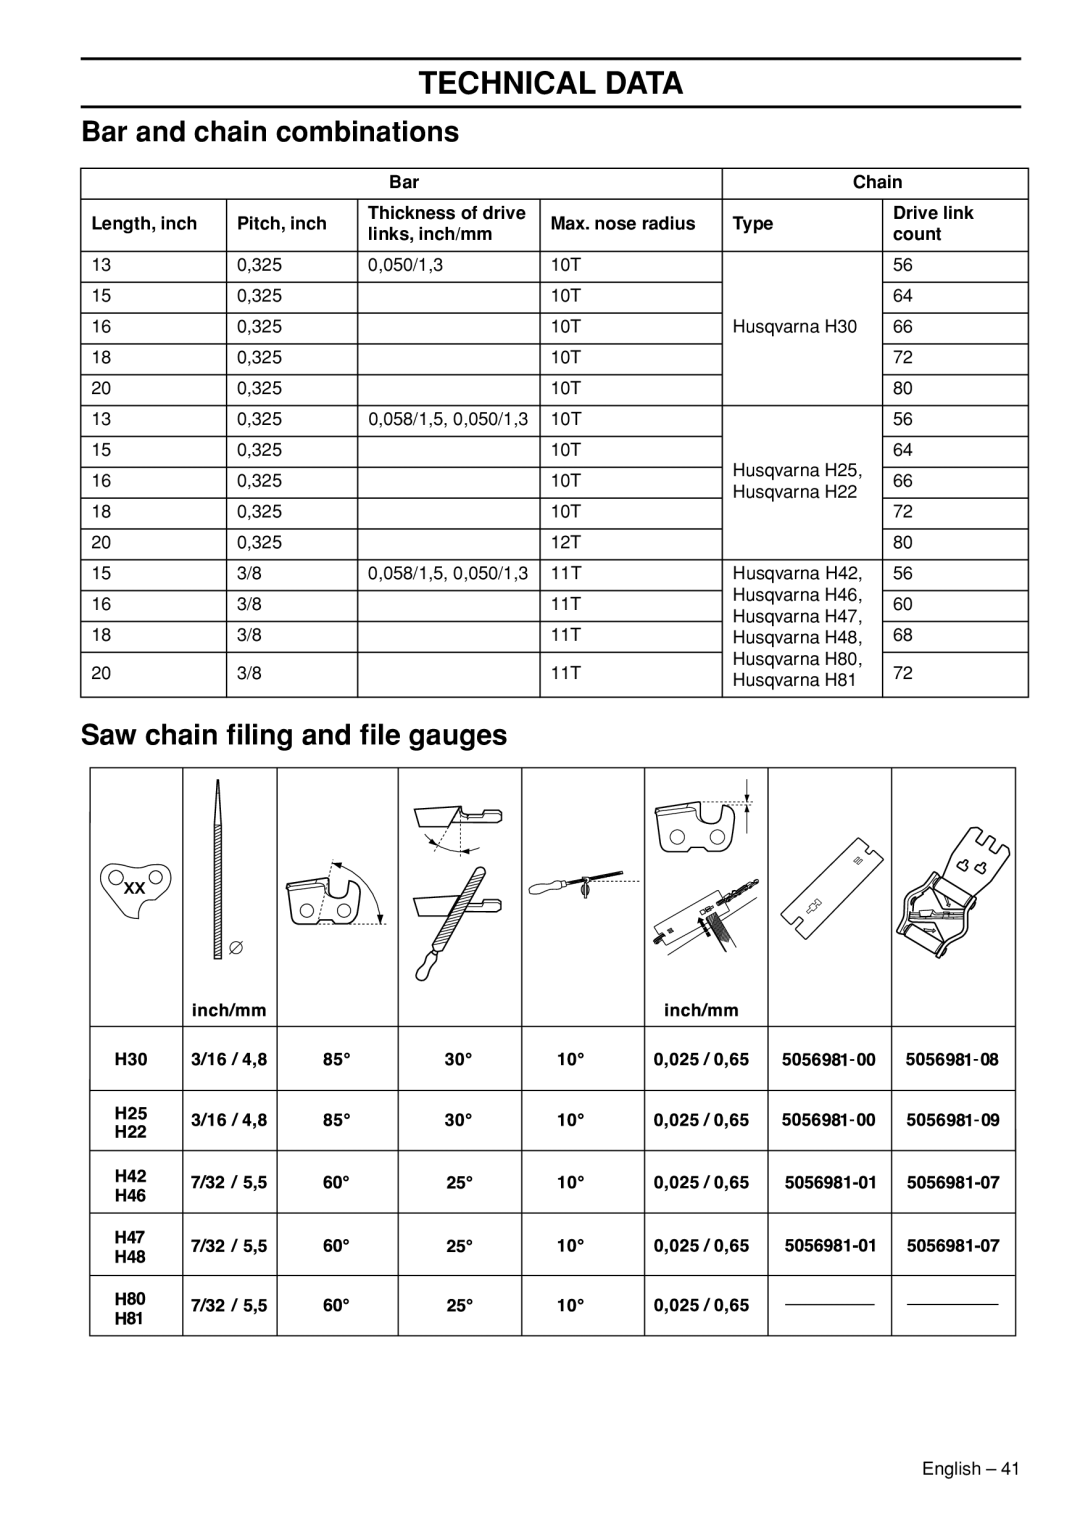
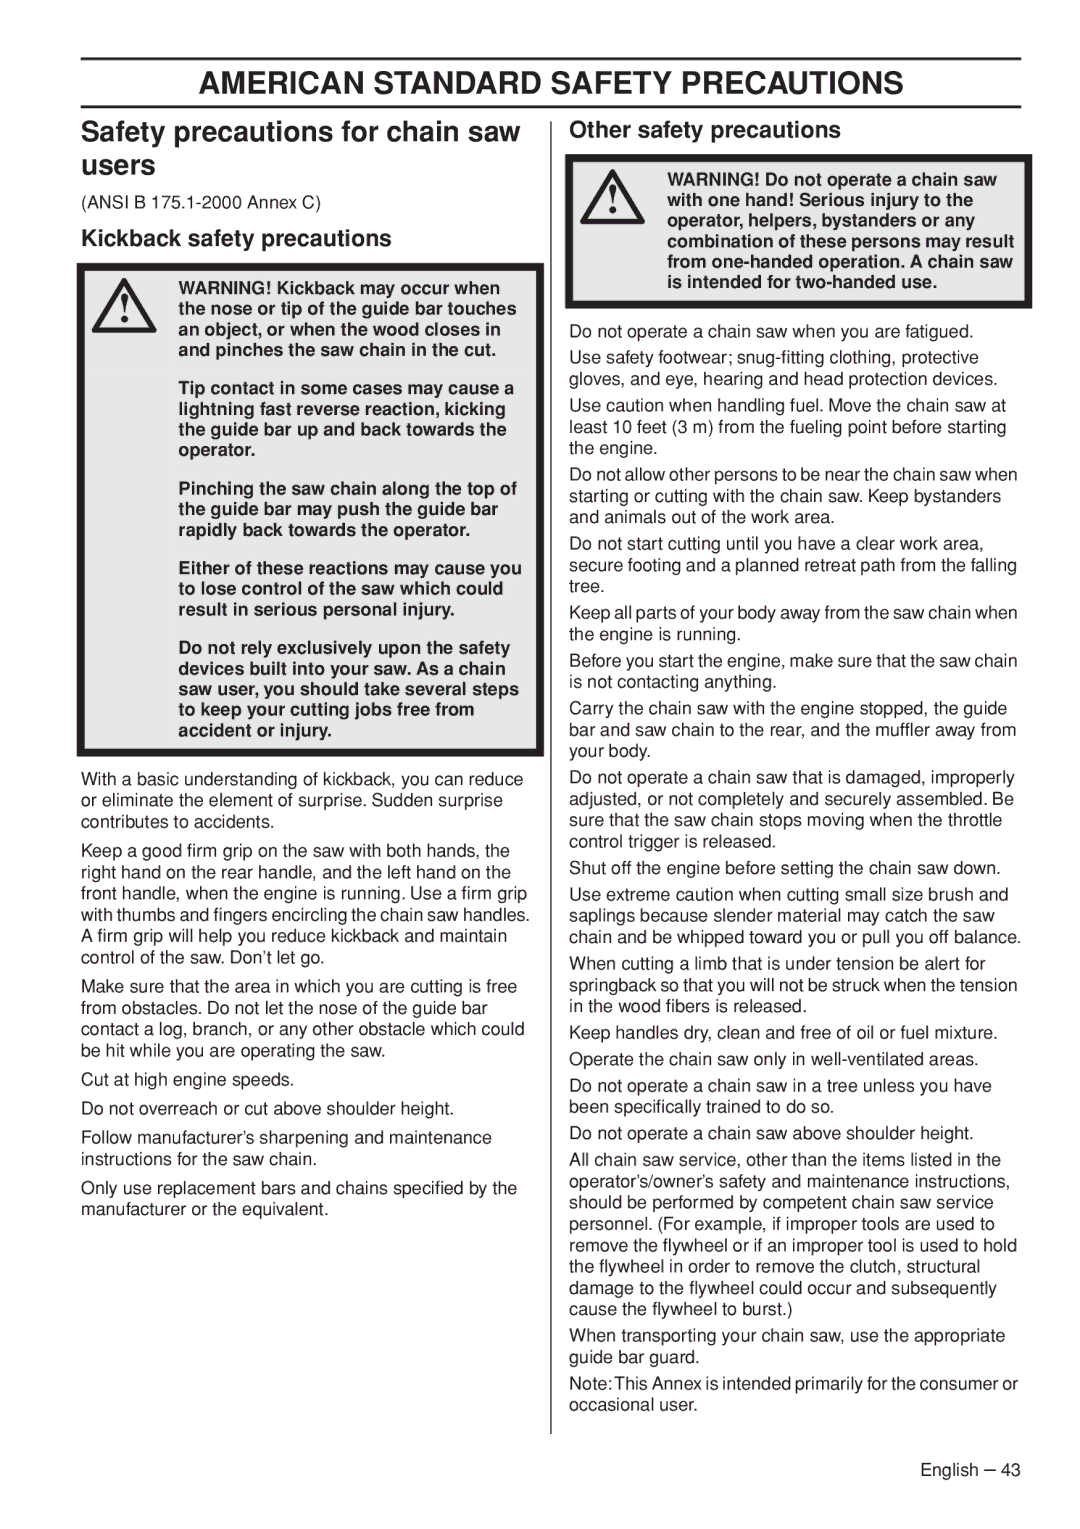
Contents 455e Rancher Rancher 460 Rancher Symbols in the operator’s manual KEY to SymbolsSymbols on the machine EPA Contents Dear customer IntroductionWhat is what on the chain saw? What is WHAT?Before using a new chain saw General Safety PrecautionsAlways use common sense Machine′s safety equipmentPersonal protective equipment Chain brake and front hand guardGeneral Safety Precautions Right hand guard Throttle lockoutChain catcher Cutting equipment Stop switchVibration damping system MufflerChain Cutting equipment designed to reduce kickbackBar General information on sharpening cutting teeth Sharpening your chain and adjusting depth gauge settingTensioning the chain 455e Rancher Lubricating cutting equipmentFilling with chain oil Checking chain lubricationChecking wear on cutting equipment Chain drive sprocketNeedle bearing lubrication Bar Fitting the bar and chain AssemblyRancher, 460 Rancher 455e RancherAssembly Fuel Fuel HandlingFueling Fuel safetyTransport and storage Long-term storageStarting and stopping Starting and StoppingCold engine Warm engineStopping Working Techniques Basic safety rulesBefore use General working instructionsGeneral rules Terms Basic cutting techniqueLimbing Safe distance Tree felling techniqueFelling direction Clearing the trunk and preparing your retreatFelling cut Directional cutsFreeing a tree that has fallen badly General adviceFreeing a trapped tree Cutting trees and branches that are in tensionCutting the trunk into logs How to avoid kickbackWhat is kickback? General MaintenanceCarburetor adjustment Checking brake band wear Correctly adjusted carburetorChecking the front hand guard Checking the inertia brake releaseThrottle lockout Changing a broken or worn starter cord MufflerStarter Tensioning the recoil spring Air filterChanging a broken recoil spring Fitting the starterSpark plug Adjustment of the oil pumpLubricating the bar tip sprocket Needle bearing lubricationTemperature 0C 32F or colder Air Injection centrifugal cleaningTemperature -5C 23F or colder Winter useDaily maintenance Weekly maintenance Monthly maintenance Maintenance scheduleTechnical data Technical DataSaw chain filing and file gauges Bar and chain combinationsConsequential Damages Husqvarna Forest Federal Emission Control Warranty StatementRepair or Replacement of Parts Repair or Safety precautions for chain saw users American Standard Safety PrecautionsKickback safety precautions Other safety precautions1150902-95