Ryobi 766r Replacing the Spark Plug, ACCESSORIES/REPLACEMENT Parts, 110-120 in.lb .3-13.5 Nm, 020

Page 20

MAINTENANCE AND REPAIR INSTRUCTIONS

REPLACING THE SPARK PLUG

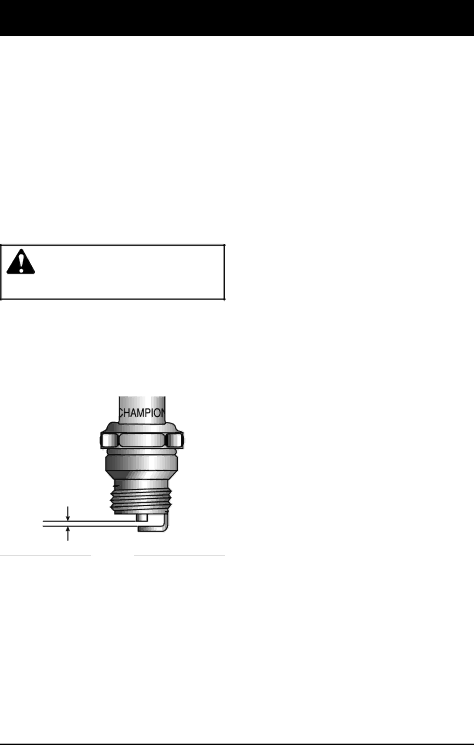
Use a Champion RDJ7Y spark plug

(or equivalent). The correct air gap is 0.020 in. (0.5 mm.). Remove the plug after every 50 hours of operation and check its condition.

1.Stop the engine and allow it to cool. Grasp the plug wire firmly and pull it from the spark plug.

2.Clean dirt from around the spark plug. Remove the spark plug from the cylinder head by turning a 5/8 in. socket counterclockwise.

3.Replace cracked, fouled or dirty spark plug. Set the air gap at 0.020 in. (0.5 mm.) using a feeler gauge (Fig. 27).

CAUTION: Do not sand blast, scrape, or clean electrodes. Grit in the engine could damage the cylinder.

4.Install a correctly gaped spark plug in the cylinder head. Tighten by turning the 5/8 in. socket clockwise until snug.

If using a torque wrench torque to;

110-120 in.•lb. (12.3-13.5 N•m).

Do not over tighten.

ACCESSORIES/REPLACEMENT PARTS

2-Cycle Oil . . . . . . . . . . . . . . . . . . . . . . . . 147543

Spark Plug . . . . . . . . . . . . . . . . . . . . . . . . 610311

Replacement Line . . . . . . . . . . . . . . . . . . 610375

Replacement Line Cartridge . . . . . . . . . . . 153577

Inner Reel Spring . . . . . . . . . . . . . . . . . . . 610317

Bump Head Knob Assembly . . . . . . . . . . . 153066

Head Assembly . . . . . . . . . . . . . . . . . . . . 180897

Fuel Cap. . . . . . . . . . . . . . . . . . . . . . . . . . 180000

Shoulder Strap . . . . . . . . . . . . . . . . . . . . . 682075

0.020 in.

(0.5 mm.)

Fig. 27

20

Image 20
Contents OPERATOR’S Manual Table of Contents IntroductionCalifornia Emission Regulations Spark ArrestorSafety Warnings for GAS Trimmers Symbol MeaningRules for Safe Operation Before OperatingWhile Operating Other Safety Warnings HOT Surface Warning Sharp Blade Do not USE Blades Indicates OILChoke Control Full Choke position Partial Choke positionKnow Your Unit Application Grip Wing Nut Bolt Washer Assembly InstructionsInstalling and Adjusting the D-HANDLE Installing the Cutting Attachment Shield ShieldShield Mount Cutting Attachment ScrewsUsing Blended Fuels Using Fuel AdditivesOIL and Fuel Information OIL and Fuel Mixing InstructionsStopping Instructions STARTING/STOPPING InstructionsStarting Instructions Holding the Trimmer Adjusting Trimming Line Length Operating InstructionsMaintenance and Repair Instructions Maintenance ScheduleFrequency Maintenance Required Refer to Tips for Best Trimming ResultsLine Installation Winding the Existing Inner ReelOuter Spool Inner Reel Shaft Spring Bump KnobHolding Slots Installing a Prewound Reel AIR Filter MaintenanceRemoving the Air Filter/Muffler Cover Choke Lever Partial Choke Position B ScrewsAir Filter Cleaning the Air FilterReinstalling the Air Filter/Muffler Cover Carburetor Adjustment Clean Air FilterAdjust Idle Speed Screw Check Fuel MixtureACCESSORIES/REPLACEMENT Parts Replacing the Spark Plug110-120 in.lb .3-13.5 Nm 020Cleaning and Storage CleaningStorage Long Term StorageTroubleshooting Problem Cause ActionDrive Shaft & String Head SpecificationsEngine Page Owners Warranty Responsibilities Limited TWO-YEAR Warranty Ryobi Outdoor ProductsRyobi Canada INC Save These Instructions for Future Reference