


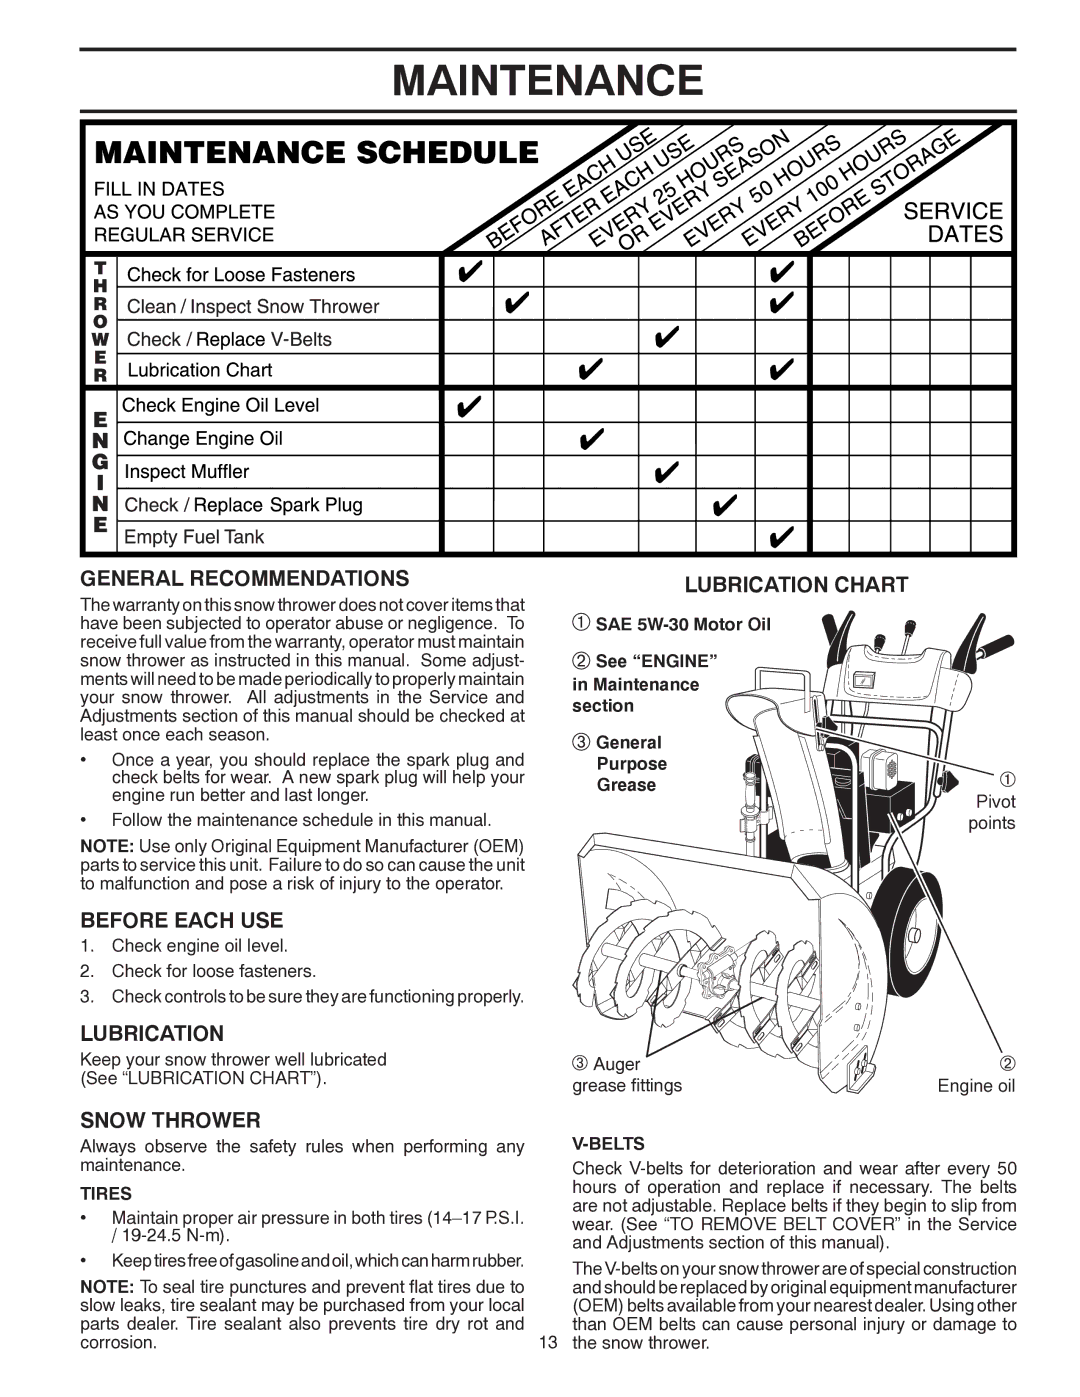
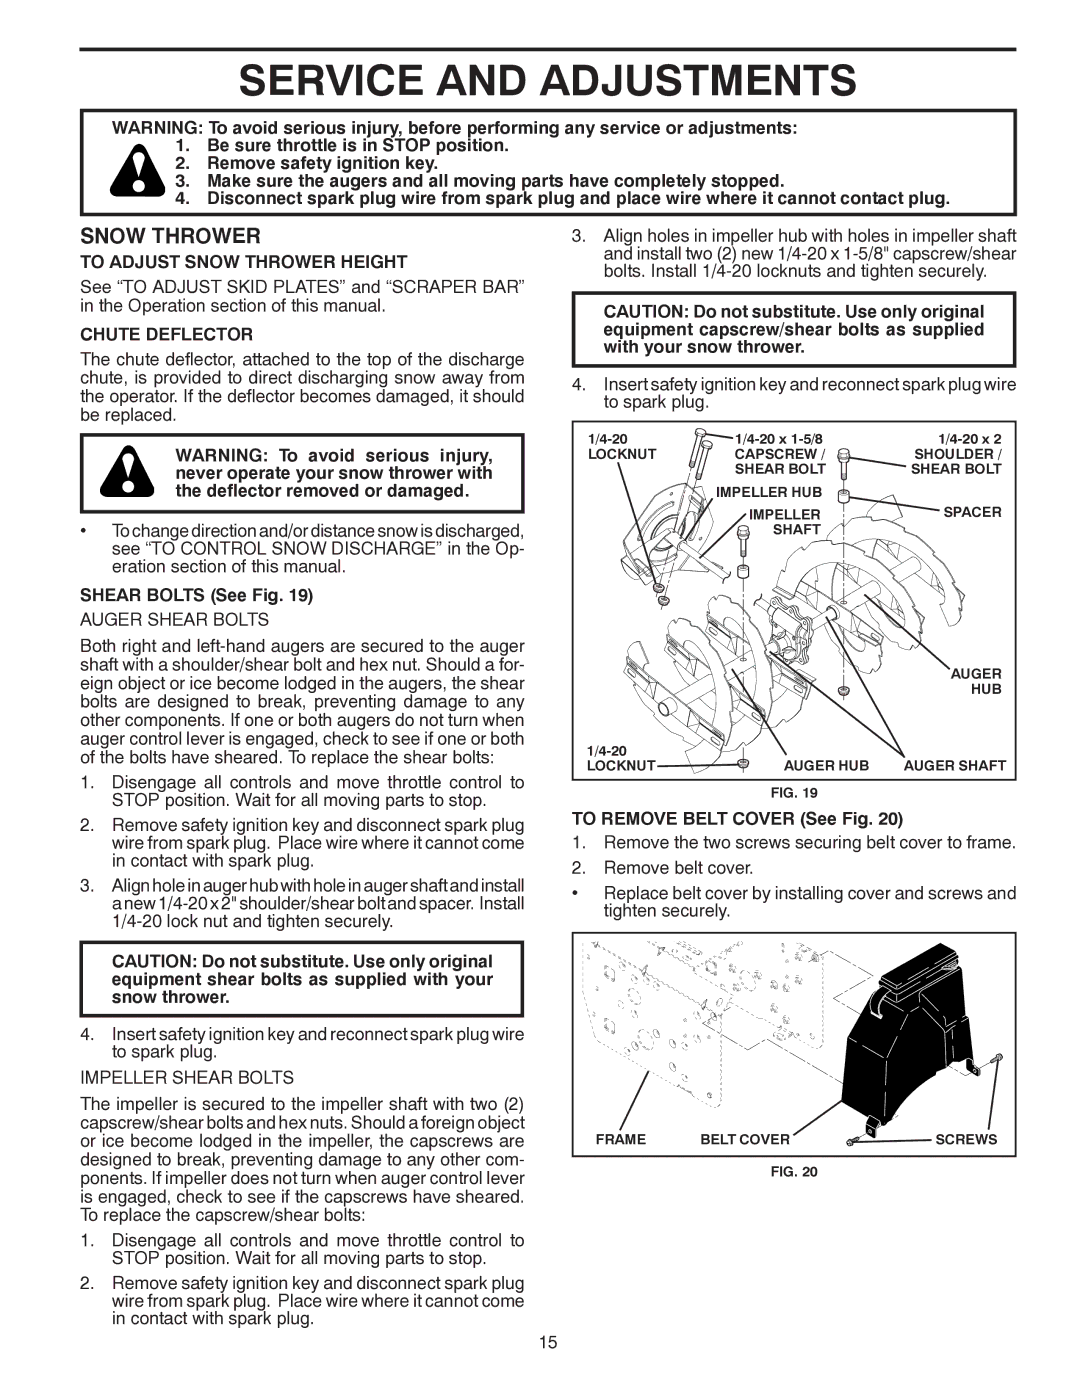


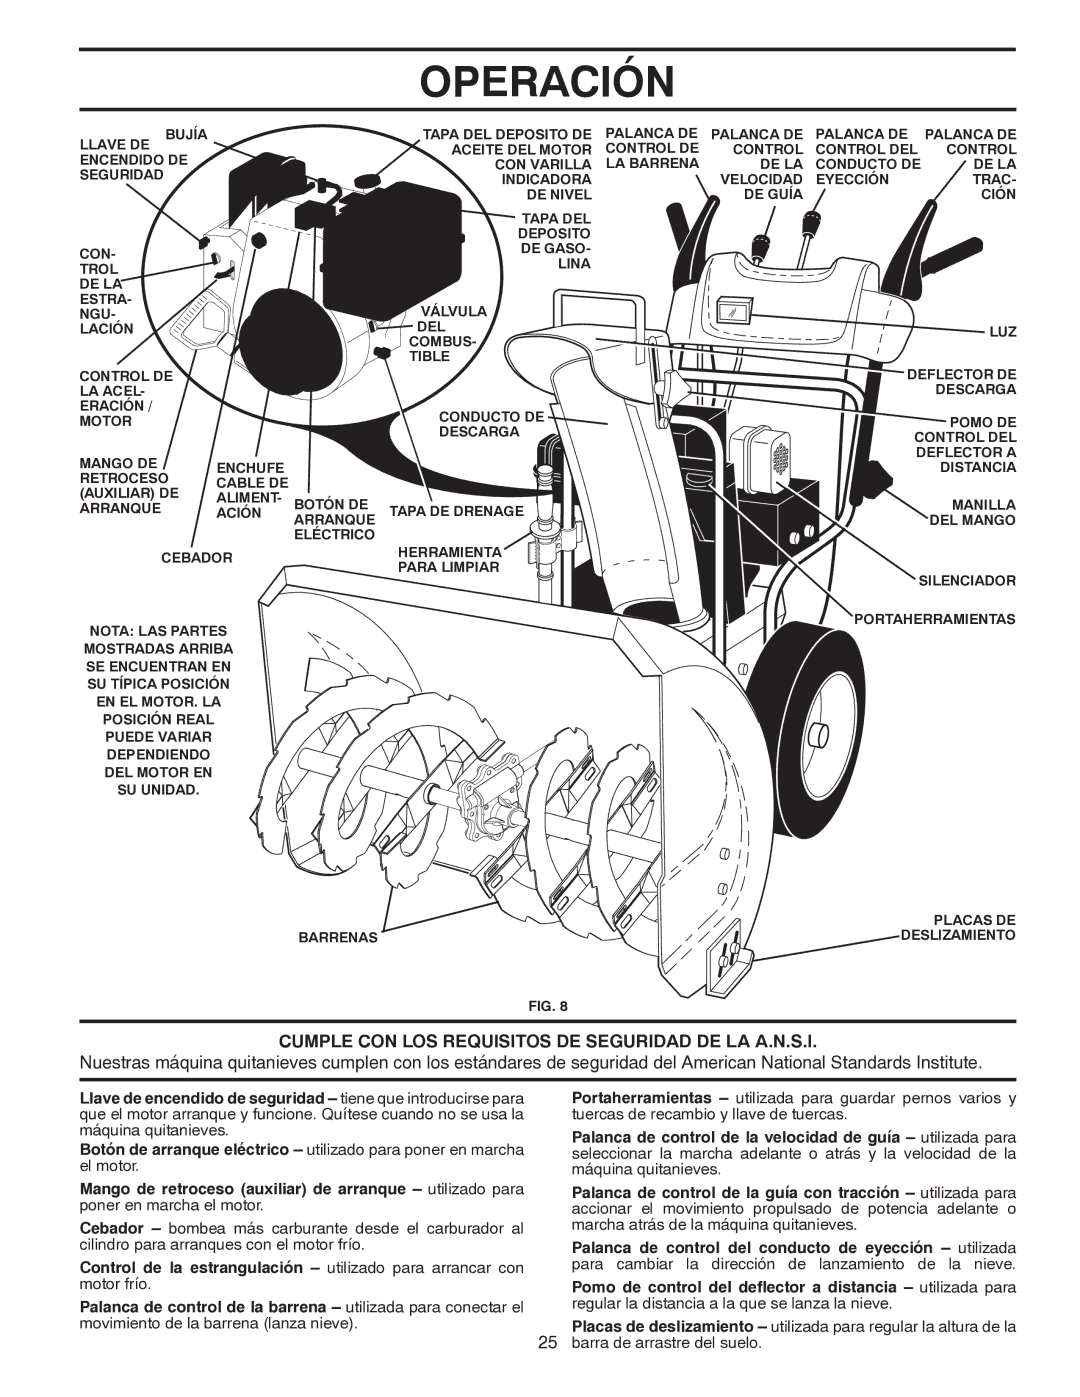


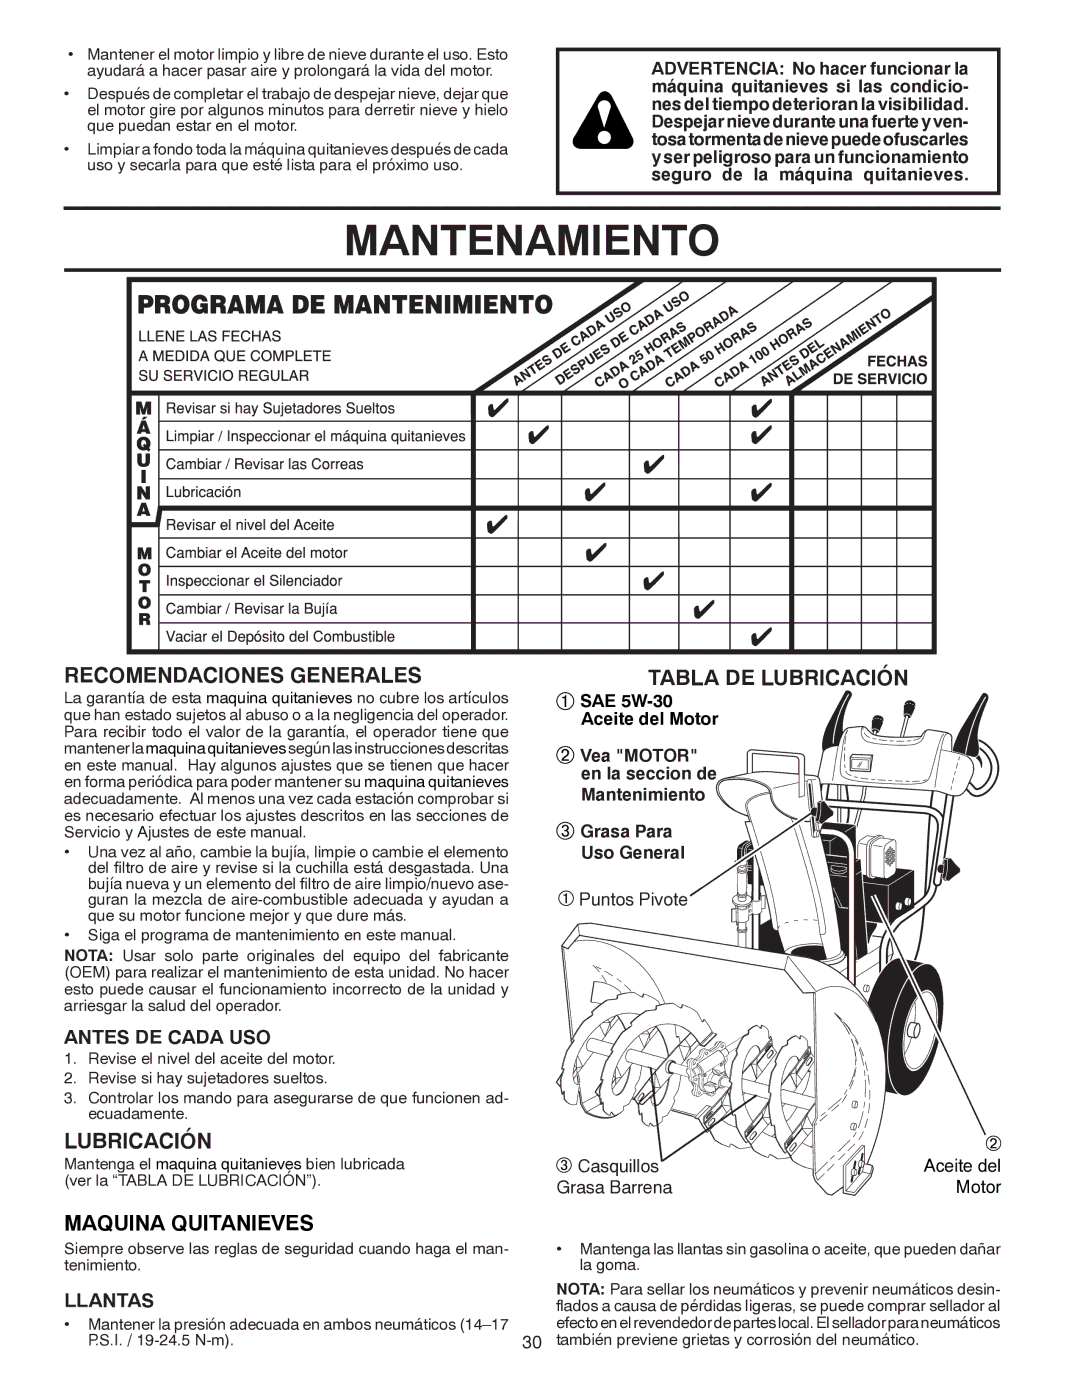
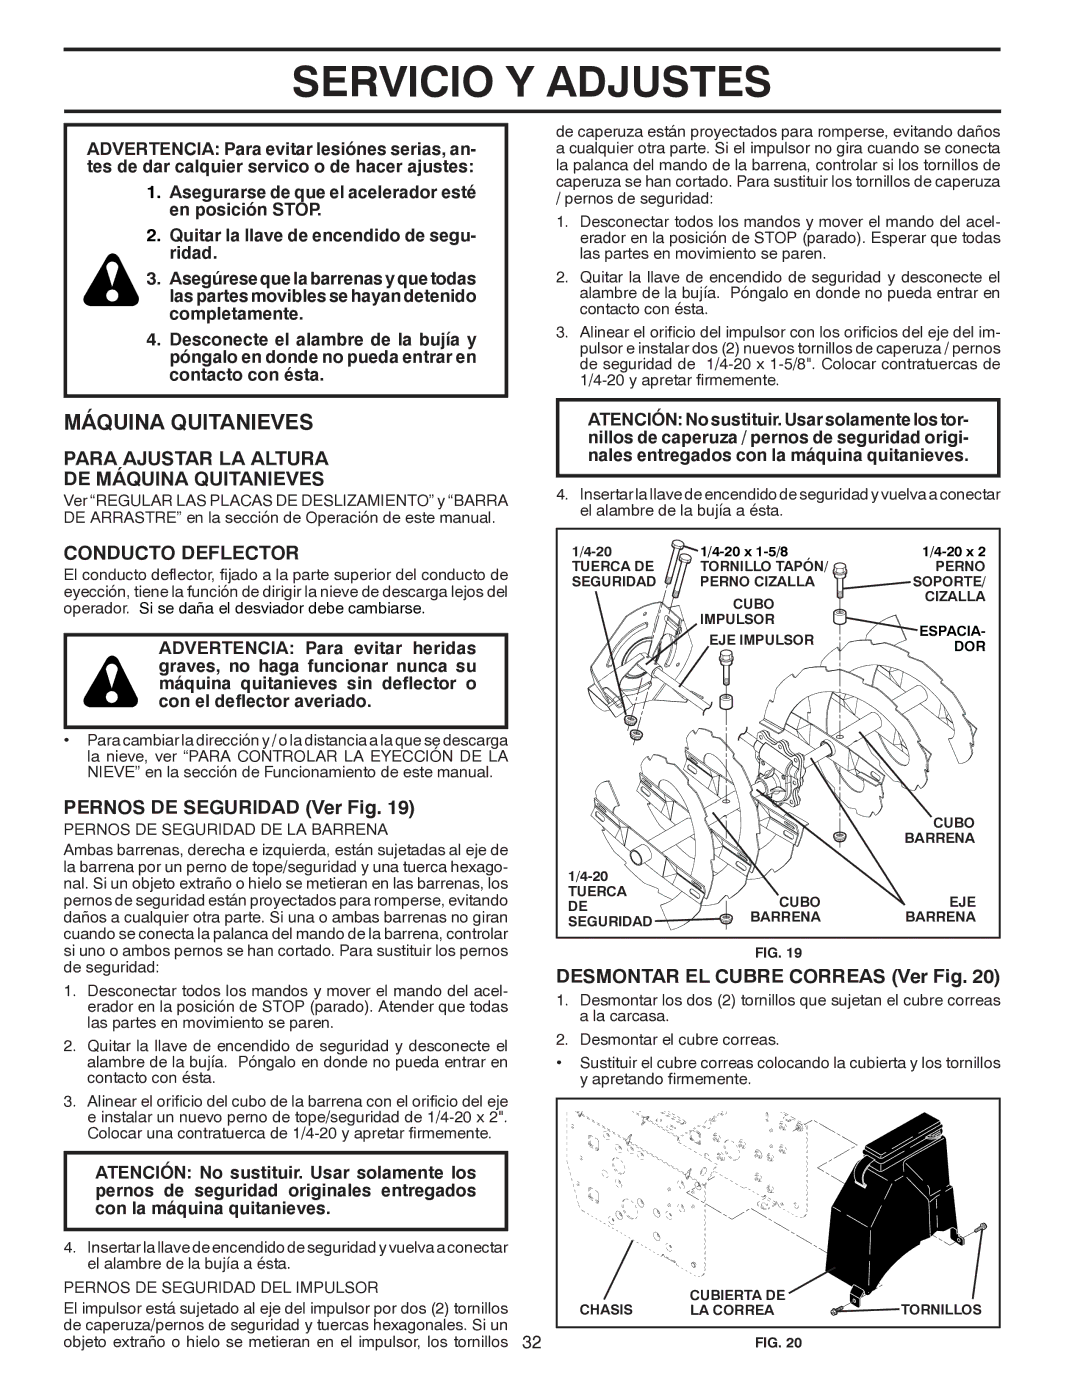


MAINTENANCE
AUGER GEAR CASE
•The gear case was filled with lubricant to the proper level at the factory. The only time the lubricant needs attention is if service has been performed on the gear case.
•If lubricant is required, use only Ronex ED #1 grease.
TRACTION DRIVE SYSTEM
DO NOT lubricate the drive components inside the snow thrower. The sprockets, hex shafts, drive disc and friction wheel require no lubrication. The bearings and bushings are lifetime lubricated and require no maintenance.
CAUTION: Any lubricating of the above compo- nents can cause contamination of the friction wheel and damage to the drive system of your snow thrower.
ENGINE
See engine manual.
LUBRICATION
Use only high quality detergent oil rated with API service classification
NOTE: Although
Changetheoilafterevery25hoursofoperationoratleastonce a year if the snow thrower is not used for 25 hours in one year.
Check the crankcase oil level before starting the engine and after each five (5) hours of continuous use. Tighten oil fill cap / dipstick securely each time you check the oil level.
TO CHANGE ENGINE OIL
Determine temperature range anticipated before next oil change. All oil must meet API service classification
•Be sure snow thrower is on level surface.
•Oil will drain more freely when warm.
•Catch oil in a suitable container.
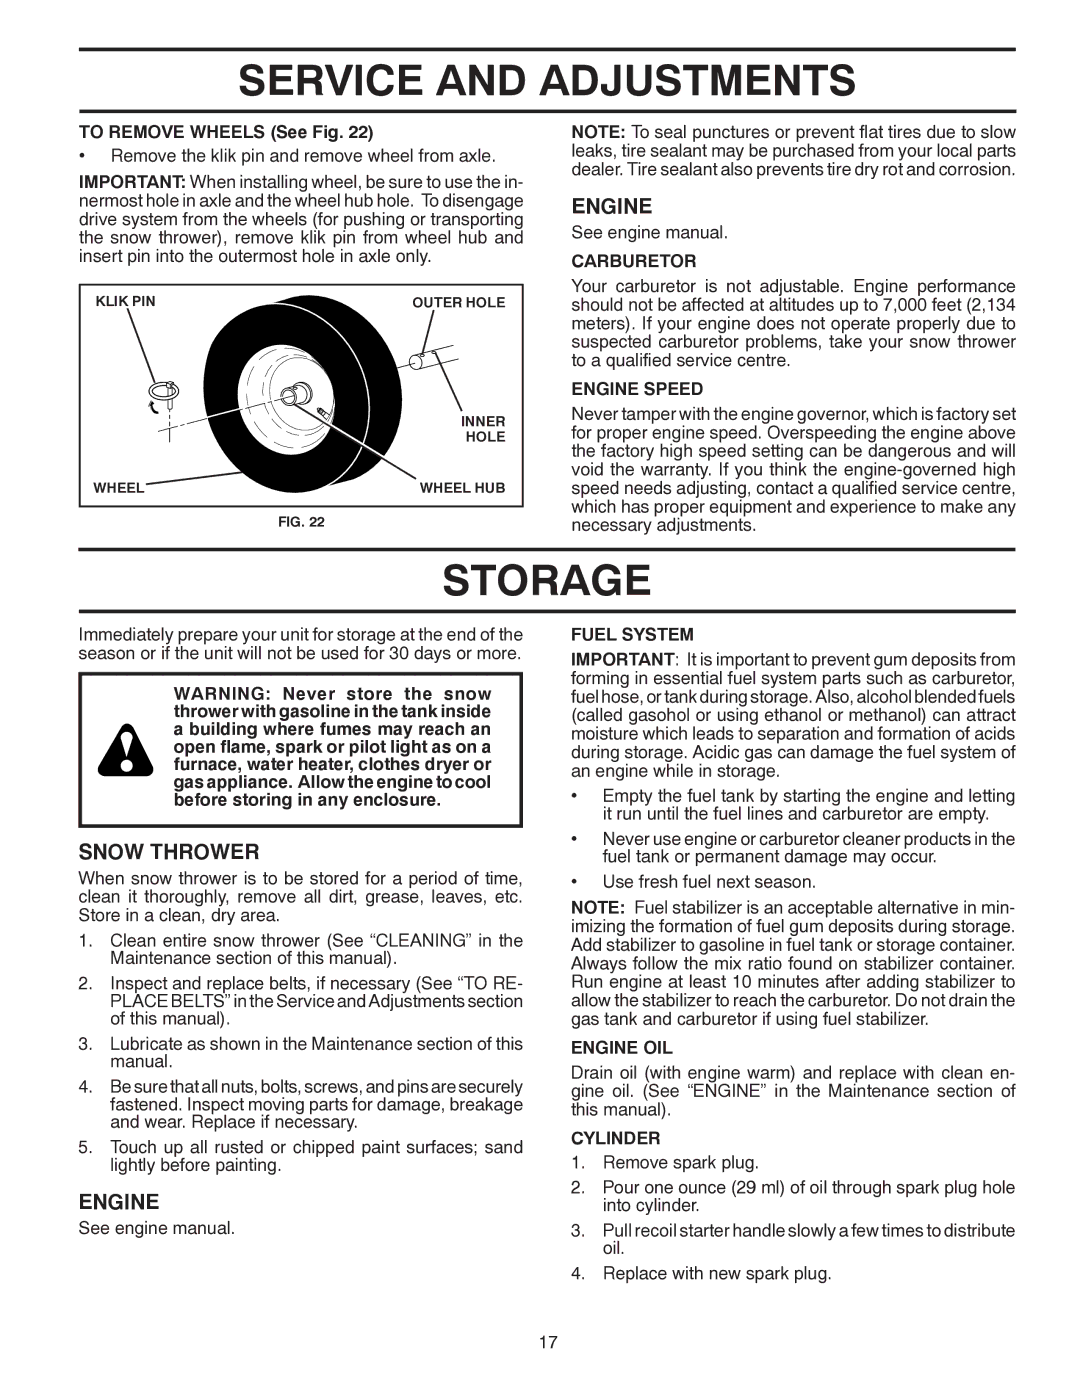
NOTE: The left side wheel may be removed from snow thrower for easier access to the oil drain plug and place- ment of a suitable container. The unit tilted, resting on the frame with the left wheel removed, will help drain any oil trapped inside the engine. (See “TO REMOVE WHEELS” in the Service and Adjustments section of this manual).
1.Remove safety ignition key and disconnect spark plug wire from spark plug. Place wire where it cannot come in contact with spark plug.
2.Clean area around drain plug.
3.Remove drain plug and drain oil in a suitable container.
4.Install drain plug and tighten securely.
5.Wipe off any spilled oil from snow thrower and engine.
6.Install left wheel (if removed for draining oil). Be sure to install klick pin into proper hole in wheel axle (See “TO REMOVE WHEELS” in the Service and Adjustments section of this manual).
7.Remove oil fill cap/dipstick. Be careful not to allow dirt to enter the engine.
8.Refill engine with oil through oil dipstick tube. Pour slowly. Do not overfill. For approximate capacity see “PRODUCT SPECIFICATIONS” section of this manual.
9.Use gauge on oil fill cap/dipstick for checking level. Be sure dipstick cap is tightened securely for accurate reading. Keep oil at “FULL” line on dipstick.
10.Wipe off any spilled oil.
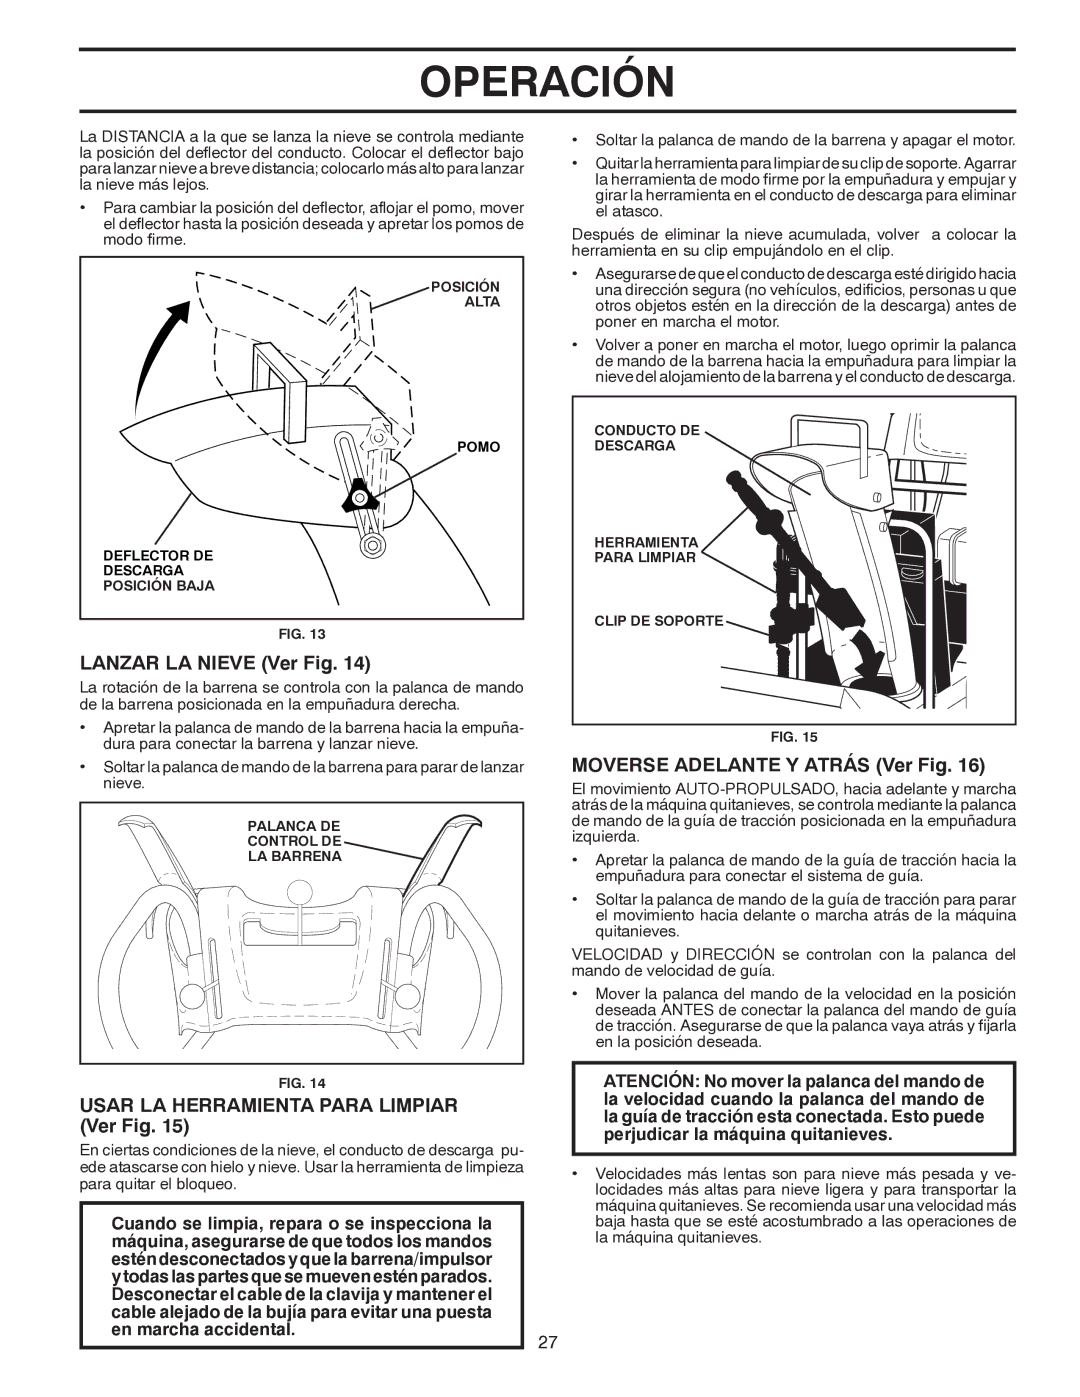
MUFFLER
Inspect and replace corroded muffler as it could create a fire hazard and/or damage.
SPARK PLUG
Replace spark plug at the beginning of each season or after every 100 hours of operation, whichever occurs first. Spark plug type and gap setting are shown in the “PRODUCT SPECIFICATIONS” section of this manual.
CLEANING
IMPORTANT: For best performance, keep snow thrower housing free of any dirt or trash. Clean the outside of your snow thrower after each use.
WARNING: Remove safety ignition key and disconnect spark plug wire from spark plug. Place wire where it cannot come in contact with spark plug.
•Keep finished surfaces/wheels free of gasoline, oil, etc.
•We do not recommend using a garden hose to clean your snow thrower unless the electrical system, muffler and carburetor are covered to keep water out. Water in engine can result in shortened engine life.
14