Instant EtherFast® Series
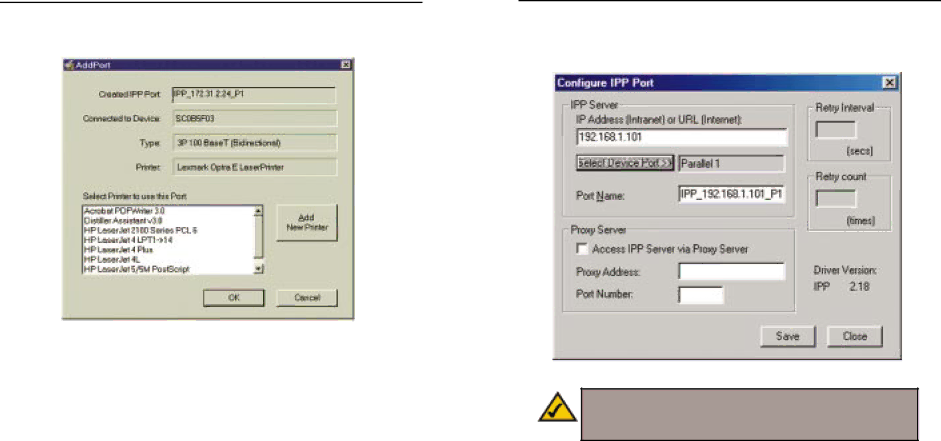
5.Click Save to create the IPP port on your system. You will see a message confirming that the port has been created and then Figure
Figure
6.Perform one of these steps. Select an existing printer to use the new port, and click OK.
OR
Click the Add New Printer button to create a new printer to use the IPP port. This will start the Add Printer Wizard. Follow the prompts to complete the process. Make sure that the new printer uses the IPP port.
Installation is now complete.
·To create additional IPP ports, repeat the entire procedure.
·The Proxy Server and other options are set individually for each IPP Port.
Changing the IPP Port Settings
After the IPP port is created, you can reach the Configure IPP Port screen by performing these steps:
1.Open the Printers folder (Start => Settings => Printers).
2.
EtherFast 10/100 PrintServers
3.Click the Port Settings or Configure Port button (Details or Port tab, depending on your version of Windows). The Configure IPP Port screen (shown in Figure
Figure
Note: Verify that the parallel port appears in the field beside the Select Device Port button. If it does not, click the Select Device Port button, and select the appropriate parallel port.
There are two
·Retry Interval sets the time interval (in seconds) between connection attempts. Increase this number if you have a poor connection, or the remote server is very busy.
·Retry Count sets how many connection attempts will be made. Increase this number if you have a poor connection, or the remote server is very busy.
36 | 37 |