

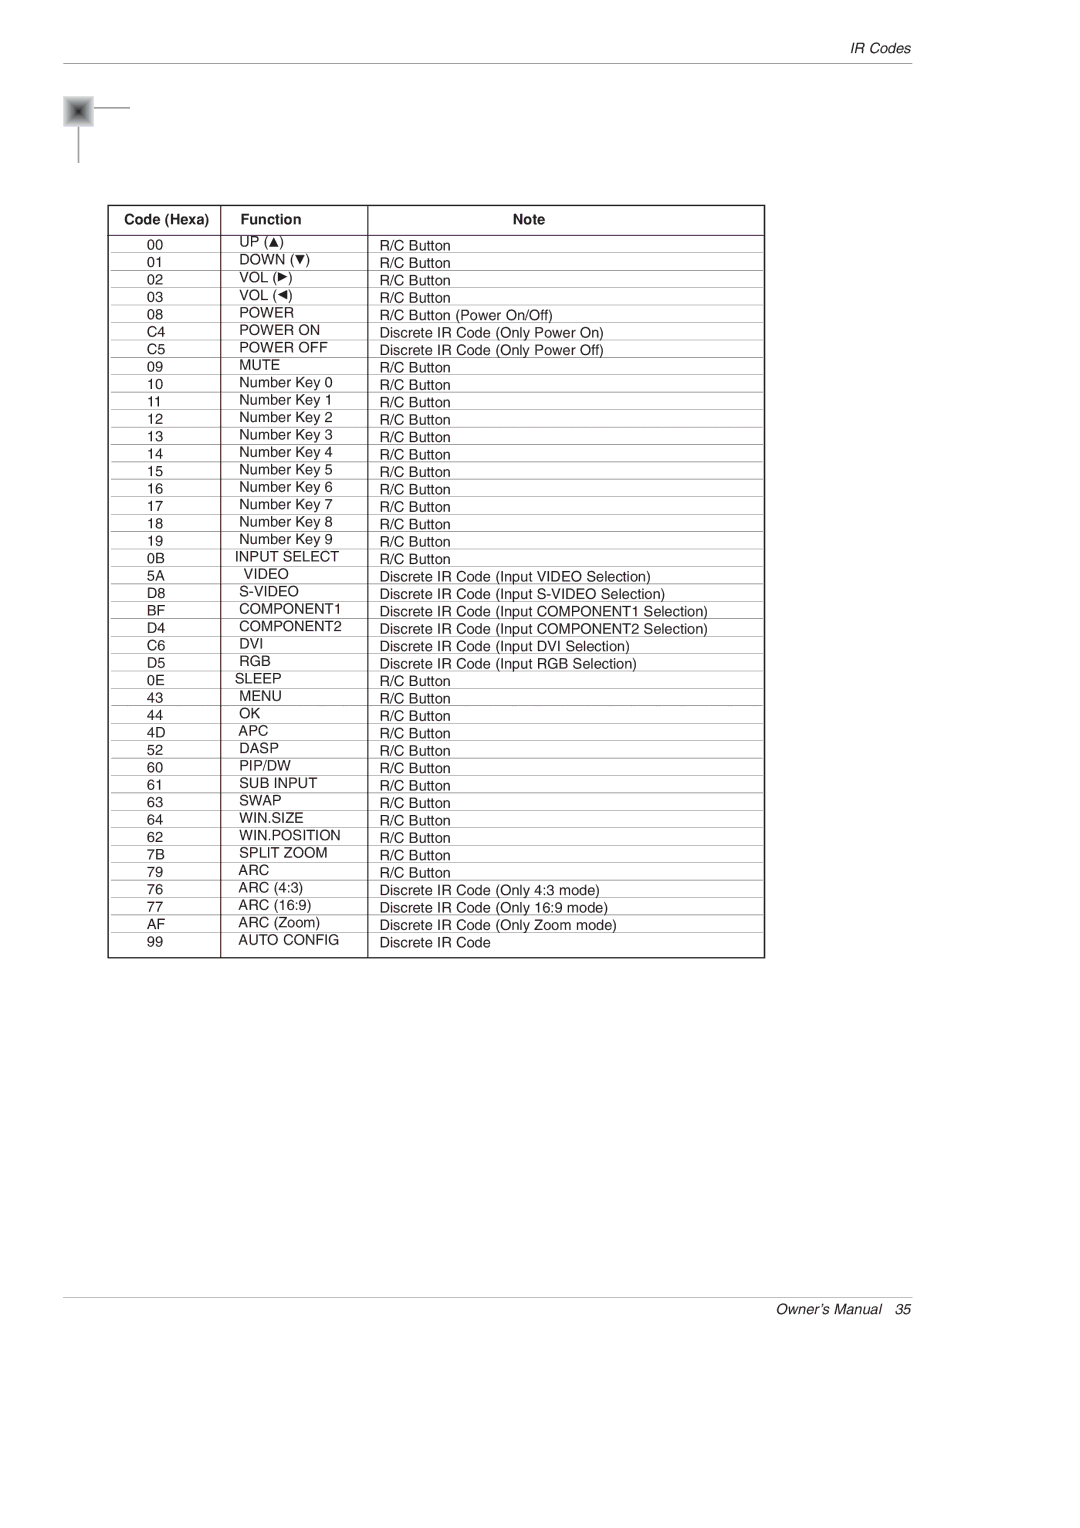
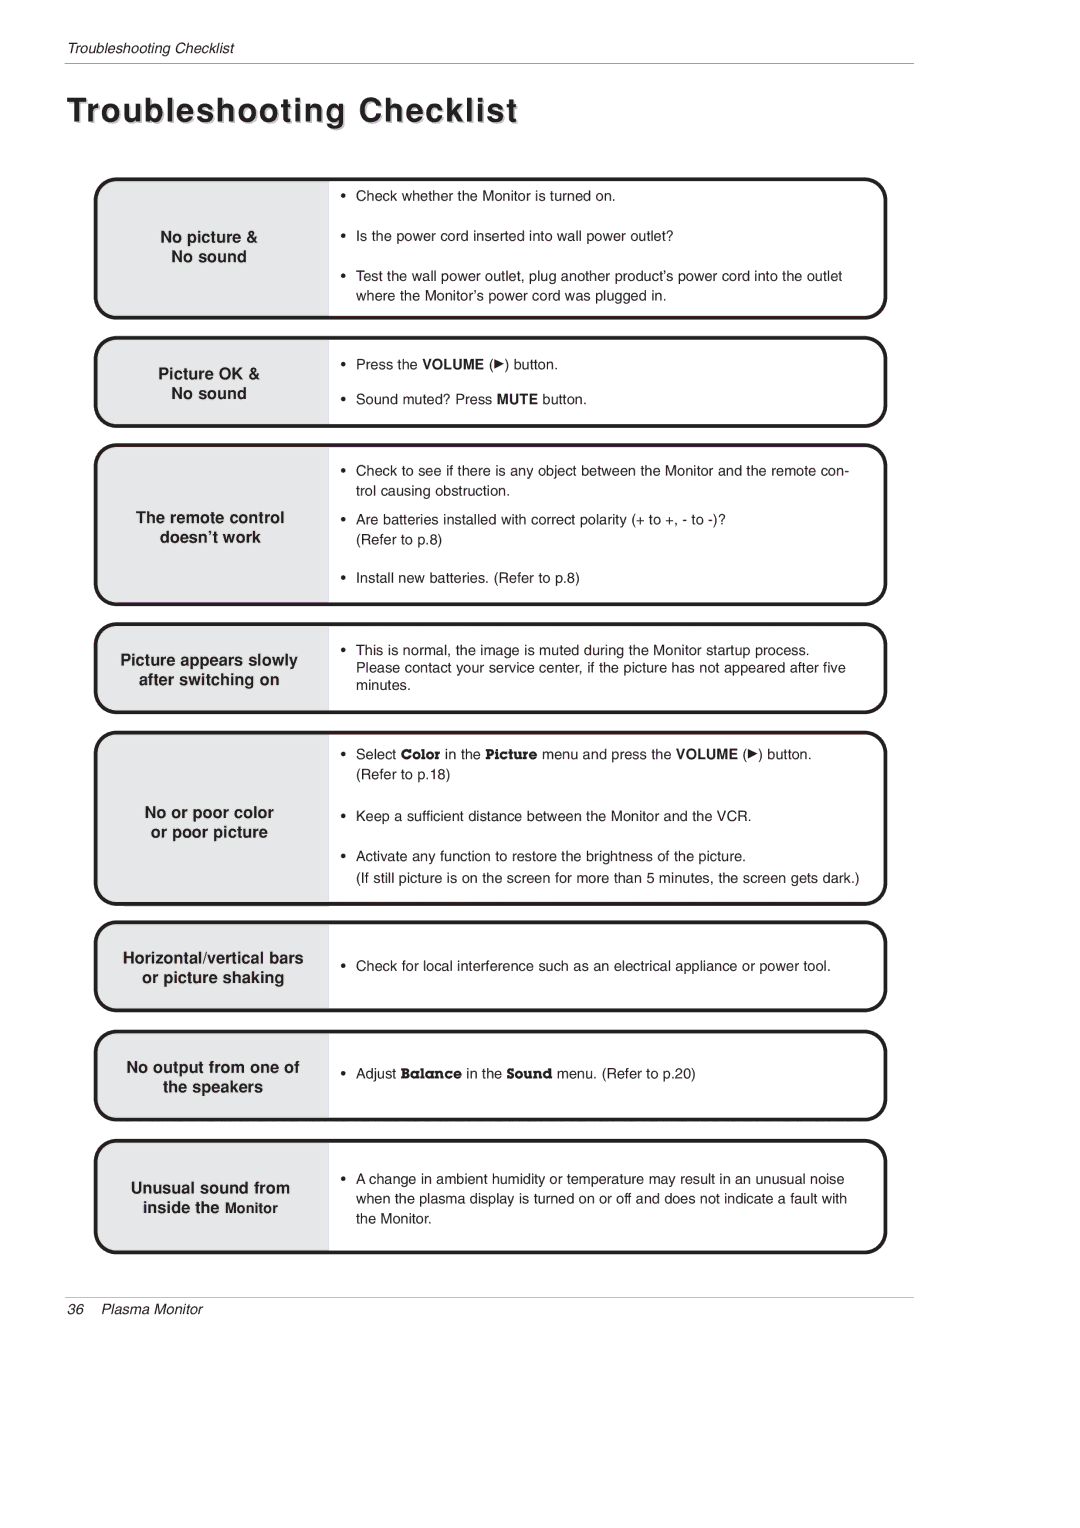
Troubleshooting Checklist
Troubleshooting Checklist
No picture &
No sound
Picture OK &
No sound
The remote control
doesn’t work
Picture appears slowly
after switching on
No or poor color or poor picture
Horizontal/vertical bars
or picture shaking
No output from one of
the speakers
Unusual sound from
inside the Monitor
•Check whether the Monitor is turned on.
•Is the power cord inserted into wall power outlet?
•Test the wall power outlet, plug another product’s power cord into the outlet where the Monitor’s power cord was plugged in.
•Press the VOLUME (G) button.
•Sound muted? Press MUTE button.
•Check to see if there is any object between the Monitor and the remote con- trol causing obstruction.
•Are batteries installed with correct polarity (+ to +, - to
•Install new batteries. (Refer to p.8)
•This is normal, the image is muted during the Monitor startup process. Please contact your service center, if the picture has not appeared after five minutes.
•Select Color in the Picture menu and press the VOLUME (G) button. (Refer to p.18)
•Keep a sufficient distance between the Monitor and the VCR.
•Activate any function to restore the brightness of the picture.
(If still picture is on the screen for more than 5 minutes, the screen gets dark.)
•Check for local interference such as an electrical appliance or power tool.
•Adjust Balance in the Sound menu. (Refer to p.20)
•A change in ambient humidity or temperature may result in an unusual noise when the plasma display is turned on or off and does not indicate a fault with the Monitor.
36 Plasma Monitor