Oregon Scientific BAR332ESA To charge the battery, Tips, Solar panel facing If you reside

Page 7

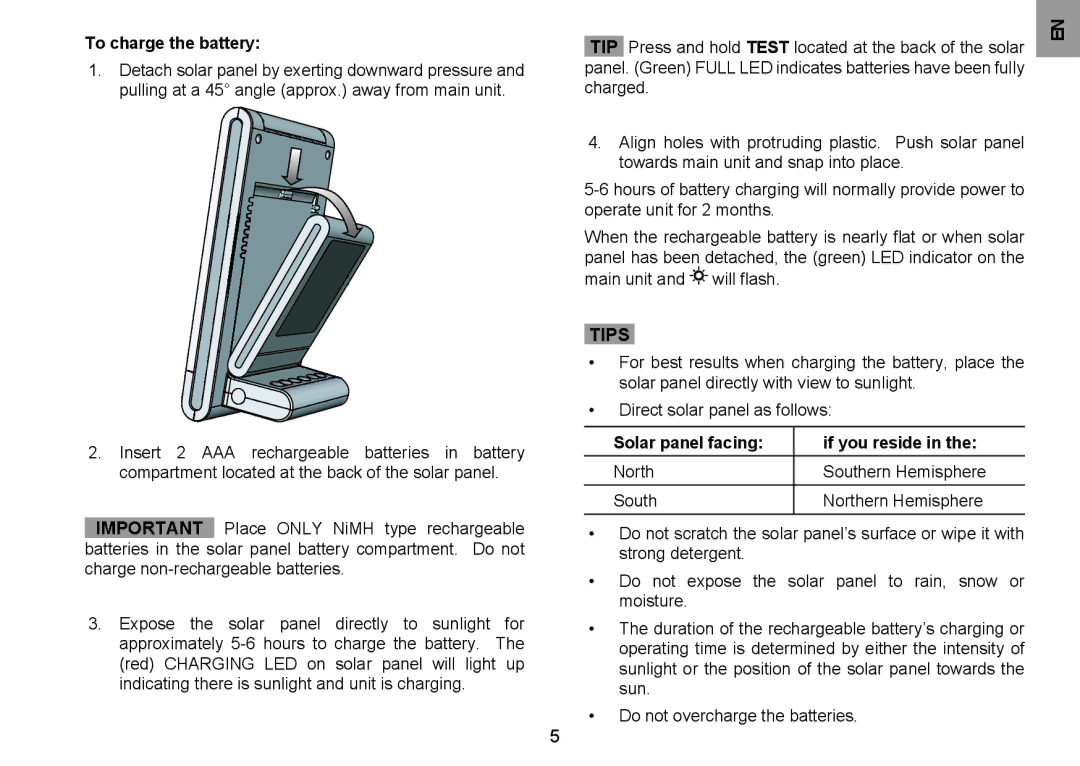
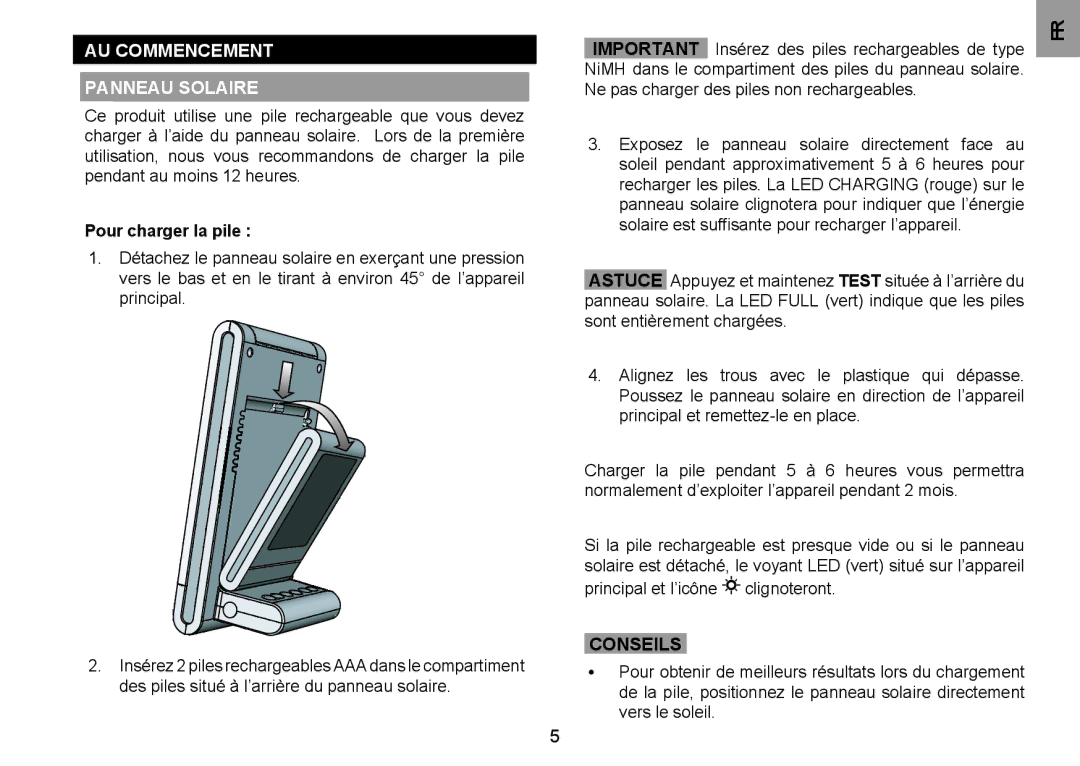
To charge the battery:

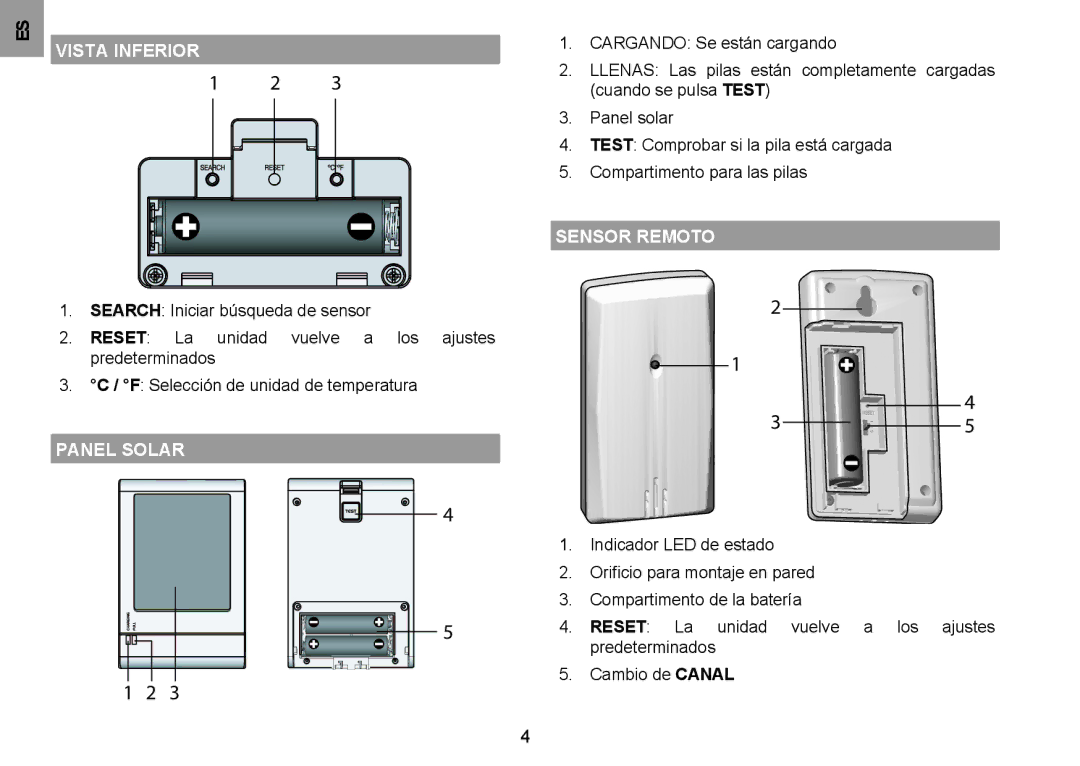
1.Detach solar panel by exerting downward pressure and pulling at a 45° angle (approx.) away from main unit.

2.Insert 2 AAA rechargeable batteries in battery compartment located at the back of the solar panel.

IMPORTANT Place ONLY NiMH type rechargeable batteries in the solar panel battery compartment. Do not charge non-rechargeable batteries.

3.Expose the solar panel directly to sunlight for approximately 5-6 hours to charge the battery. The (red) CHARGING LED on solar panel will light up indicating there is sunlight and unit is charging.

TIP Press and hold TEST located at the back of the solar panel. (Green) FULL LED indicates batteries have been fully charged.

4.Align holes with protruding plastic. Push solar panel towards main unit and snap into place.

5-6 hours of battery charging will normally provide power to operate unit for 2 months.

When the rechargeable battery is nearly flat or when solar panel has been detached, the (green) LED indicator on the

main unit and will flash.

TIPS

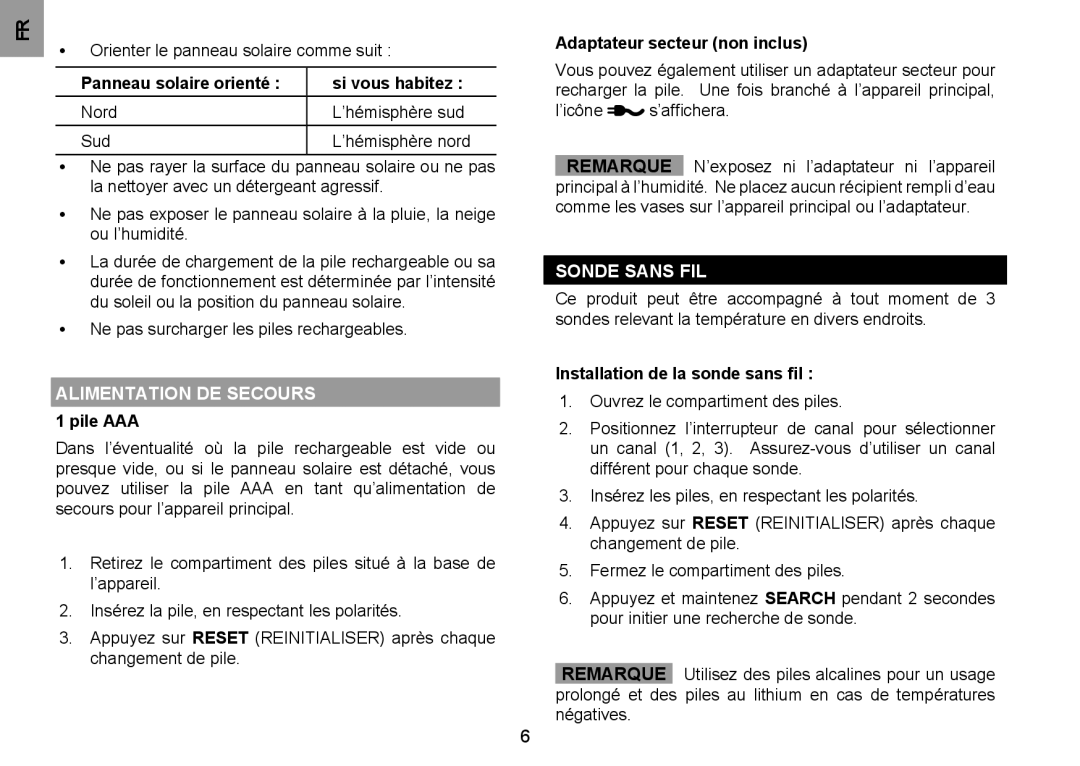
For best results when charging the battery, place the solar panel directly with view to sunlight.

Direct solar panel as follows:

Solar panel facing:

if you reside in the:


North

Southern Hemisphere


South

Northern Hemisphere


Do not scratch the solar panel’s surface or wipe it with strong detergent.

Do not expose the solar panel to rain, snow or moisture.

The duration of the rechargeable battery’s charging or operating time is determined by either the intensity of sunlight or the position of the solar panel towards the sun.

Do not overcharge the batteries.

EN
Image 7
Contents Page Page BAR332ESU ContentsOverview Front View Earth FriendlyBottom View Top ViewGetting Started Channel switchSolar Panel Remote SensorTips To charge the batterySolar panel facing If you reside Remote sensor Backup powerIcons Manually Set Clock To enable / disable clock signal receptionClock signal reception indicator Clock and calendar Clock receptionTemperature AlarmWEATHER fORECAST Backlight ResetSpecifications Main Unit PrecautionsAbout oregon scientific FCC Statement EU-Declaration of ConformityDeclare that the product Declaration of conformityPage Table DES Matières Manuel DE L’UTILISATEURVue d’ensemble Face Avant EcologiqueVUE Supérieure Panneau solaire VUE DU BASSonde Sans FIL Pour charger la pile AU CommencementConseils Adaptateur secteur non inclus Installation de la sonde sans filPanneau solaire orienté Si vous habitez Alimentation DE Secours 1 pile AAAHorloge et calendrier Réception de l’horloge IconesRéGLER Manuellement L’HORLOGE Indicateur de réception du signal de l’horlogeSignal Fort Signal Faible / Aucun Signal Pour sélectionner le mode d’affichage de l’horlogeRéTRO éCLAIRAGE Alarme Régler l’alarmeTempérature PRéVISION MéTéOPrécautions Réinitialisation DU SYSTèMECaractéristiques Appareil principal Sonde sans fil modèle THN132NEurope DéCLARATION DE Conformité Propos D’OREGON ScientificPays Concernés RTT&E Page BAR332ESU Manual DE Usuario Resumen Vista frontal Una línea ecológicaVista superior Panel solar ES vista inferiorSensor Remoto Para cargar la batería Cómo EmpezarConsejos Sensor remoto Alimentación de reservaReloj y calendario Recepción del reloj IconosSeñal Fuerte Señal Débil / SIN Señal AlarmaAjuste manual del reloj Restablecer TemperaturaPredicción Meteorológica Iluminación de la pantallaPrecaución Ficha técnica Unidad principalTipo Descripción Sensor remoto THN132NSobre Oregon Scientific Page Page Oregon Scientific. All rights reserved