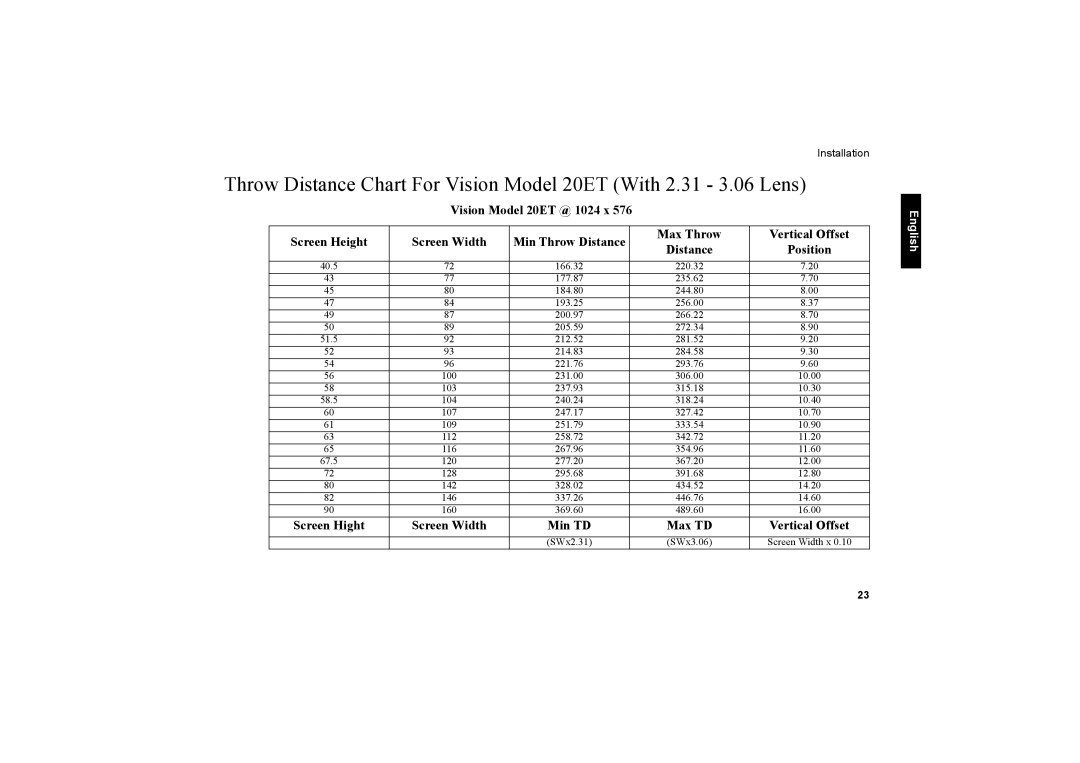
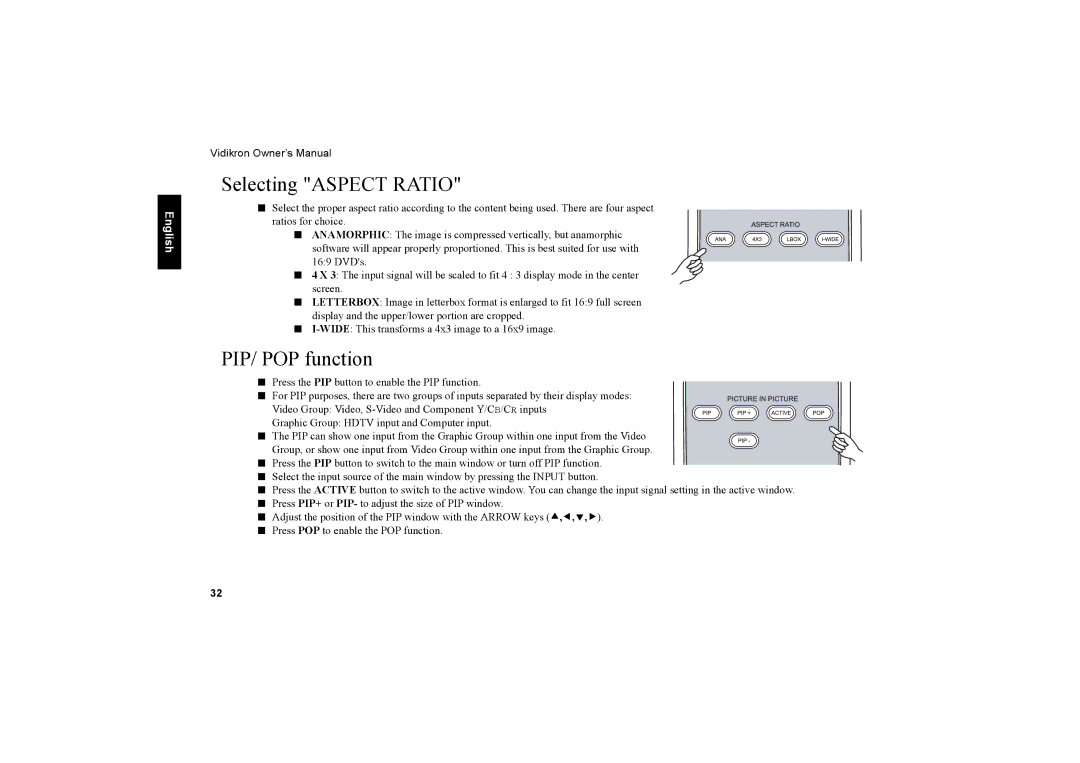
Vidikron Vision 20ET owner manual Arrow c/e/d/f, Zoom Ring, Focus Ring

Page 14

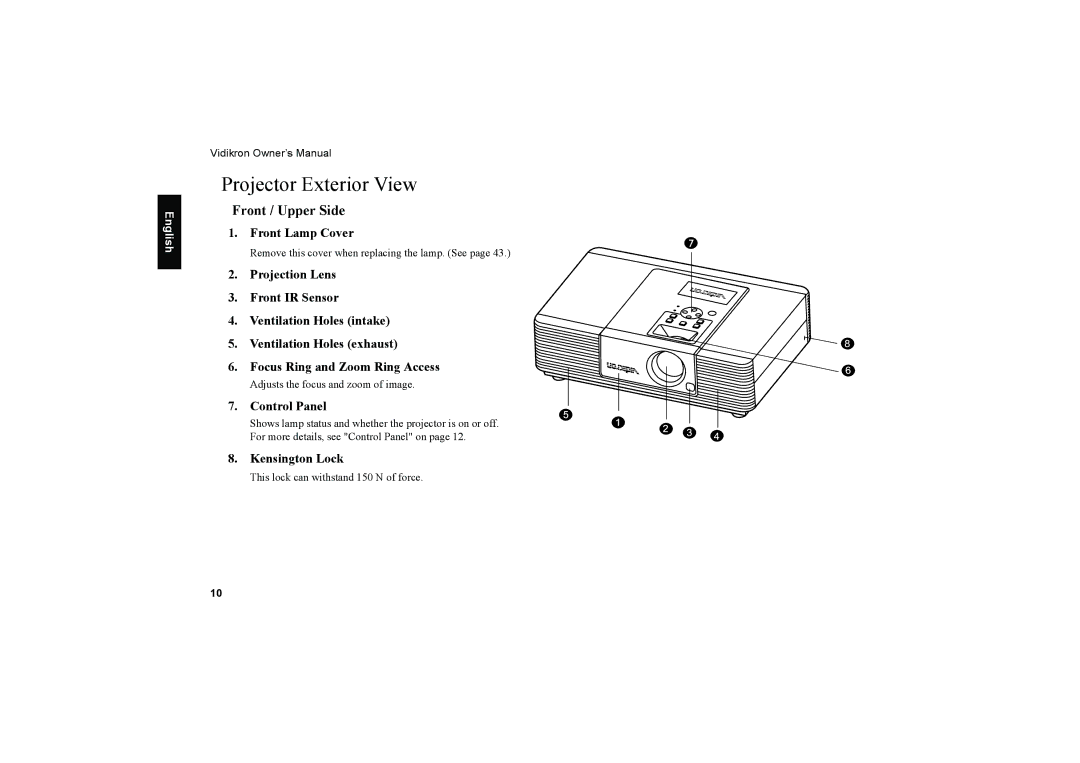
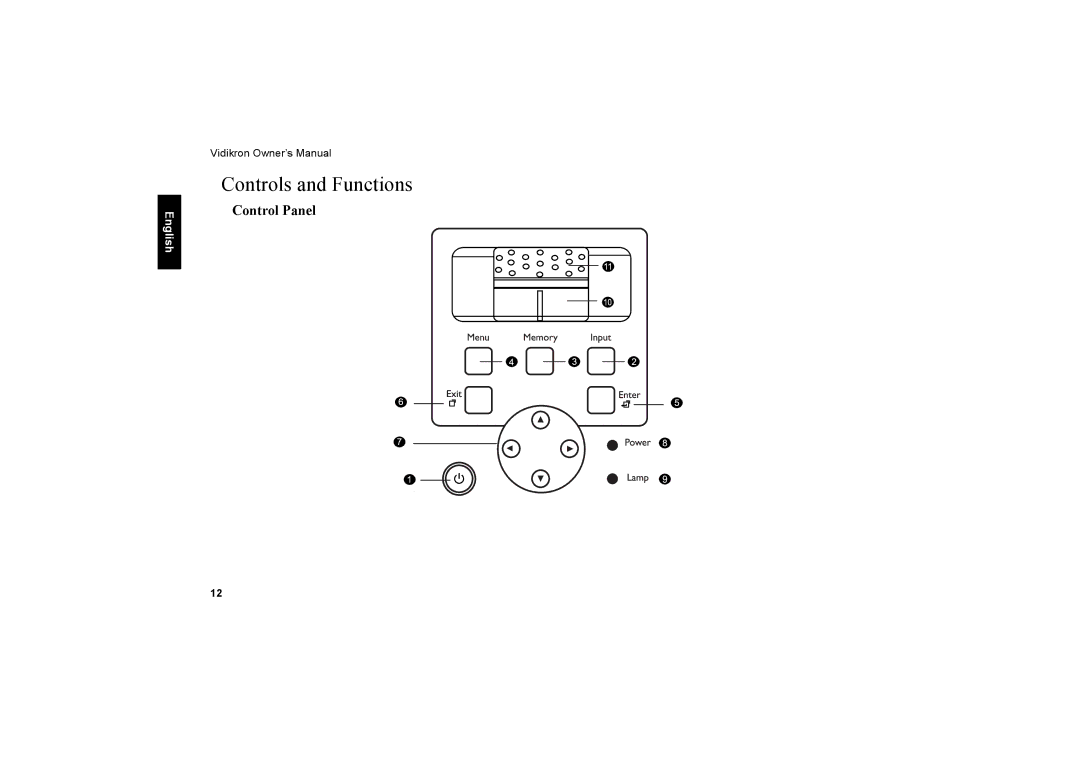
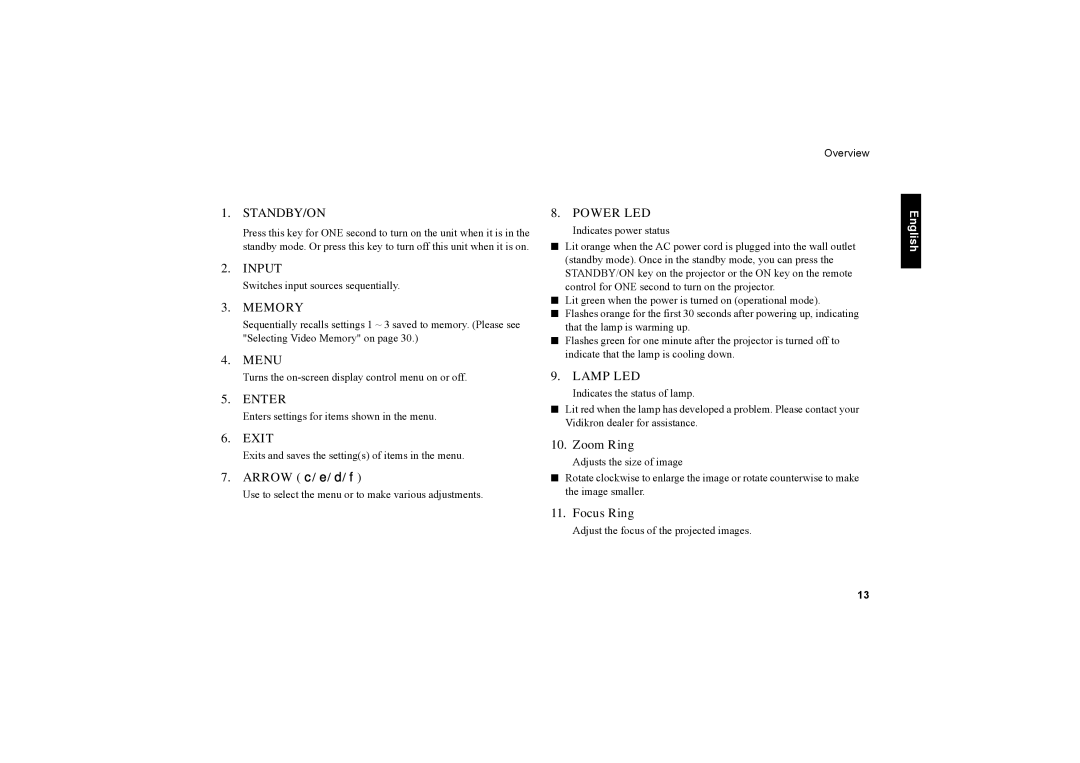
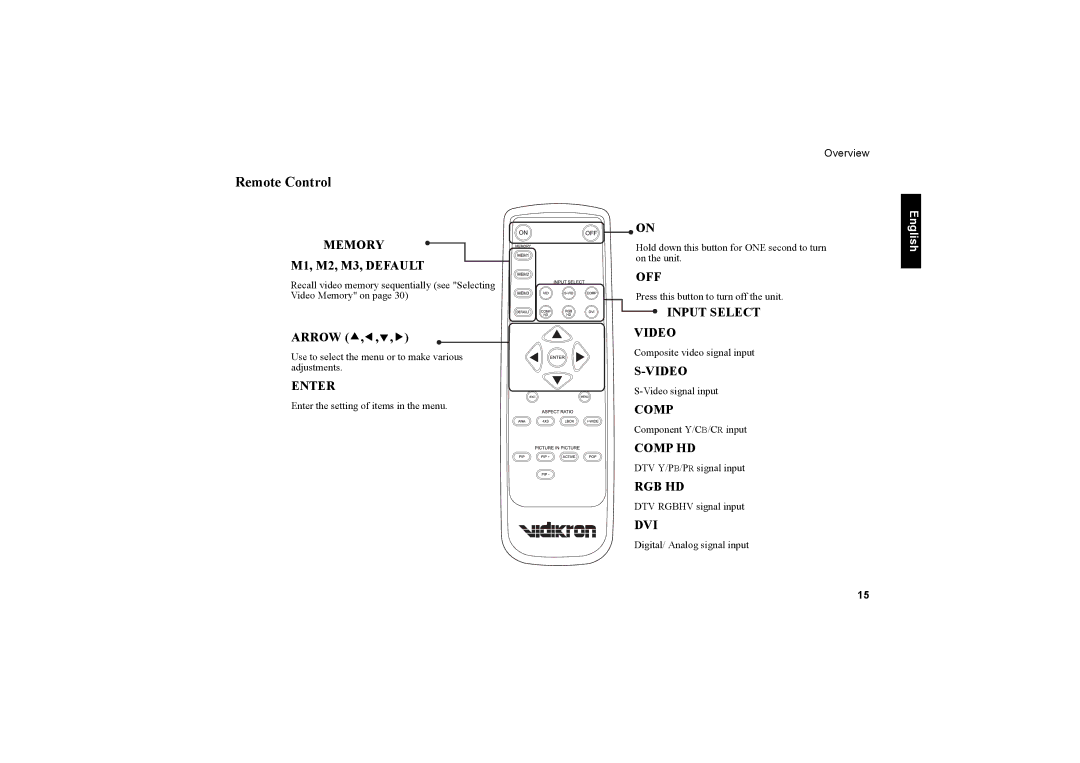
1. STANDBY/ON

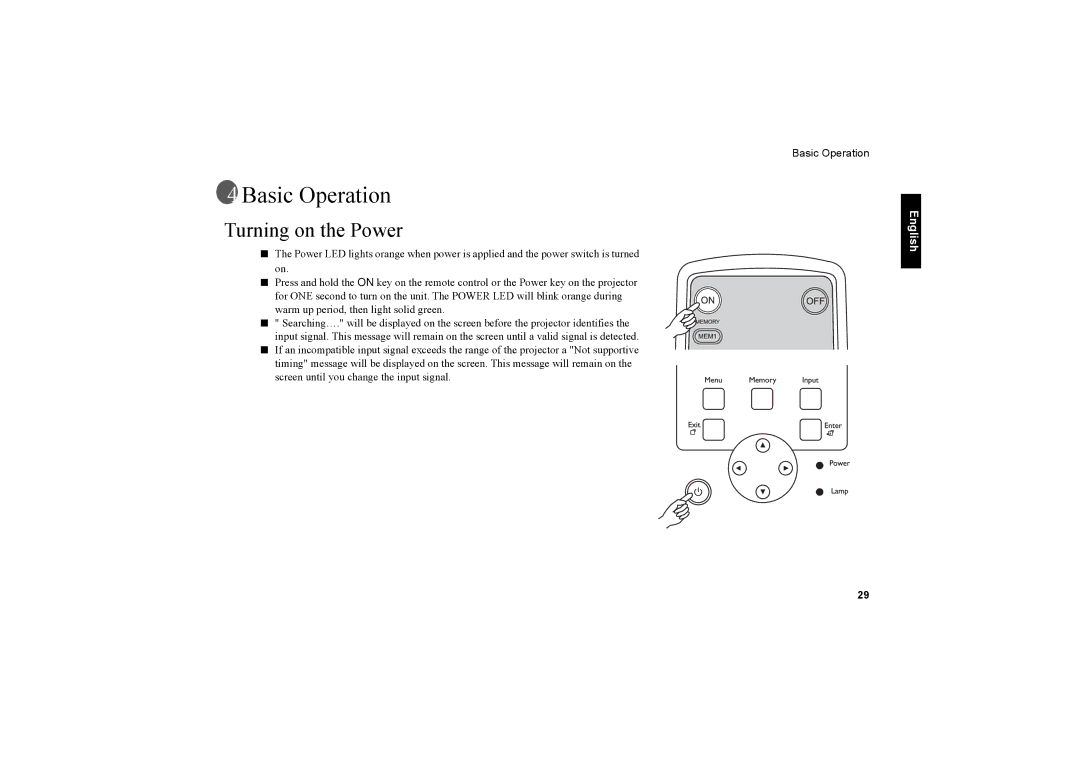
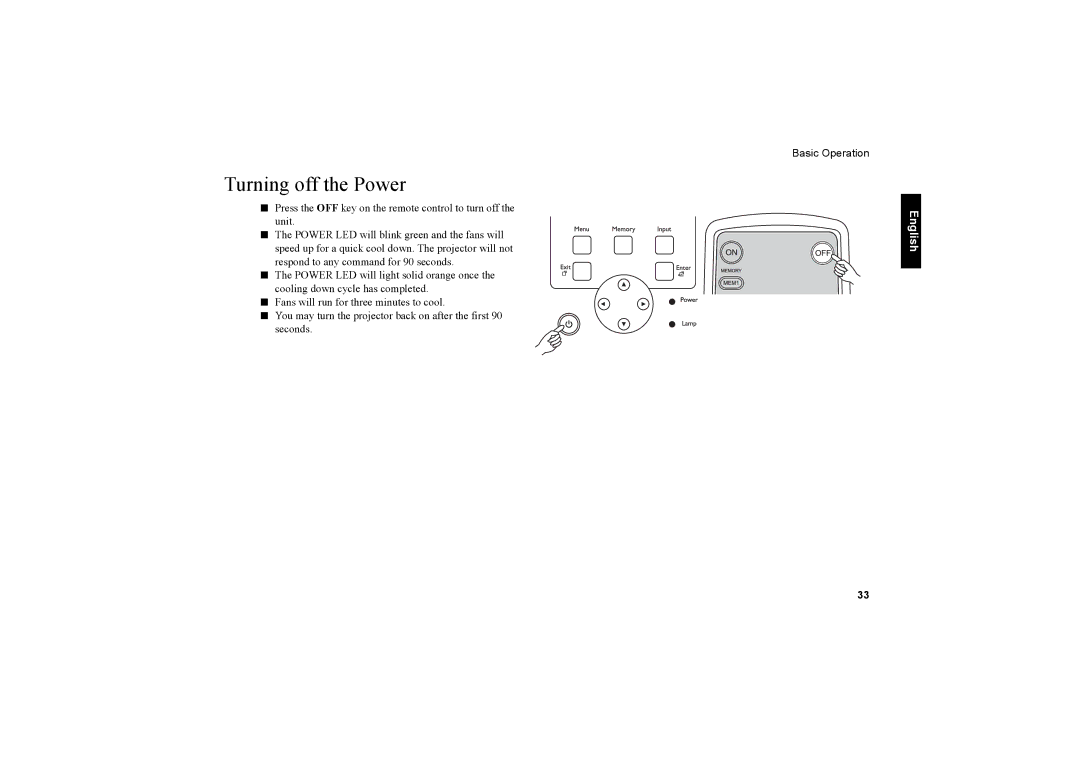
Press this key for ONE second to turn on the unit when it is in the standby mode. Or press this key to turn off this unit when it is on.

2. INPUT

Switches input sources sequentially.

3. MEMORY

Sequentially recalls settings 1 ~ 3 saved to memory. (Please see "Selecting Video Memory" on page 30.)

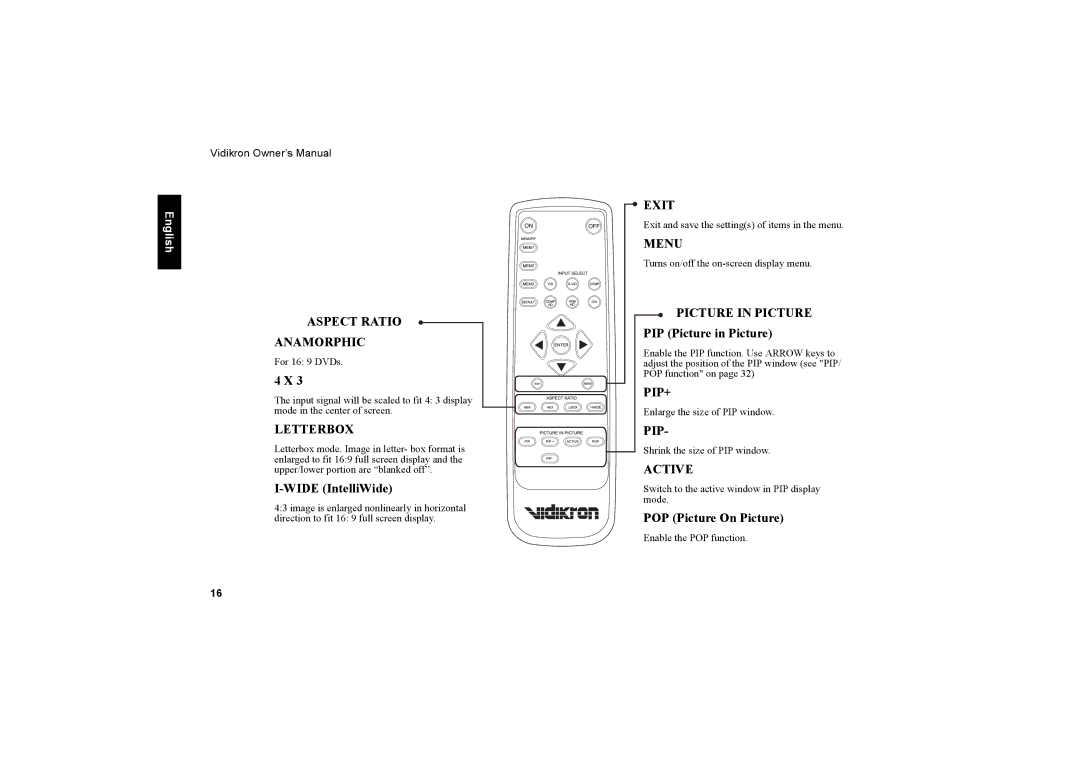
4. MENU

Turns the on-screen display control menu on or off.

5. ENTER

Enters settings for items shown in the menu.

6. EXIT

Exits and saves the setting(s) of items in the menu.

7. ARROW (c/e/d/f)

Use to select the menu or to make various adjustments.

Overview

8. POWER LED

Indicates power status

Lit orange when the AC power cord is plugged into the wall outlet (standby mode). Once in the standby mode, you can press the STANDBY/ON key on the projector or the ON key on the remote control for ONE second to turn on the projector.

Lit green when the power is turned on (operational mode).

Flashes orange for the first 30 seconds after powering up, indicating that the lamp is warming up.

Flashes green for one minute after the projector is turned off to indicate that the lamp is cooling down.

9. LAMP LED

Indicates the status of lamp.

Lit red when the lamp has developed a problem. Please contact your Vidikron dealer for assistance.

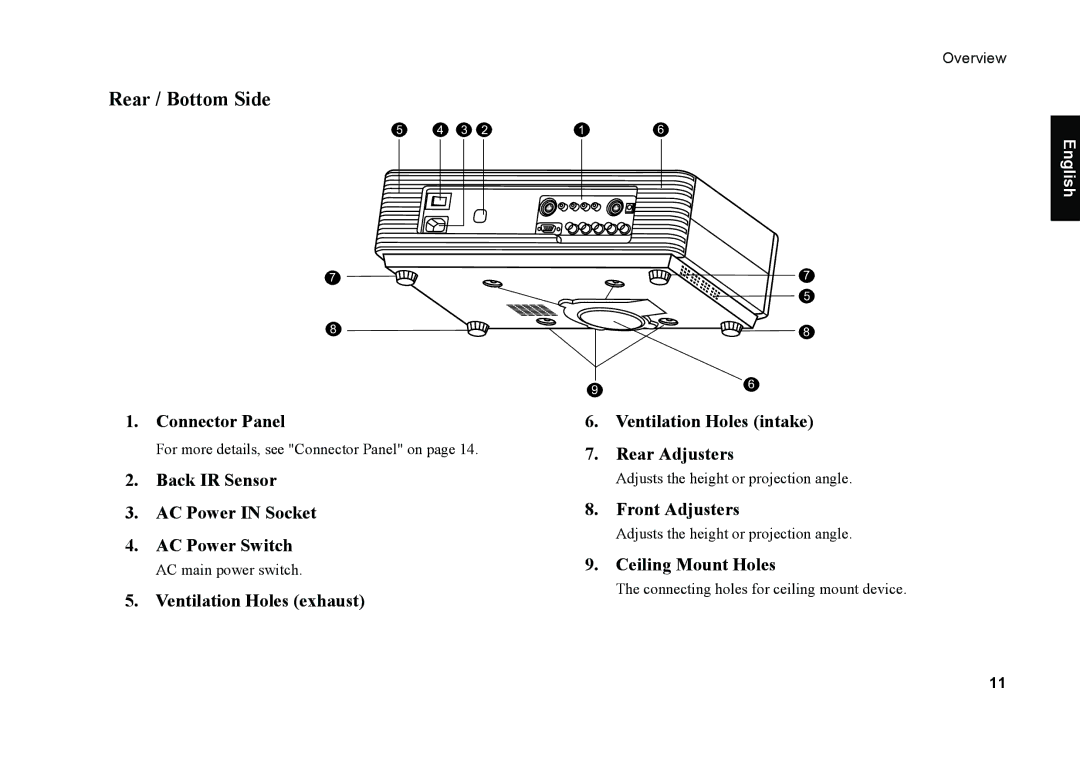
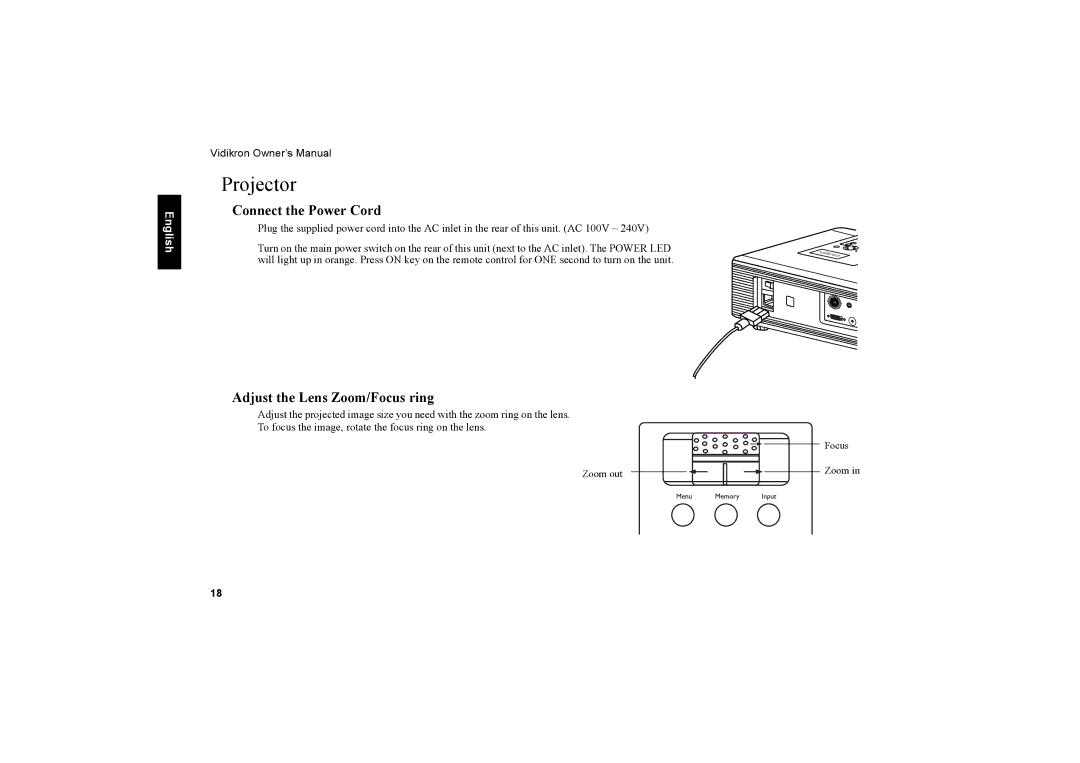
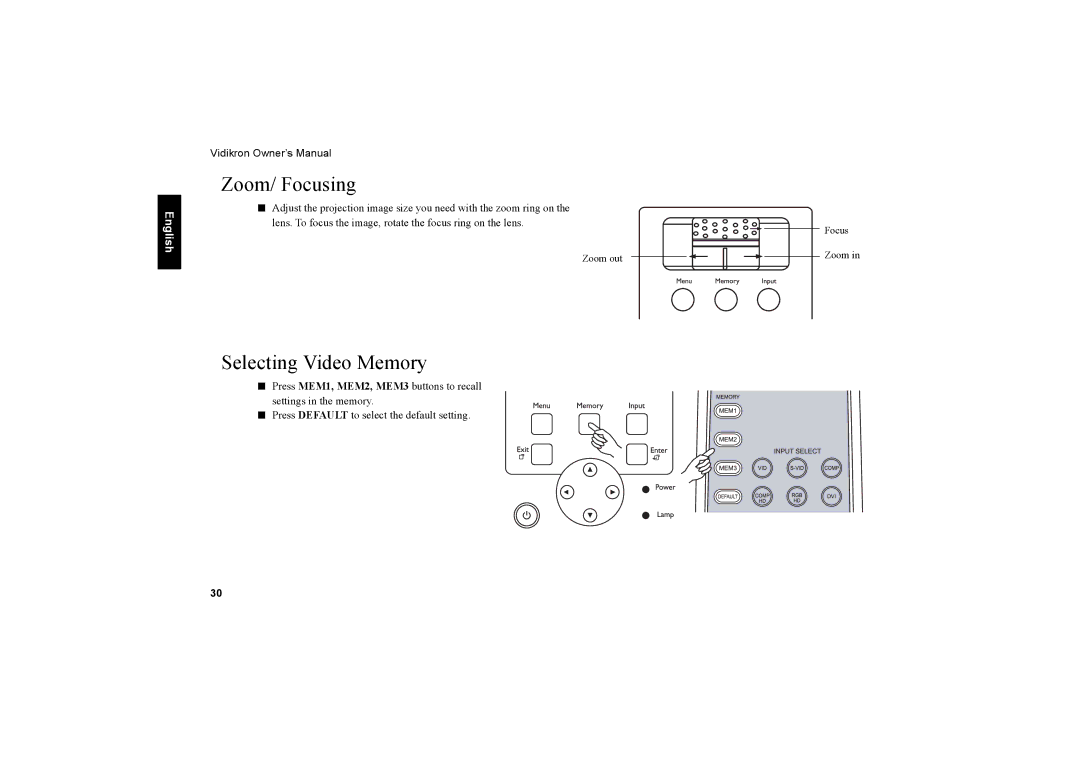
10. Zoom Ring

Adjusts the size of image

Rotate clockwise to enlarge the image or rotate counterwise to make the image smaller.

11. Focus Ring

Adjust the focus of the projected images.

English

13

Image 14
Contents Vision Model Vision Model 20ET Table of Contents Connecting Video Inputs Using the Menu Main Menu Picture Quality AdjustmentsImage Option Projector Status Install Service Image OptionsRisk of Electric Shock English Two Year Limited Warranty RIGHTS, Limits and Exclusions Features OverviewPIP/ PBP function Video MemoryFront Lamp Cover Projector Exterior ViewFront / Upper Side Control PanelRear / Bottom Side Controls and Functions Control PanelFocus Ring Arrow c/e/d/fZoom Ring Connector Panel Remote Control Arrow c,e,d,fPOP Picture On Picture Wide IntelliWidePIP Picture in Picture Installation Remote ControlProjector Connect the Power CordAdjust the Lens Zoom/Focus ring Adjust the height Installation For Vision Model 20 With 1.71 2.06 Lens CeilingThrow Distance Chart For Vision Model 20 With 1.71 2.06 Lens Screen Hight Screen Width Min TD Max TD Vertical OffsetInstallation For Vision Model 20ET With 2.31 3.06 Lens CeilingSWx2.31 SWx3.06 Screen Width x Connecting DVD Player Connecting Video InputsVideo / S-Video / Component Interlaced Video Progressive Component DTV Y/PB/PR DTV SourceRgbhv DTV RGB English Turning on the Power Basic OperationZoom/ Focusing Selecting Video MemorySetting Menu Selecting Input SourceSelecting Aspect Ratio PIP/ POP functionTurning off the Power Using the Menu MenuProjector Status Install Service Picture Quality AdjustmentsPicture Adjust Main MenuImage Options Input SelectAspect Ratio ScreensImage Option Memory StoreProjector Status Picture Adjust Image OptionsInstall Service Floor Front Ceiling Front Floor Rear Ceiling Rear Picture ConfigurationEnglish Francais Espanol Deutsch Italiano Lamp Reset Timer ServiceBlue Enable White BalanceWhite Balance Blue Enable Blue EnableReset Lamp Timer Additional Information Replace the Lamp Contact your Vidikron DealerTroubleshooting This unit does not turnNo picture Remote control doesPower LED blinks Image is unstableSpecifications Vision Model 20/ Vision Model 20ET SpecificationsAnsi Lumen specification Dimensions RS-232 Setup RS-232C Control CodesPC Out Adapter Sub 9-pin female