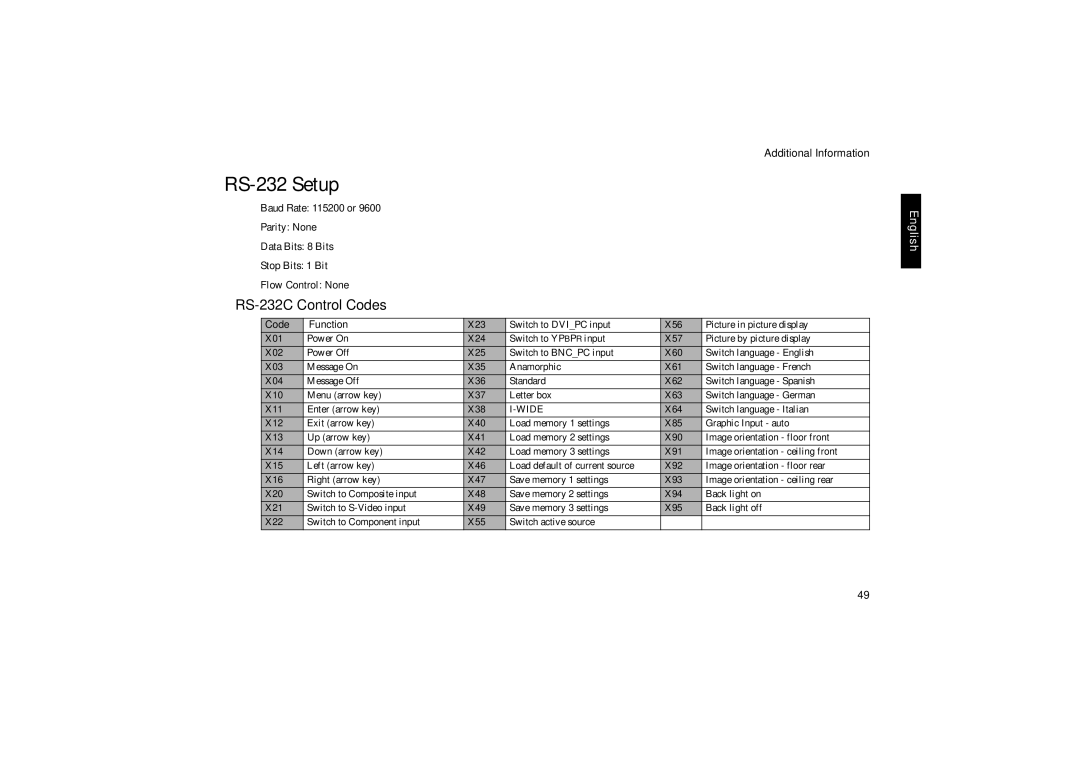
Vidikron Vision 20ET owner manual RS-232 Setup, RS-232C Control Codes

Page 50

Additional Information

RS-232 Setup

Baud Rate: 115200 or 9600

Parity: None

Data Bits: 8 Bits

Stop Bits: 1 Bit

Flow Control: None

RS-232C Control Codes

Code

Function

X23

Switch to DVI_PC input

X56

Picture in picture display

X01

Power On

X24

Switch to YPBPR input

X57

Picture by picture display

X02

Power Off

X25

Switch to BNC_PC input

X60

Switch language - English

X03

Message On

X35

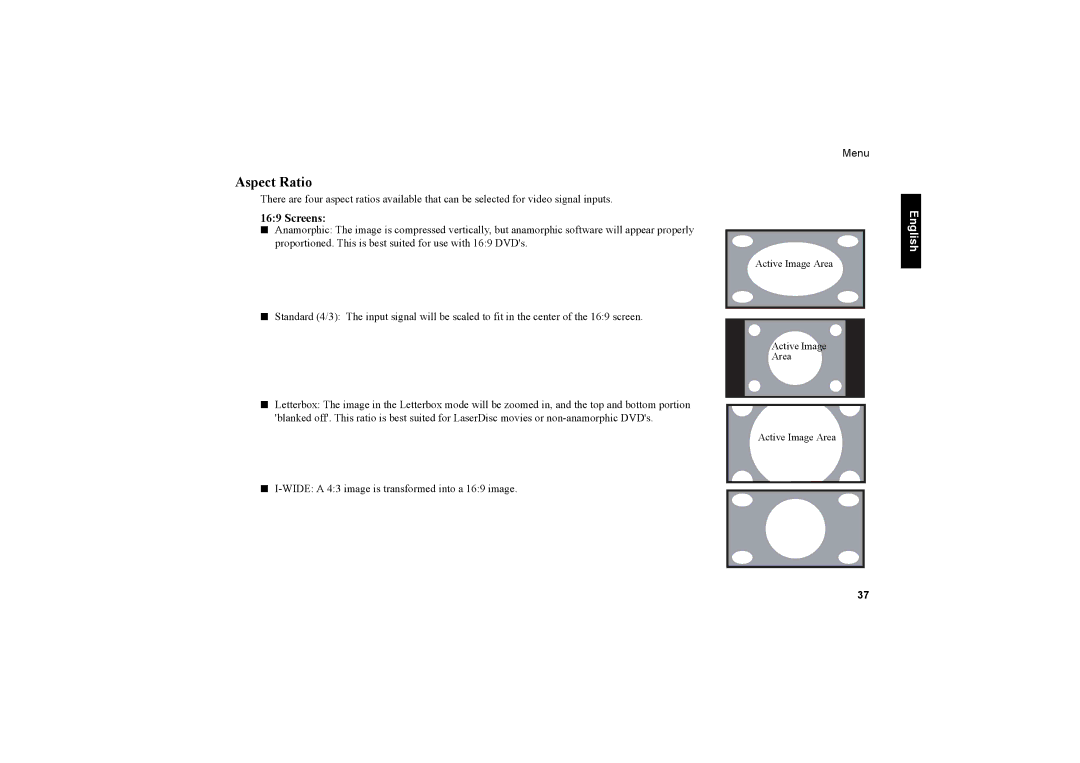
Anamorphic

X61

Switch language - French

X04

Message Off

X36

Standard

X62

Switch language - Spanish

X10

Menu (arrow key)

X37

Letter box

X63

Switch language - German

X11

Enter (arrow key)

X38

I-WIDE

X64

Switch language - Italian

X12

Exit (arrow key)

X40

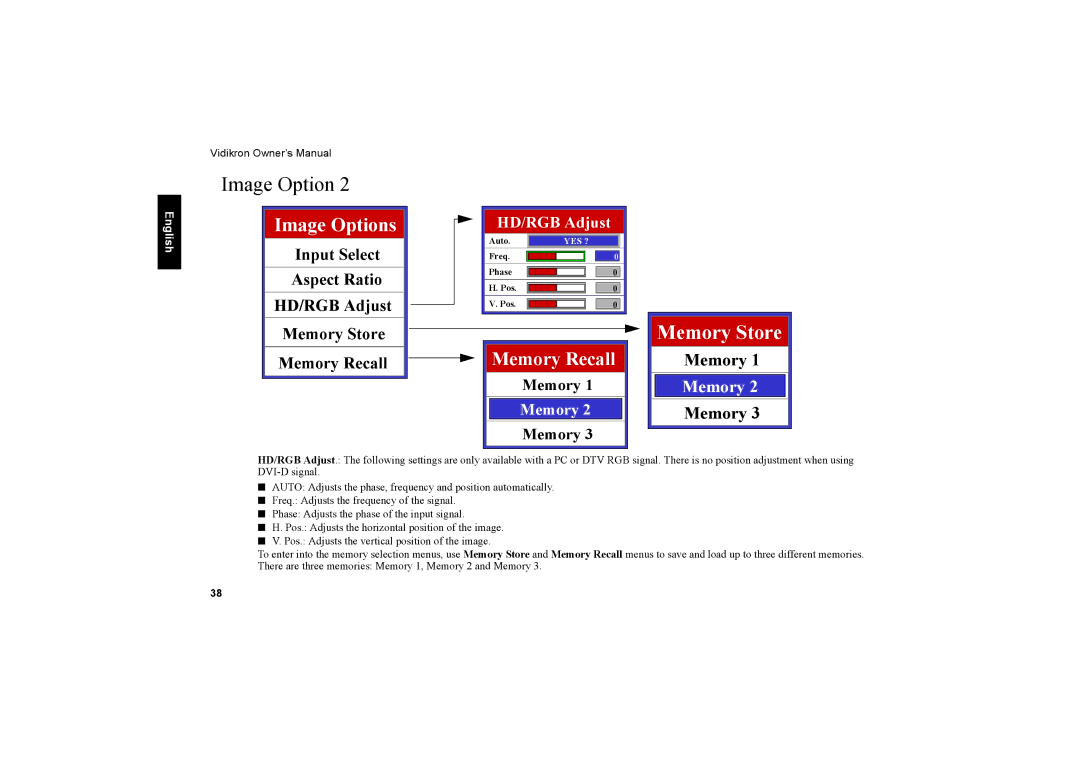
Load memory 1 settings

X85

Graphic Input - auto

X13

Up (arrow key)

X41

Load memory 2 settings

X90

Image orientation - floor front

X14

Down (arrow key)

X42

Load memory 3 settings

X91

Image orientation - ceiling front

X15

Left (arrow key)

X46

Load default of current source

X92

Image orientation - floor rear

X16

Right (arrow key)

X47

Save memory 1 settings

X93

Image orientation - ceiling rear

X20

Switch to Composite input

X48

Save memory 2 settings

X94

Back light on

X21

Switch to S-Video input

X49

Save memory 3 settings

X95

Back light off

X22

Switch to Component input

X55

Switch active source


English

49

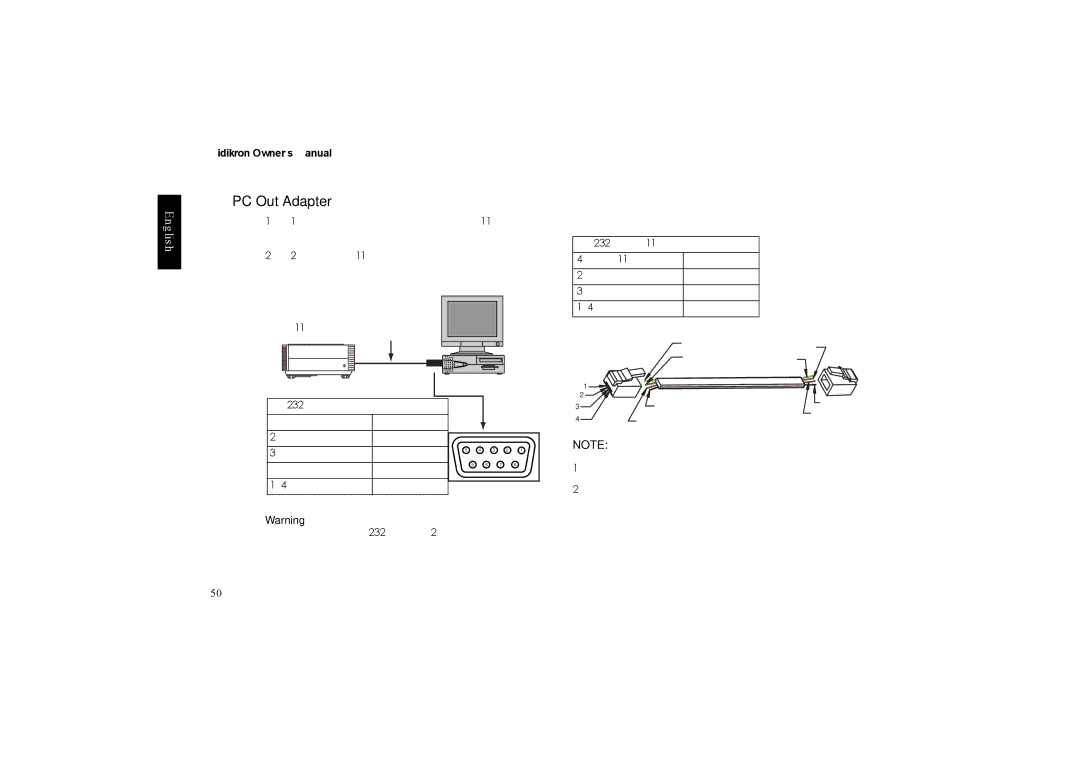
Image 50
Contents Vision Model Vision Model 20ET Table of Contents Connecting Video Inputs Using the Menu Main Menu Picture Quality AdjustmentsImage Option Projector Status Install Service Image OptionsRisk of Electric Shock English Two Year Limited Warranty RIGHTS, Limits and Exclusions Features OverviewPIP/ PBP function Video MemoryFront Lamp Cover Projector Exterior ViewFront / Upper Side Control PanelRear / Bottom Side Controls and Functions Control PanelFocus Ring Arrow c/e/d/fZoom Ring Connector Panel Remote Control Arrow c,e,d,fPOP Picture On Picture Wide IntelliWidePIP Picture in Picture Installation Remote ControlProjector Connect the Power CordAdjust the Lens Zoom/Focus ring Adjust the height Installation For Vision Model 20 With 1.71 2.06 Lens CeilingThrow Distance Chart For Vision Model 20 With 1.71 2.06 Lens Screen Hight Screen Width Min TD Max TD Vertical OffsetInstallation For Vision Model 20ET With 2.31 3.06 Lens CeilingSWx2.31 SWx3.06 Screen Width x Connecting DVD Player Connecting Video InputsVideo / S-Video / Component Interlaced Video Progressive Component DTV Y/PB/PR DTV SourceRgbhv DTV RGB English Turning on the Power Basic OperationZoom/ Focusing Selecting Video MemorySetting Menu Selecting Input SourceSelecting Aspect Ratio PIP/ POP functionTurning off the Power Using the Menu MenuProjector Status Install Service Picture Quality AdjustmentsPicture Adjust Main MenuImage Options Input SelectAspect Ratio ScreensImage Option Memory StoreProjector Status Picture Adjust Image OptionsInstall Service Floor Front Ceiling Front Floor Rear Ceiling Rear Picture ConfigurationEnglish Francais Espanol Deutsch Italiano Lamp Reset Timer ServiceBlue Enable White BalanceWhite Balance Blue Enable Blue EnableReset Lamp Timer Additional Information Replace the Lamp Contact your Vidikron DealerTroubleshooting This unit does not turnNo picture Remote control doesPower LED blinks Image is unstableSpecifications Vision Model 20/ Vision Model 20ET SpecificationsAnsi Lumen specification Dimensions RS-232 Setup RS-232C Control CodesPC Out Adapter Sub 9-pin female