Sanyo DP32D13 manual Initial Setup, USB Connection, Power Connection

Page 12

ENGLISH

USB Connection

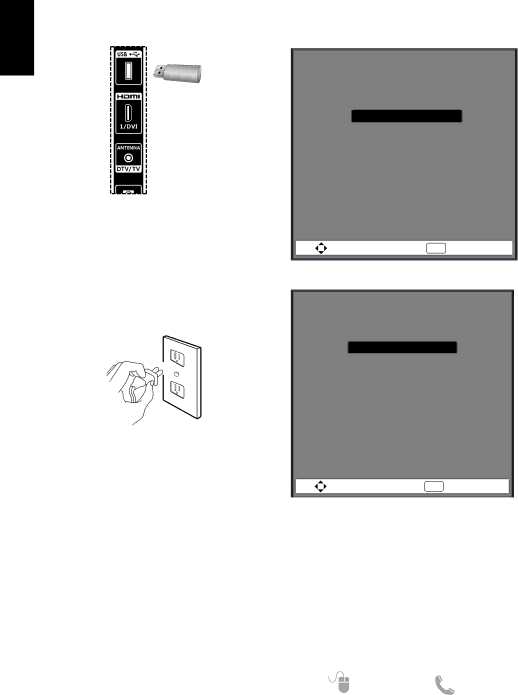
Your LCD TV features a JPEG Photo Viewer that allows watching digital still pictures from your USB disk plugged to the USB slot at the side panel.

1.Plug your USB disk to the USB slot at the side panel.

2.Press the [INPUT] button to select [USB] as the input signal (see page 17 for detail).

Power Connection

1.Plug in AC power cord (120V AC, 60Hz)

2.Press the [POWER] button, (Follow the on- screen instructions).

Initial Setup

For the first time after powering on your LCD TV, the Setup Wizard appears.

1.Select the language used for the OSD (On- Screen-Display) Menu.

Setup Wizard (1/6) Please select language

English

French

Spanish

Cancel

Move

ENTER Select

2. Select either Home or Shop mode.

Setup Wizard (2/6)

Please select Home/Shop

Home Mode

Shop Mode

Home mode default settings are recommended for in-home use. ENERGY STAR® qualified.

Shop mode is intended for in-store display and resets

video settings at Power On.

Previous Cancel

Move

ENTER Select

If later you want to change the mode, you can change it via the Home/Shop selection under Energy Options on the Setup menu (See page 16).

NOTE:

•• The Home mode is intended for home use, and will save much energy.

•• Any menu or control changes in the Shop mode will not be saved when the LCD TV is turned off.

12

Need help?

www.sanyoctv.com

1-800-877-5032

Image 12
Contents 32 LED Important Safety Instructions Do not OpenHandling Precautions FCC InformationCanadian Notice Energy Star User InformationContents Installation AccessoriesPositioning the TV Installing Stand Wall Mounting OptionalScrew type Install Batteries in the Remote Control Operating Range of the Remote ControlAntenna Connection for Off-air Signals Getting StartedControls and Jacks VOLHdmi HDMI1/DVI, HDMI2, HDMI3 Connect your Hdmi devices Wireless Remote Control Volume UP / Down VOLConnection Hdmi to Hdmi ConnectionComponent YPbPr Connection Video Connection Shared With Component-Y PC ConnectionDigital Audio Connection DVI to Hdmi ConnectionInitial Setup Power ConnectionUSB Connection Press Enter button to start the channel scan OSD Menu Operation Video MenuAudio Menu Channels Menu Setup Menu ‰‰ Demo Mode‰‰ Menu Language ‰‰ Parental ControlsPhotos Menu To control while in photo folderTo control while in full-screen photo show To control while in photo slideshowProblems and Solutions Specifications Resolution Supported Timing TableFreq. KHz Clock MHz ONE-YEAR Limited Parts and Labor Warranty For customer assistance, call toll freeSanyo Manufacturing Corp Sanyo Road, Forrest City, AR