Operation in HDTV mode
2. XGA Mode
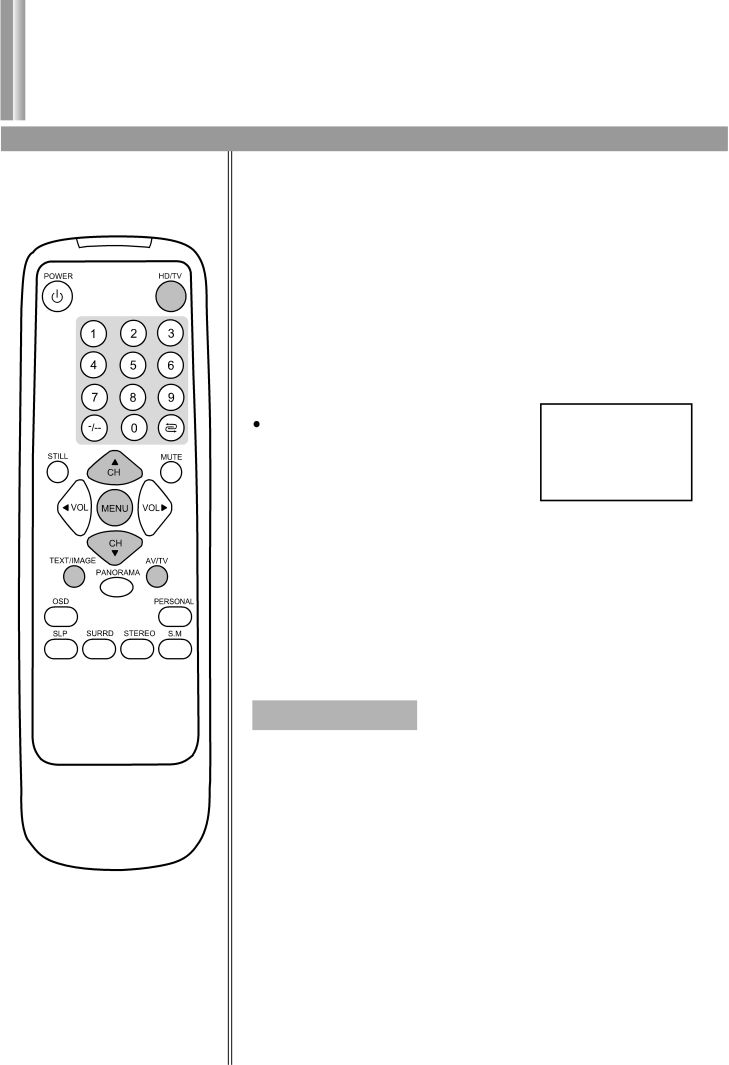
Buttons' function
When the signal source is input through XGA interface, then the set will work in HDTV mode.
The XGA IN interface on this set can be used to connect to the following equipment:
1. PDVD with VGA output.
2. HDTV set top box with VGA output.
3. Personal computer.
Firstly please press AV/TV button to call up the signal source selection menu and then select XGA mode.
Later on you can directly press HD/TV button to switch between the previous viewing mode (RF or VIDEO mode) and HDTV mode.
If you select XGA as input signal source |
| |
while there is no input signal through |
| |
XGA interface, the screen will display |
| |
"NO SIGNAL". At this time, pressing | NO SIGNAL | |
MENU button has no function. | ||
|
![]() If XGA input signal is in 1080i/50Hz format, then for menu operation please refer to Operation in YPbPr mode in previous page.
If XGA input signal is in 1080i/50Hz format, then for menu operation please refer to Operation in YPbPr mode in previous page.
![]() If XGA input signal is in other format, for its operation please see the following instructions (from page 29 to page 33).
If XGA input signal is in other format, for its operation please see the following instructions (from page 29 to page 33).
Moreover, there is only one group of audio input terminals in HDTV mode, therefore you can only select to connect either XGA or YPbPr audio terminals.
Buttons' function
MENU on the set or MENU on the remote controller: It is used to call up OSD menu, or to enter or exit from the selected menu item after OSD menu is activated.
CH+ on the set or CH ![]() on the remote controller: It is used to move the cursor upward or clockwise after OSD menu is activated, or increase the value of parameter after menu item is selected.
on the remote controller: It is used to move the cursor upward or clockwise after OSD menu is activated, or increase the value of parameter after menu item is selected.
CH- on the set or CH ![]() on the remote controller: It is used to move the cursor downward or
on the remote controller: It is used to move the cursor downward or
TEXT/IMAGE: It is used to cancel the OSD menu after OSD menu is activated. It is also used to switch between text mode and image mode (in either mode contrast and brightness are different).
29