Getting started
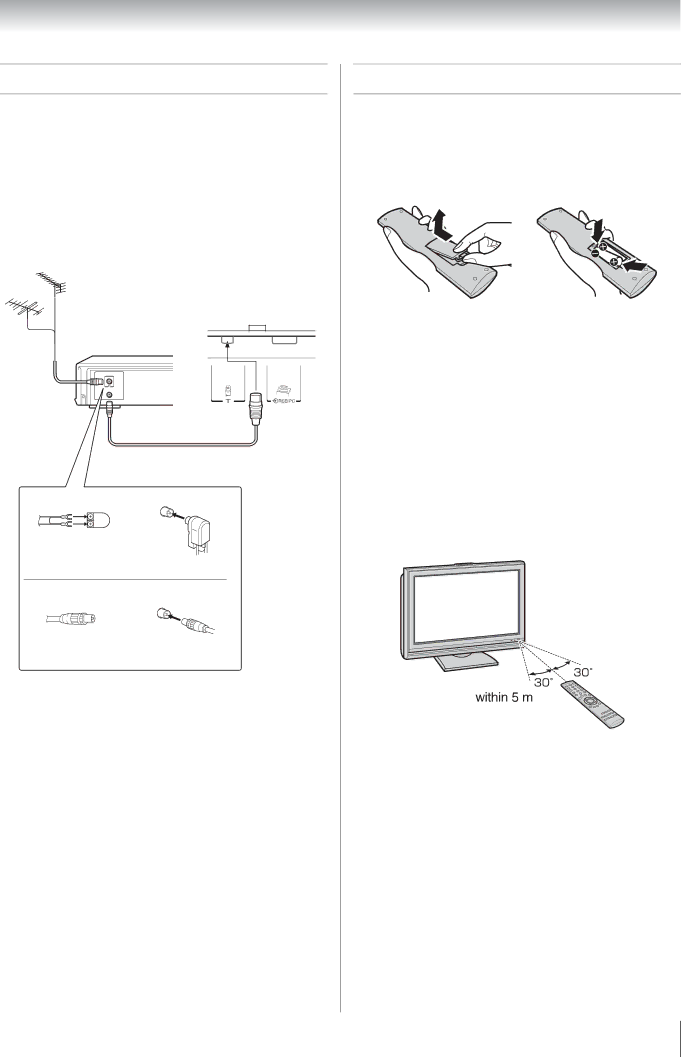
Connecting an antenna
Optimum reception of color requires a good signal and will generally mean that an outdoor antenna must be used.
The exact type and positioning of the antenna will depend upon your particular area.
Your Toshiba dealer or service personnel can best advise you on which antenna to use in your area.
Before connecting the antenna cable, turn off all main power switches.
VHF and/or
UHF antenna
TV back view
Media Recorder
IN
OUT
Antenna cable (75 7 coaxial) (not supplied)
300 7
Antenna adaptor | 75 7 |
(not supplied) | |
| antenna |
| terminal |
75 7 coaxial cable |
|
Plug
(not supplied) 75 7 antenna terminal
Exploring your new TV
Installing the remote control batteries
Remove the battery cover.
Insert two R03 (AAA) batteries matching the
Cautions:
•Dispose of batteries in a designated disposal area. Never throw batteries into a fire.
•Attention should be drawn to the environmental aspects of battery disposal.
•Never mix battery types or combine used batteries with new ones.
Notes:
•If the remote control does not operate correctly, or if the operating range becomes reduced, replace both batteries with new ones.
•If the batteries are dead or if you will not use the remote control for a long time, remove the batteries to prevent battery acid from leaking into the battery compartment.
Effective range
7