Getting started
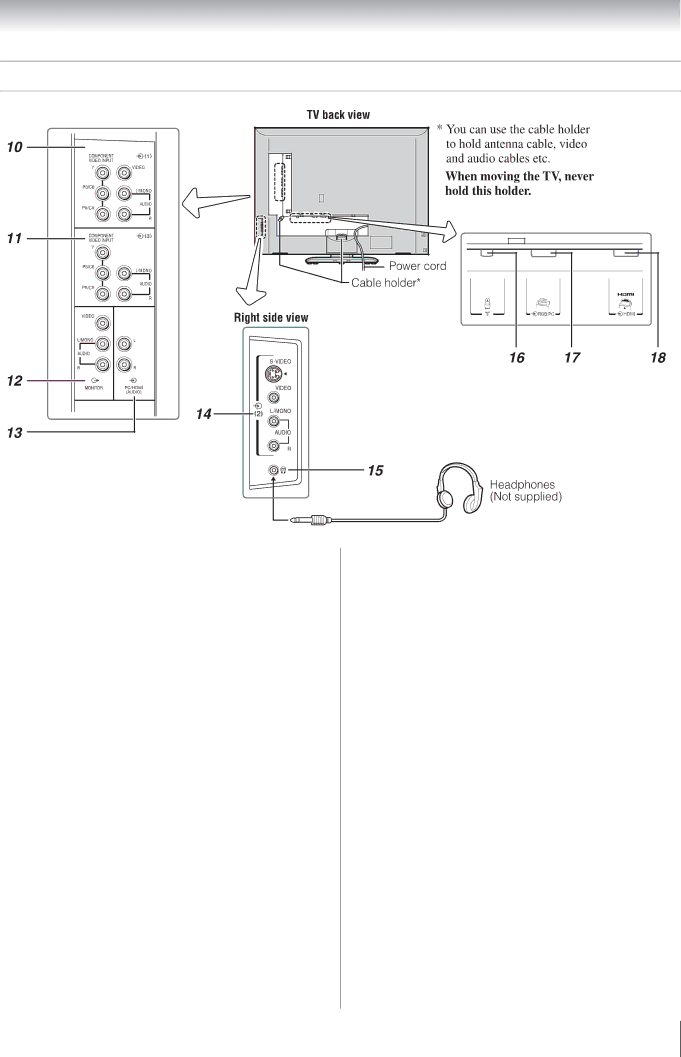
TV side and back panel connections
10o (1) (Video 1 input terminals) —
11o (3) (Video 3 input terminals) —
12O MONITOR (output terminals) — Standard video and standard audio outputs (- page 24).
13o PC/HDMI (AUDIO) (input terminals) — For use when connecting a personal computer (PC) or a DVI device with standard audio output (- page 24, 26).
14o (2) (Video 2 input terminals) — Optional
15D (Headphone jack) — For use with headphones.
Note:
When the Headphone jack is being used, the sound from all speakers will be muted, and normal sound will be output to the headphones only.
16A (Antenna input terminal) — Analog antenna signal input (- page 7).
17o RGB/PC (input terminal) — For use when connecting a personal computer (PC) (- page 26).
18o HDMI (input terminal) —
9