Magnifying Images
This feature enables you to zoom in on a picture at up to four times the original viewing size.
To magnify the images:
1.Set the Mode switch to ![]() (Playback).
(Playback).
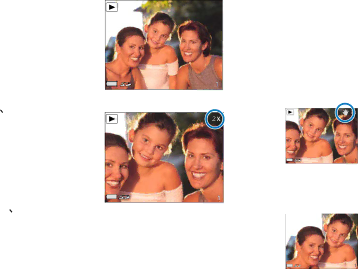
2. Press the ![]() button repeatedly to enlarge the image from normal, to twice the size, to three times the size, and to four times the size.
button repeatedly to enlarge the image from normal, to twice the size, to three times the size, and to four times the size.
The picture appears on the LCD screen with its magnification level shown.
3.Press the ![]() /
/![]() repeatedly to reduce the image from four times the size, to three times the size, to twice the size, to normal size.
repeatedly to reduce the image from four times the size, to three times the size, to twice the size, to normal size.
NOTE:
Image magnification only works on still images. When you see an image on the LCD screen with a playback icon (![]() ), this indicates the image can be magnified for viewing.
), this indicates the image can be magnified for viewing.
Before
After
If you are currently viewing a magnified image, you can use the camera’s Pan feature for scrolling through the magnified image.
1.Press the Shutter (OK) button.
A Pan icon (![]() ) appears on the LCD screen next to the image magnification level.
) appears on the LCD screen next to the image magnification level.
Magnified image
2.Use the
![]() Scrolled
Scrolled
image
3.Press the Shutter (OK) button again to disable the Pan feature.
!!