Samsung HMX-Q100UP, HMX-Q130BP, HMX-Q10BP, HMX-Q11BP Special effects for recordings, Time Lapse REC

Page 55

Special effects for recordings

Time Lapse REC

Using the Time Lapse feature, you can programme your camcorder to create a time lapse video by recording a series of frames over a set period of time with a set time interval between each frame. The Time Lapse feature lets you create time lapse videos of blooming flowers and similar subjects.

• Select the video recording mode. ¬page 26

To record in the Time Lapse REC mode, you must set the recording interval between frames (Interval) using the menu.

1 Press the Home ( ) button p touch “Art Film” p touch the

Time Lapse REC ( ) tab.

STBY 00:00:00 [253Min]

Time Lapse REC : Off

0.5

1

3

5

2Touch the desired submenu item.

STBY 00:00:00 [253Min]

0.5 Sec/72Hr

Time Lapse REC : 0.5 Sec

0.5

1

3

5

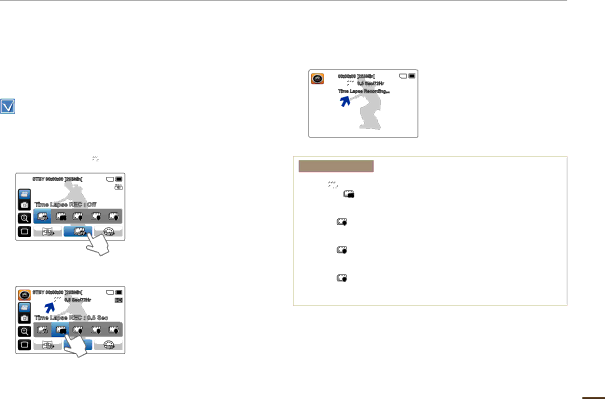
3After setting the Time Lapse REC mode, press the Recording start/stop button.

The Time Lapse recording starts.

Time Lapse REC only supports the 720/50p resolution.

00:00:00 [253Min]

0.5 Sec/72Hr

Time Lapse Recording...

Submenu items

Off ( ): Disables the function.

0.5 Sec ( 0.5 ): Enables the interval recording function. Images are automatically captured one frame at a time, at 0.5 seconds interval and stored in the storage media.

1 Sec ( 1 ): Enables the interval recording function. Images are automatically captured one frame at a time, at 1 second interval and stored in the storage media.

3 Sec ( 3 ): Enables the interval recording function. Images are automatically captured one frame at a time, at 3 seconds interval and stored in the storage media.

5 Sec ( 5 ): Enables the interval recording function. Images are automatically captured one frame at a time, at 5 seconds interval and stored in the storage media.

55

Image 55
Contents High Definition Digital Camcorder Precautions Safety WarningsImportant Information on USE Before using this camcorder Unplug from the power supply Safety informationSafety information Safety information Safety information Contents Contents You can record videos in H.264 format Quick start guideQuick start guide Using ‘Quick On STBY’ by opening/closing the LCD screenPlay back videos or photos Delete videos or photos Whats Included with Your Getting to know the camcorderCamcorder Location of Controls Getting to know the camcorderFront/Left Rear/Right/Bottom Identifying the Screen Displays Video recording modeLeft of the LCD screen Right of the LCD screen Photo recording modeVideo playback mode Single view Video playback mode Thumbnail viewPhoto playback mode Single view Photo playback mode Thumbnail viewGetting started INSERTING/EJECTING the BatteryTo insert the battery To eject the batteryUsing the AC power adaptor Using the USB cable Charging the BatteryGetting started Battery level display Checking the Battery StateTo check the charging state Continuous Recording without zoom Available running time for the batteryUsing an AC power source About the batteryBasic operation of the camcorder When using this camcorder for the first timeTurning Your Camcorder ON/OFF Using the Touch Screen Setting the Operation ModesBasic operation of the camcorder Drag Switching the information display modeInternal rechargeable battery Setting the Time Zone and DATE/TIME for the First TimeCharging the internal rechargeable battery Supported languages Selecting the OSD LanguageTo eject a memory card Getting ready to start recordingINSERTING/EJECTING a Memory Card not Supplied To insert a memory cardSdhc Secure Digital High Capacity cards Getting ready to start recordingSelecting a Suitable Memory Card not Supplied Compatible memory cardsHandling a memory card Recording time available for video in minutes Recordable Time and CapacityRecordable number of photos Switch grip Either handed grip Using the Grip BeltAdjusting the LCD Screen Recording Videos Basic recordingTo pause recording Basic recording Recording Photos Align your subject in the frame Recording with Ease for Beginners Smart AutoTo zoom ZoomingTo zoom out Understanding how to change the operation modes Changing the Playback ModeBasic playback Playing Videos Basic playbackFind videos in various ways Touch the / tab to increase or decrease audio volume To adjust the volume during video playbackSlow playback Playback / Pause / StopSearch playback Skip playbackFind photos in various ways Viewing PhotosZooming during photo playback Viewing a slide showUsing the Home menu Using the menu itemsHandling Menus Art Film menu items Using the menu itemsMenu Items Manual menu itemsItems Default value Settings menu itemsUnderstanding White Balance Advanced recordingsWhite Balance To set the white balance manuallyUnderstanding EV Exposure Value Advanced recordingsEV Exposure Value Back LightSuper C.Nite Self TimerFocus Cont. ShotFader Special effects for recordingsRecording a video with Fade effect Time Lapse REC Special effects for recordingsExample of Time Lapse Recording OFF Digital EffectDelete Editing videos and photosProtect Editing videos and photosDivide Combine  File Info Video Resolution Other settingsPhoto Resolution OIS Duo Other settingsTele Macro Thumbnail Digital ZoomSlide Show Option Video Play OptionGuideline LCD BrightnessTV Display Date/Time DisplayAuto LCD Off Hdmi TV OutUSB Connect PC SoftwareTV Connect Guide Anynet+ HDMI-CEC File No Card InfoDate Type Setting the local timeTime Zone Date/Time SetBeep Sound Time TypeShutter Sound Auto Power OffQuick On Stby Switch Grip Format Language Default SetDemo Using the Demo functionWhat is Anynet+ function? Connecting to a TVConnecting to a High Definition TV with Hdmi Using a mini Hdmi cableConnecting to a Regular TV Connecting to a TVConnecting an Audio/Video cable for the composite output Image appearance depends on the TV screen aspect ratio Viewing on a TV ScreenDubbing to a VCR or DVD/HDD Recorder Dubbing videosDirect Printing with a Pictbridge Printer Printing photosTo set the date/time imprint for Pictbridge printers Printing photosSystem requirements Using with a Windows computerWhat YOU can do with a Windows Computer Main functionTo disconnect the USB cable Using with a Windows computerUsing the Intelli-studio Programme Connecting the USB cableAbout the Intelli-studio main window Editing videos or photos Playing back videos or photosSharing the videos/photos online Viewing the contents of storage media Using AS a Removable Storage DeviceFile format Structure of folders and files on the storage mediaVideo file H.264 Photo fileBattery TroubleshootingStorage media Recording TroubleshootingChange to another card which has enough free Editing videos PlaybackUSB Power Symptoms and SolutionsDisplay An afterimage remains on the LCD screen 100 Playback on your camcorder Adjusting the image during recordingPlayback on other devices TV, etc 102 Connecting to a computer103 Overall operationsLCD screen MaintenanceCleaning the camcorder Additional informationAdditional information Using Your Camcorder AbroadGlossary 107 SpecificationsRegion Country Contact Centre  Web Site Contact Samsung World WidePage RoHS compliant