PREPARING YOUR DC E510 FOR USE
2.1 Installing the Battery
English
We highly recommend you to use the specified rechargeable
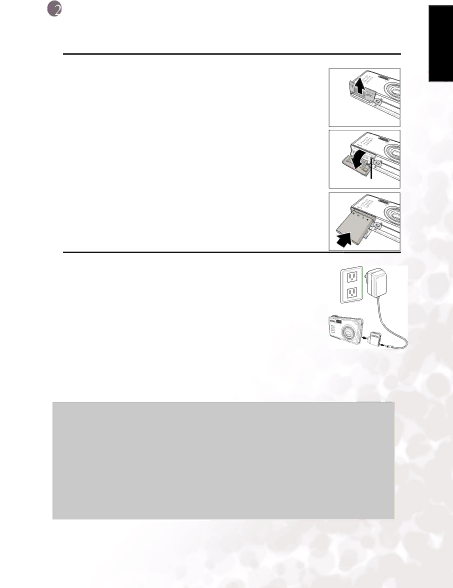
1.Open the battery/SD memory card cover (A) and (B).
2.Insert the battery in the correct orientation shown (C).
3.Close the battery/SD memory card cover.
To remove the battery
Open the battery/SD memory card cover and then press the battery lock lever. The battery will pop out slightly. Remove the battery.
A
B |
Battery lock lever |
C |
2.2 Charging the Battery
The |
| |
digital still camera. To maximize battery performance and lifetime, |
| |
it is recommended that you fully charge the battery using the |
| |
optional AC power adapter and then fully discharge it (through | C | |
normal use) at least one time. Make sure that the power of the |
| |
digital still camera is off and then insert the battery before starting. | A | |
1. Insert the conversion adapter into the conversion adapter | ||
B | ||
terminal of the camera as shown in the illustration (A). | ||
|
2.Connect one end of the AC power adapter to the DC IN terminal of the conversion adapter (B).
3.Connect the other end of the AC power adapter to a wall outlet (C).
Charging time differs depending on the ambient temperature and the status of battery.
Notes
•The battery will also be charged when connected to a PC using the USB cable.
•The digital still camera must be used with the specified AC power adapter. Dam- age caused by the use of an incorrect adapter is not covered under the warranty.
•Always make sure that the digital still camera is off before removing the battery.
•The battery may feel warm after it has been charged or immediately after being used. This is normal and not a malfunction.
•When using the digital still camera in cold environments, keep the digital still camera and its battery warm by holding it inside your jacket or other warm pro- tective environment.
Preparing Your DC E510 for Use | 3 |