![]()
![]()
![]()
![]()
![]()
![]()
![]()
![]()
![]()
![]()
![]()
![]()
![]()
![]()
![]()
![]()
![]()
![]()
![]()
![]()
![]()
![]()
![]()
![]()
![]()
![]()
![]()
![]()
![]()
![]()
![]()
![]()
![]()
![]()
![]()
![]()
![]()
![]()
![]()
![]()
![]()
![]()
![]()
![]()
![]()
![]()
![]()
![]()
![]()
![]()
![]()
![]()
![]()
![]()
![]()
![]()
![]()
![]()
![]()
![]()
![]()
![]()
![]()
![]()
![]()
![]()
![]()
![]()
![]()
![]()
![]()
![]()
![]()
![]()
![]()
![]()
![]()
![]()
![]()
![]()
![]()
![]()
![]()
![]()
![]() EN25
EN25![]()
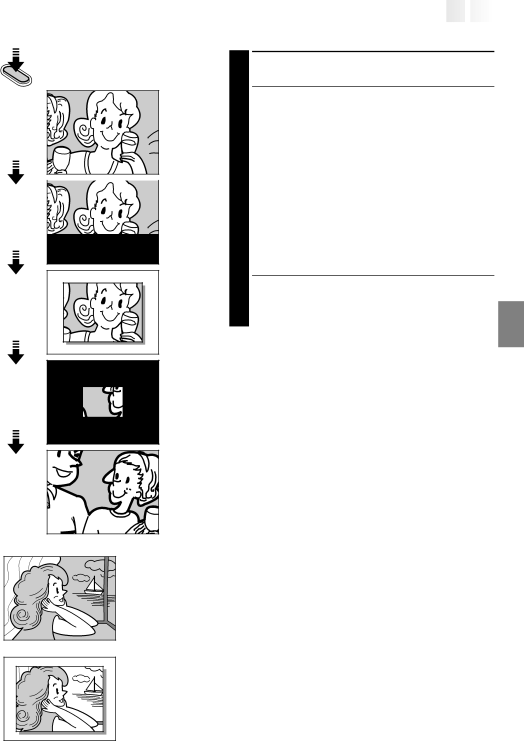
SNAPSHOT
Display (ex. Pin-Up)
1
![]() 2
2
3 |
4 |
![]() 5
5
FULL
(Snapshot mode with no frame)
SNAPSHOT RECORDING
1 TAKE SNAPSHOT
Press SNAPSHOT.
•Regardless of the Power Switch position (“AUTO” or “PRO.”), Snapshot recording takes place using the selected Snapshot mode.
•A still image is recorded onto the tape and into the camcorder’s
•First there is a momentary camera
The screen changes as shown in the illustrations 1 to 5 and the screens 1 to 5 are recorded onto the tape in the selected mode. Only the still image 3 is stored in the
If you press during Record-Standby mode . . .
.... the screens 1 to 3 are recorded onto the tape in
the selected mode. Then the camcorder
NOTES:
●When the remaining number indicator displays “0” (blinking), the still image will be recorded onto the
tape but not in the
●The Picture Mode can be switched to either “FINE” or “STANDARD”. Since the remaining number of shots available depends on the selected Picture Mode, switching the Picture Mode will vary this number.
●If SNAPSHOT is pressed with the System Select Switch set to “D.S.C.”, ☞ pg. 20.
●Image data stored in the camcorder’s
the provided image transfer software, Picture Navigator (☞ pg. 51). The image data transferred to a Windows® PC can also be further processed using Mr. Photo Gold.
●If a snapshot is taken while the camcorder is in the WIDE mode (☞ pg. 35), the snapshot image is recorded without the black bars at the top and bottom of the screen.
●When a Snapshot is taken in a dark environment, the still image recorded onto the tape and stored in memory will become coarse and its true colors will be lost.