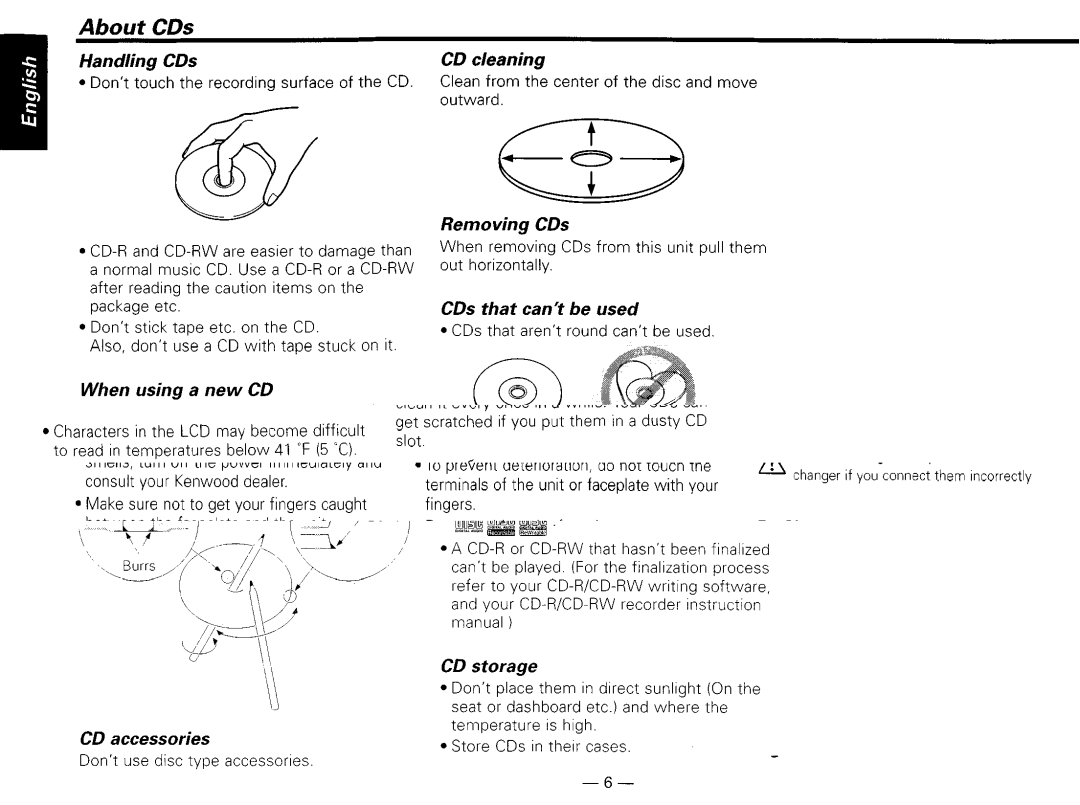
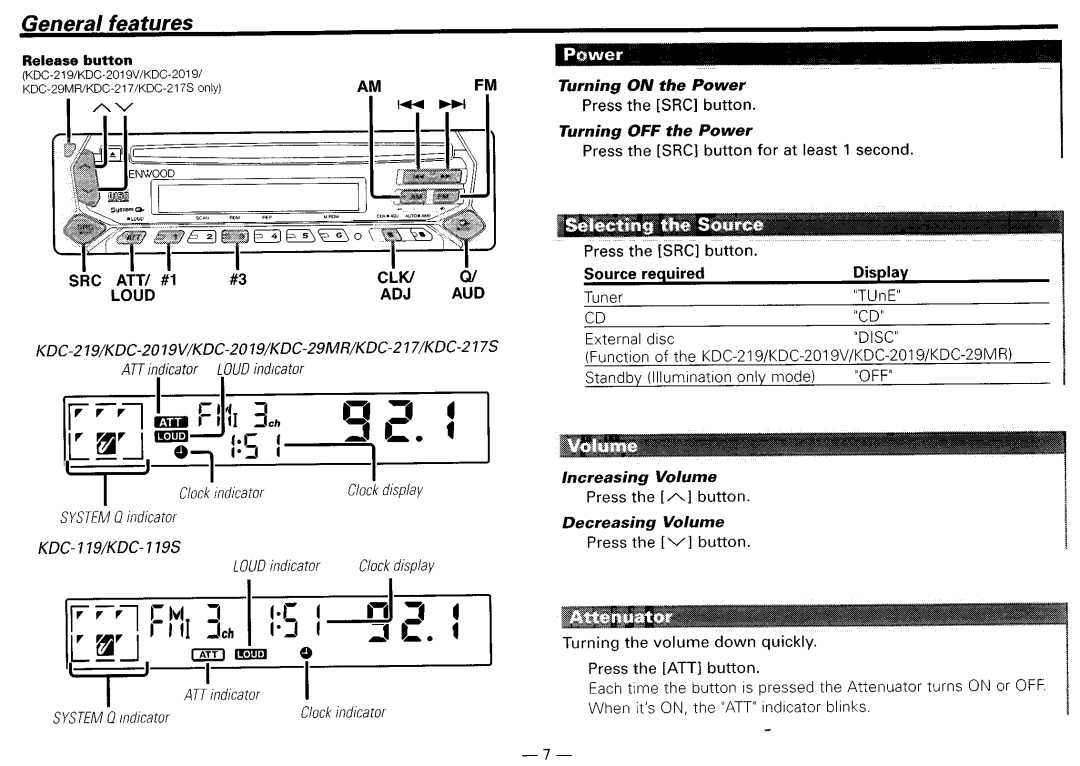
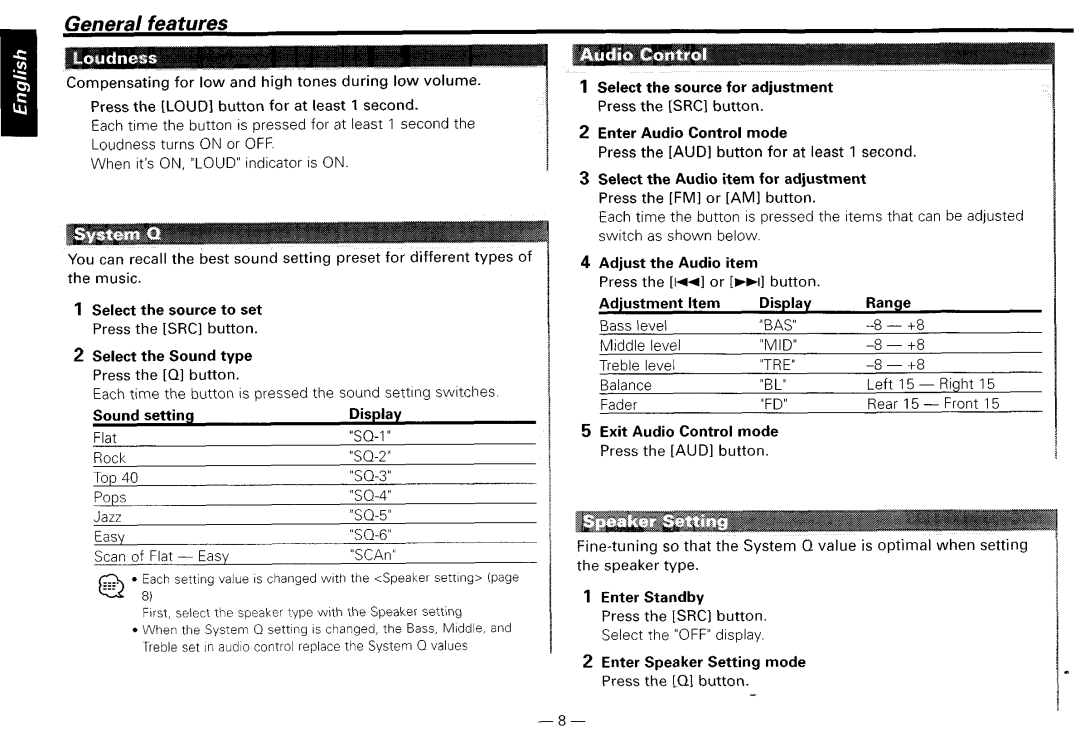
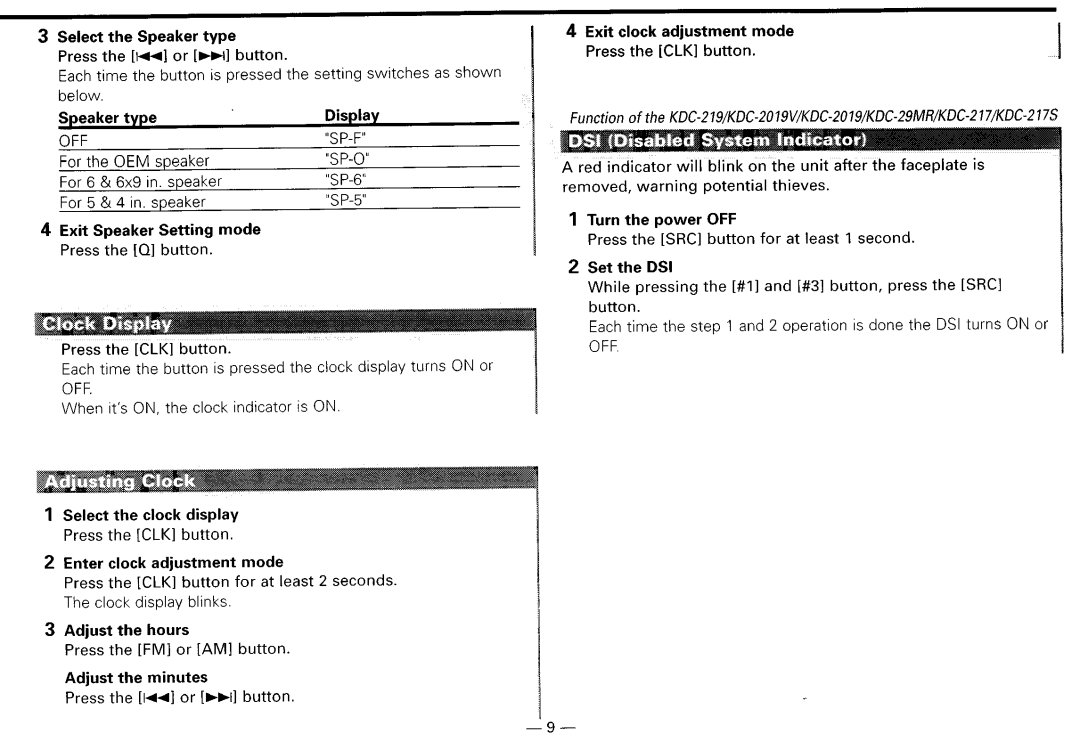
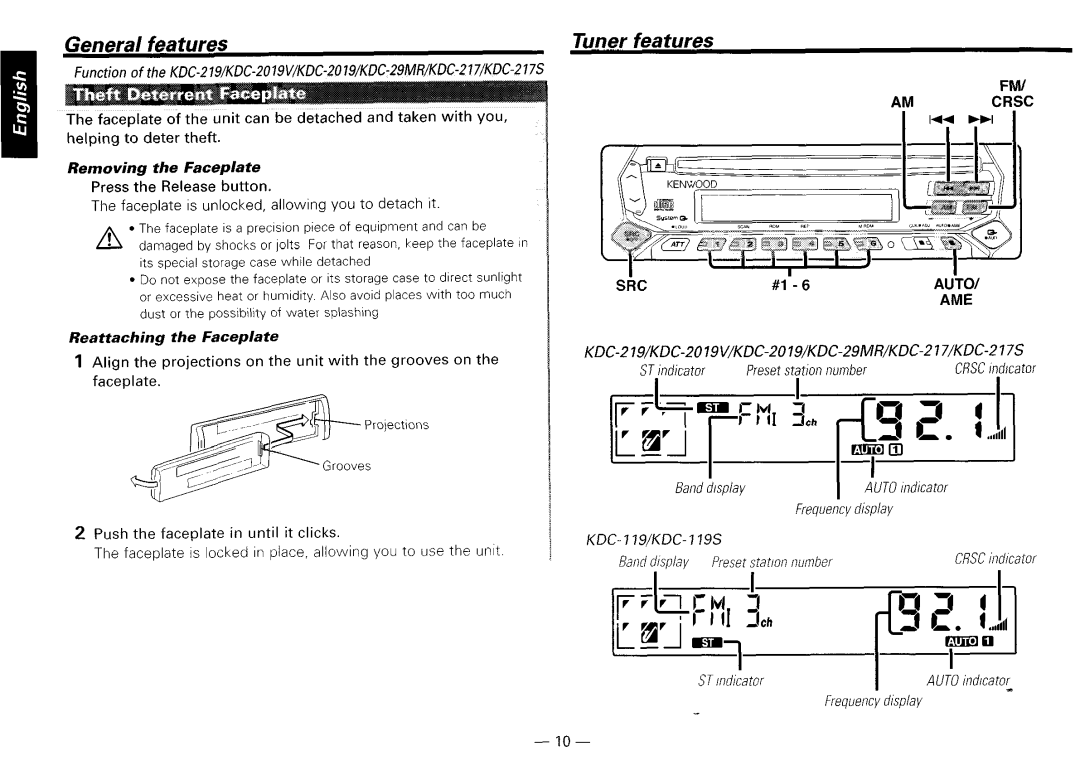
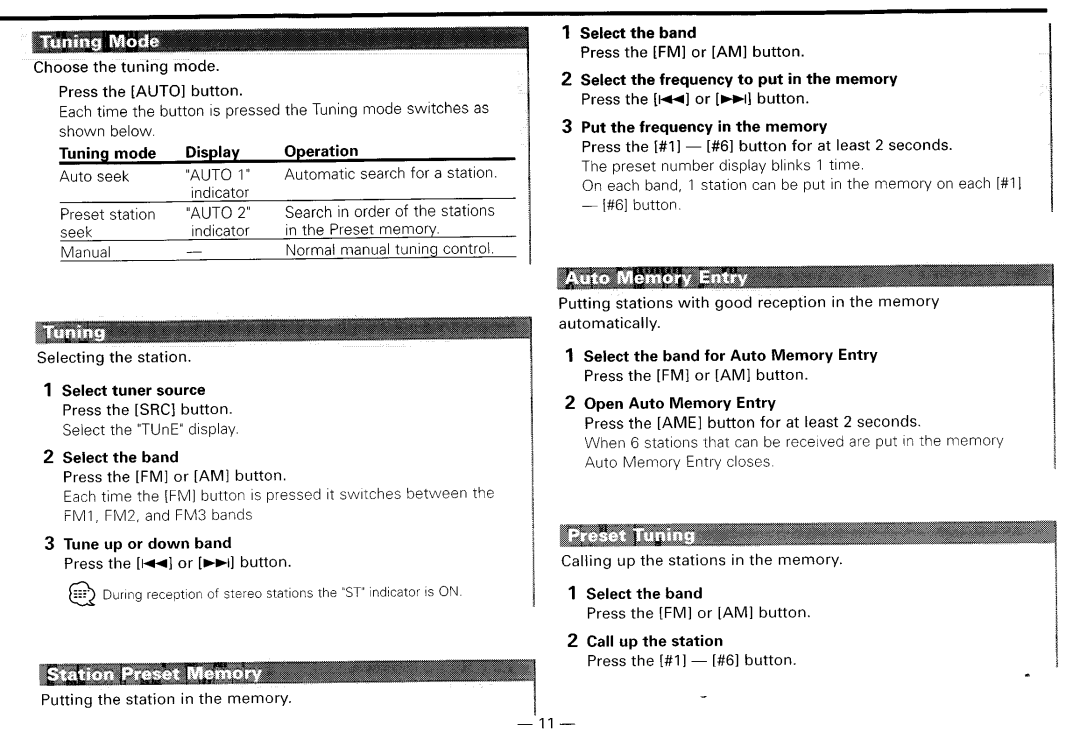
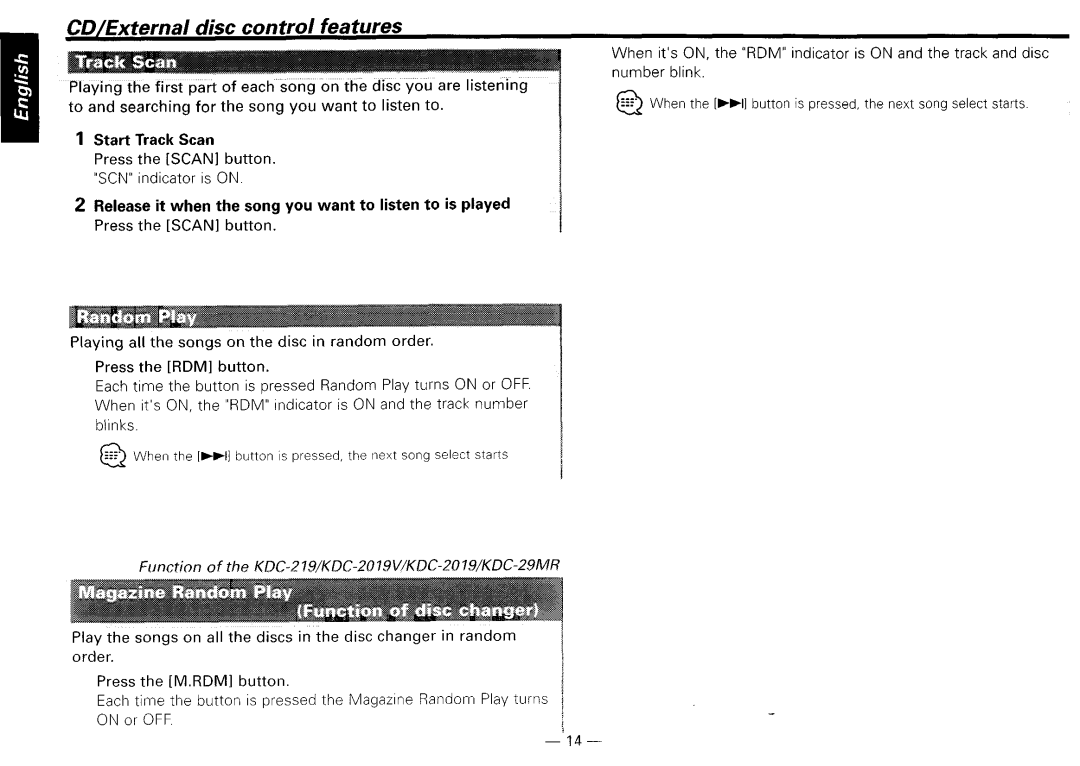
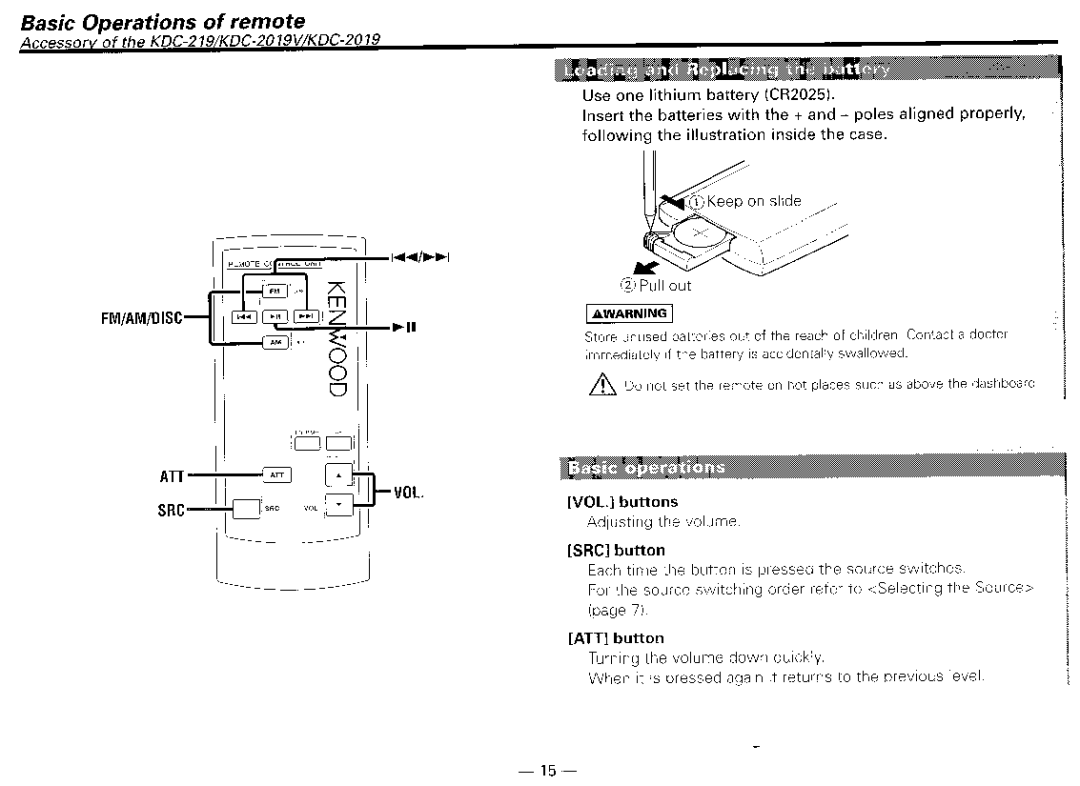
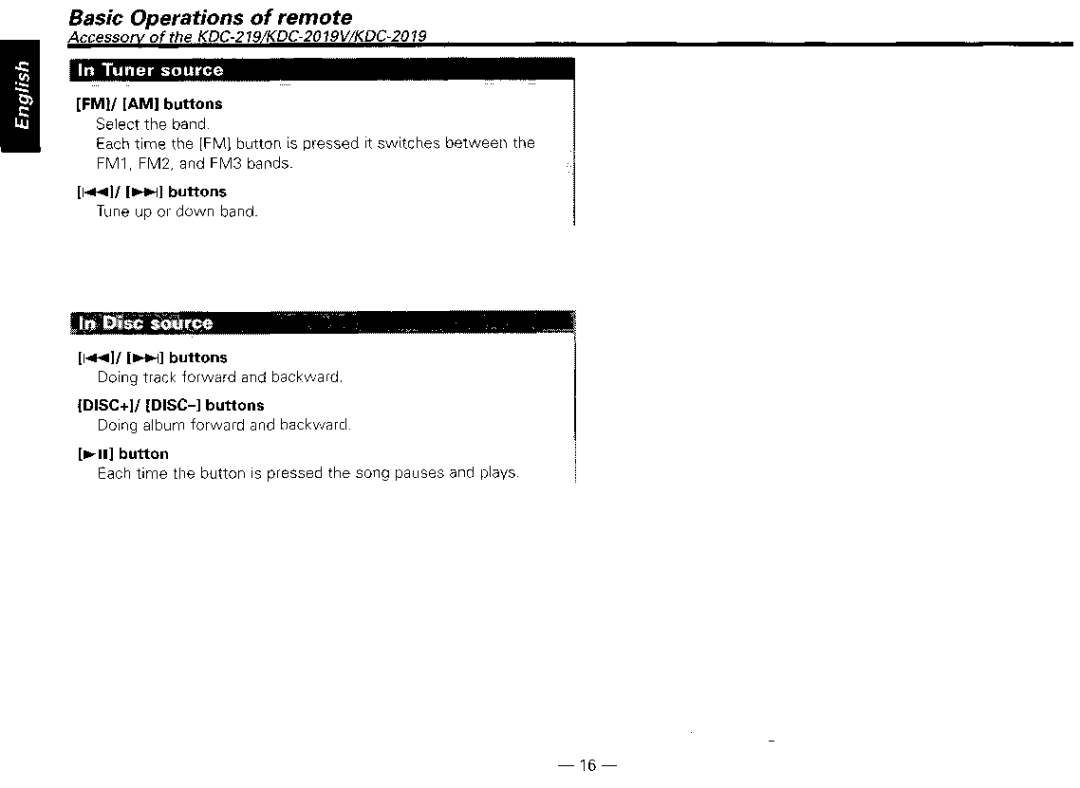
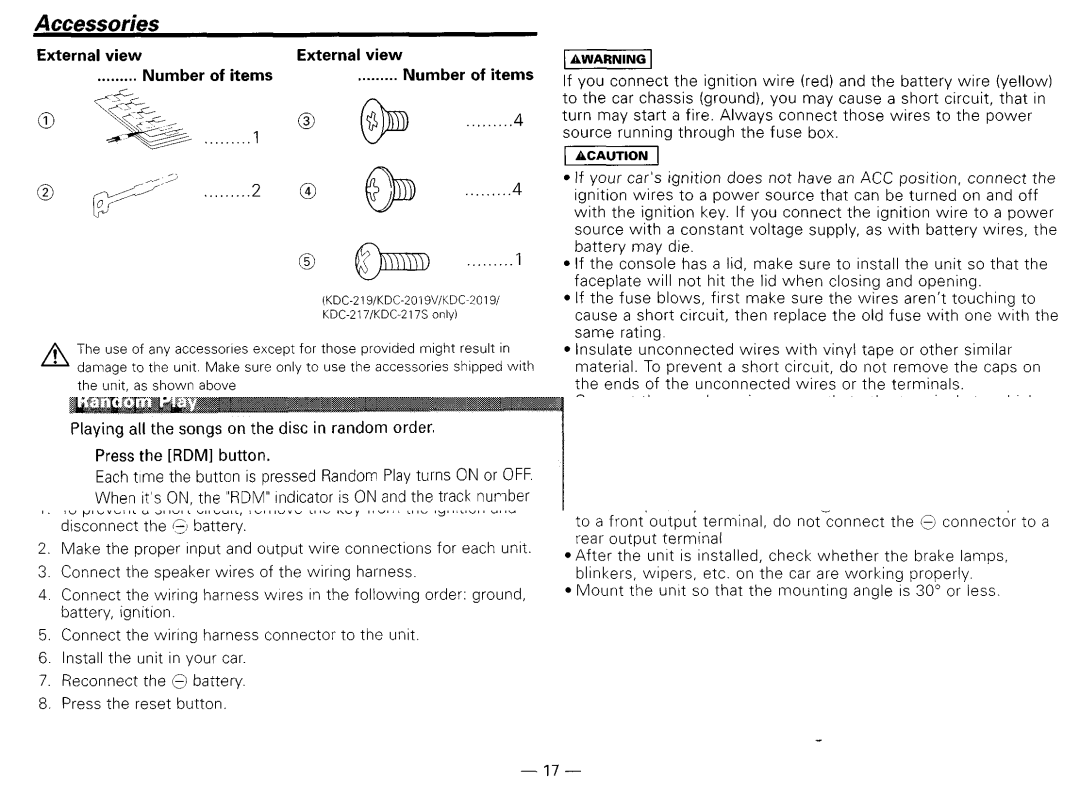
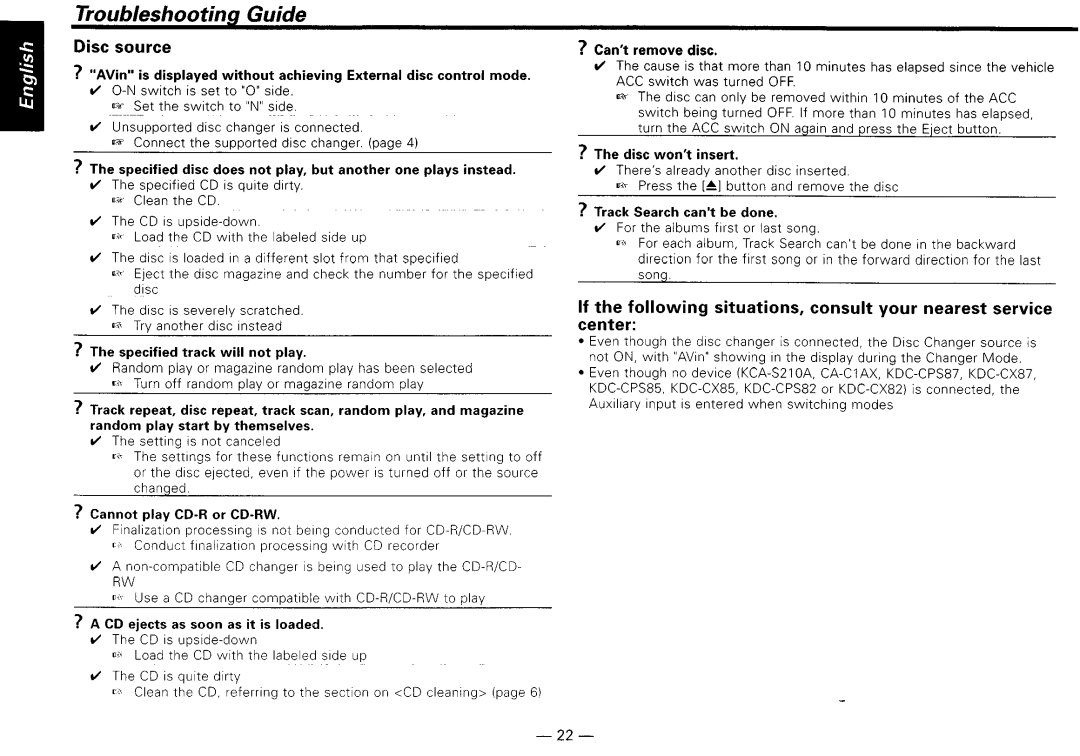
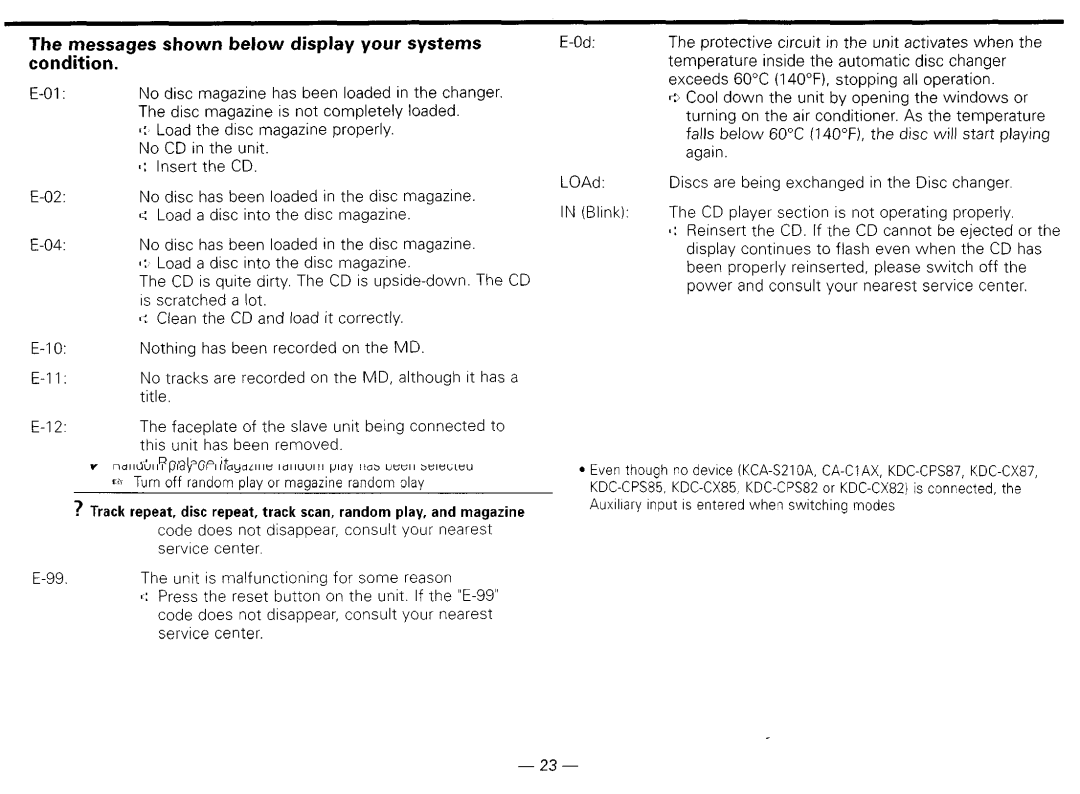
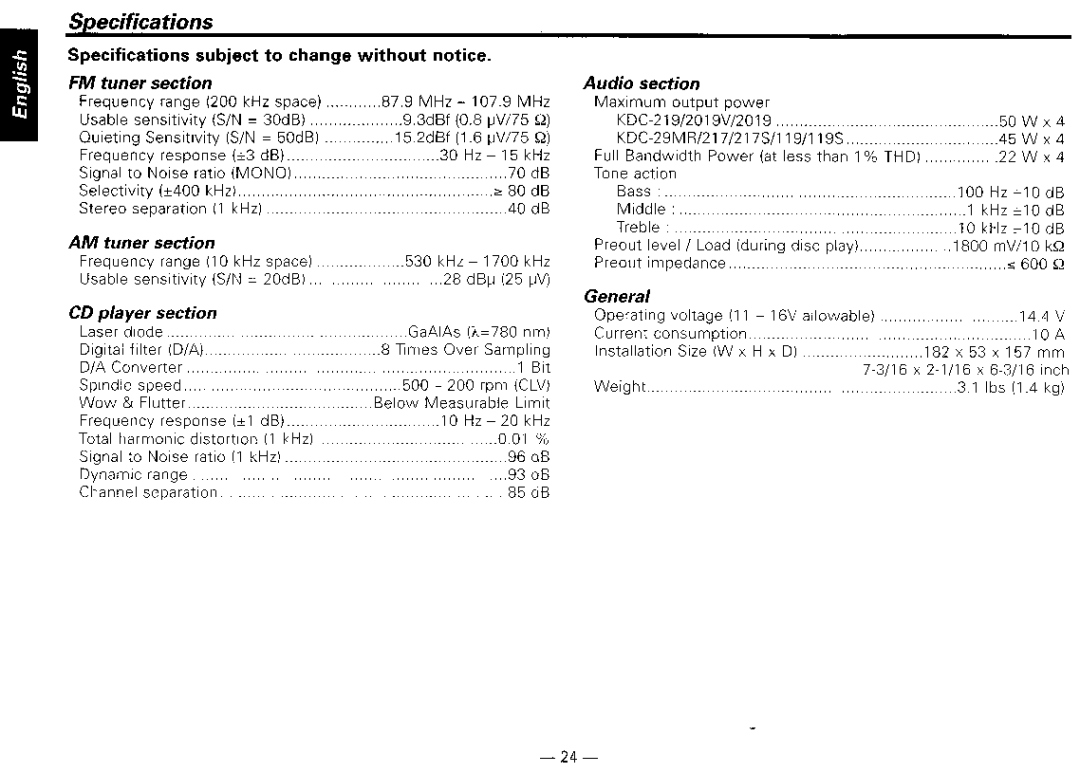
Kenwood KDG119S Installing in Japanese-Made Cars, Screwing the Faceplate on the Unit, Shown below

Page 19

W Installation

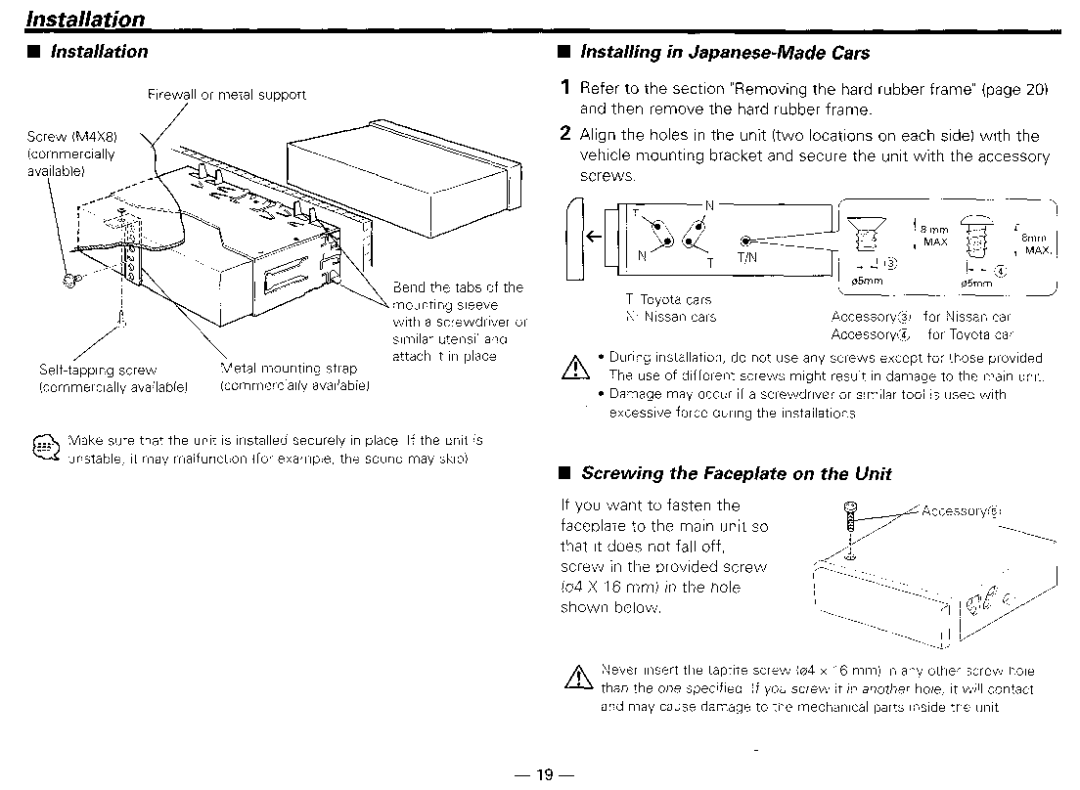
Frrewall or metal support

/

Screw (M4X8)

nInstalling in Japanese-Made Cars

1Refer to the section “Removing the hard rubber frame” (page 20) and then remove the hard rubber frame.

2Align the holes in the unit (two locations on each side) with the vehicle mounting bracket and secure the unrt with the accessory screws

Bend the tabs of the

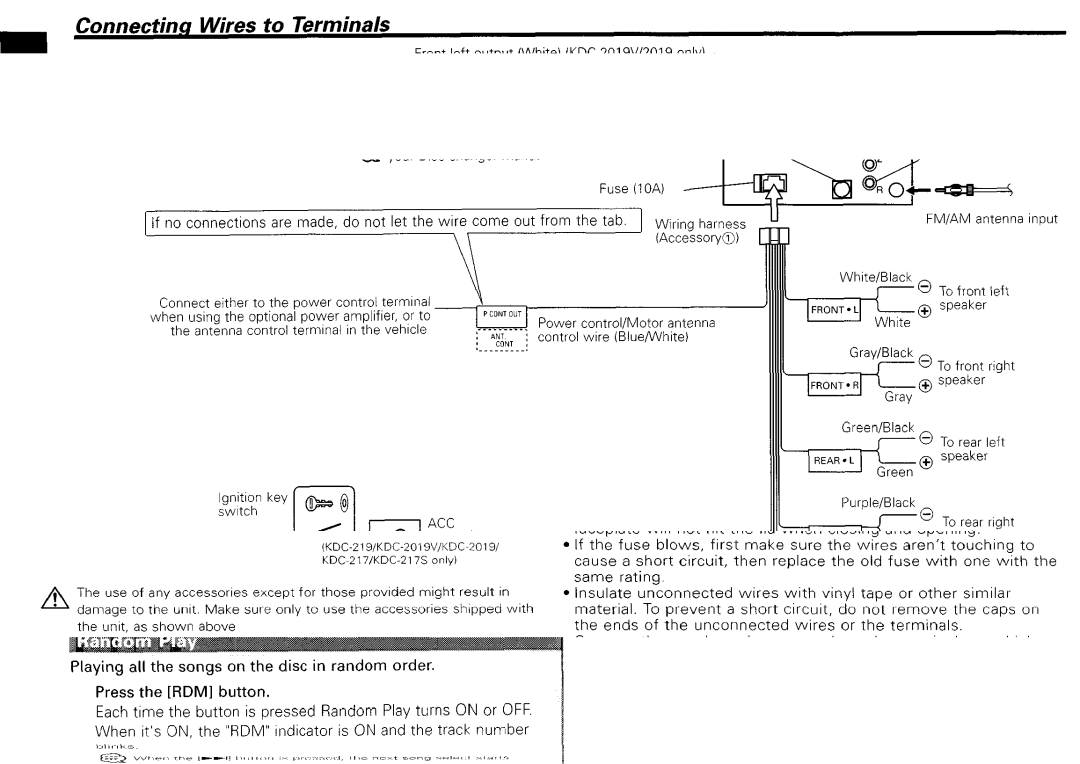
T Toyota cars

.I

i


\

Self-tapprng screw

Metal mounting strap

(commercrallv availablei

(commercially avarIable)

wrth a screwdrrver or srmrlar utensrl and attach It I” place

N Nrssan carsAccessory& for Nrssan car Accessory@) for Toyota car

lDurrng rnstallatron, do not use any screws except for those provided

A The use of different screws mrght result in damage to the marn unit

l Damage may occur if a screwdriver or srmilar tool E used with excessrve force during the rnstallatrons

Make sure that the unrt IS installed securely rn place If the unrt IS unstable, It may malfunction (for example, the sound may skrp)

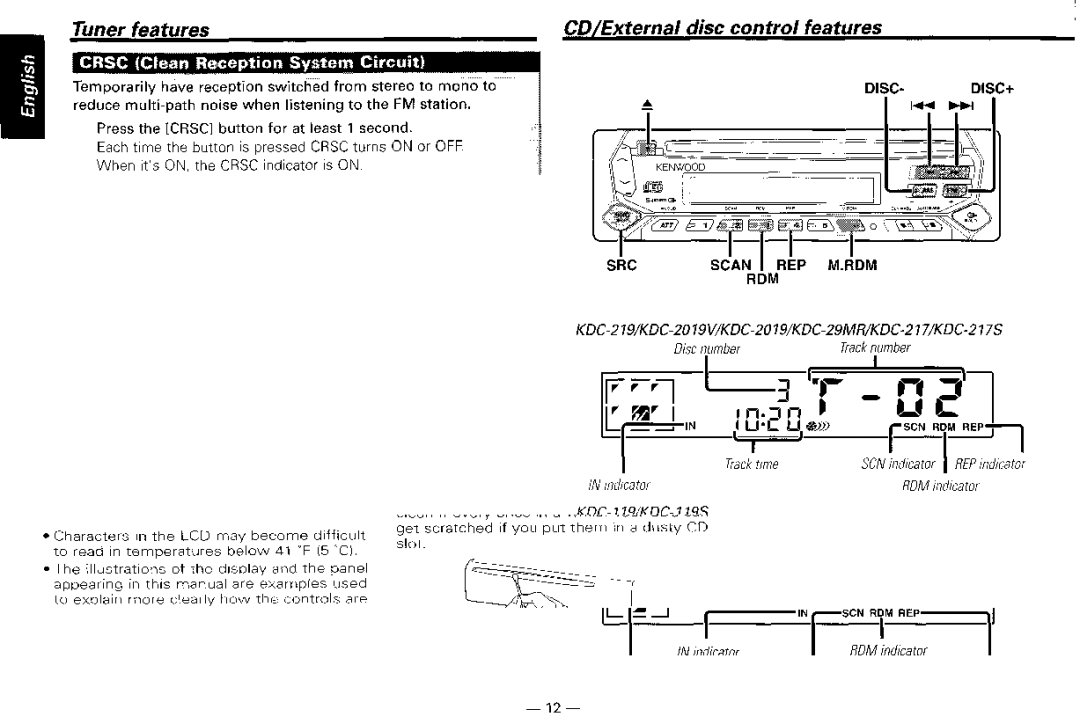
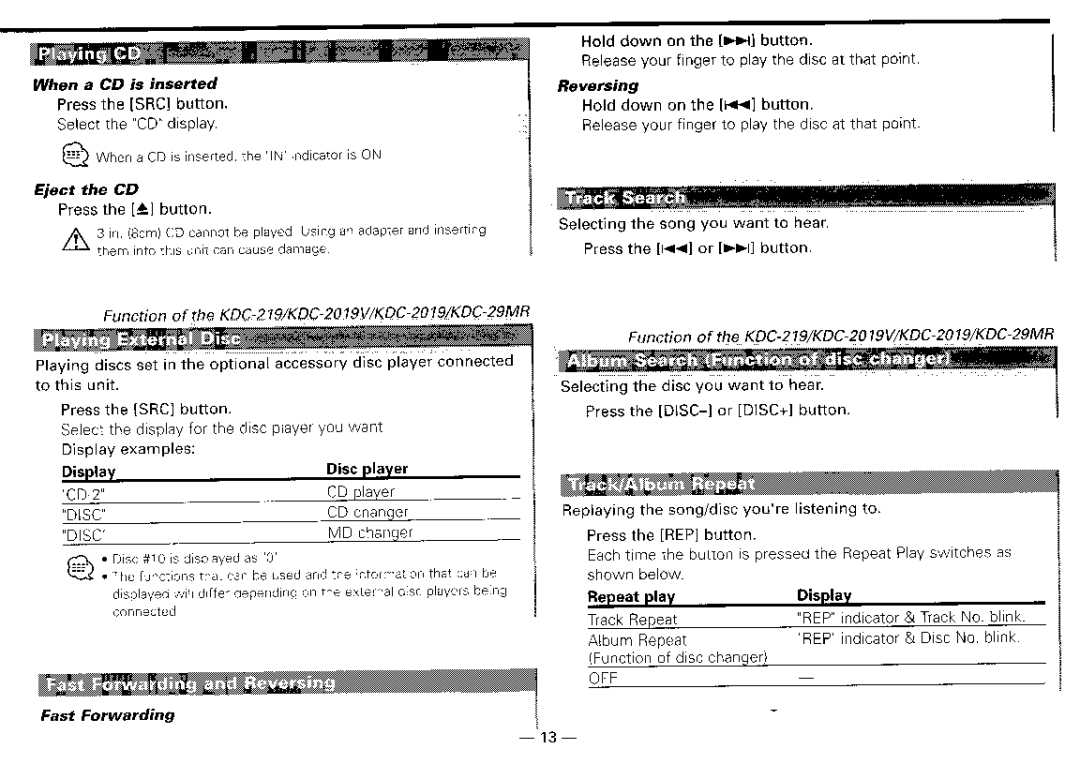
W Screwing the Faceplate on the Unit

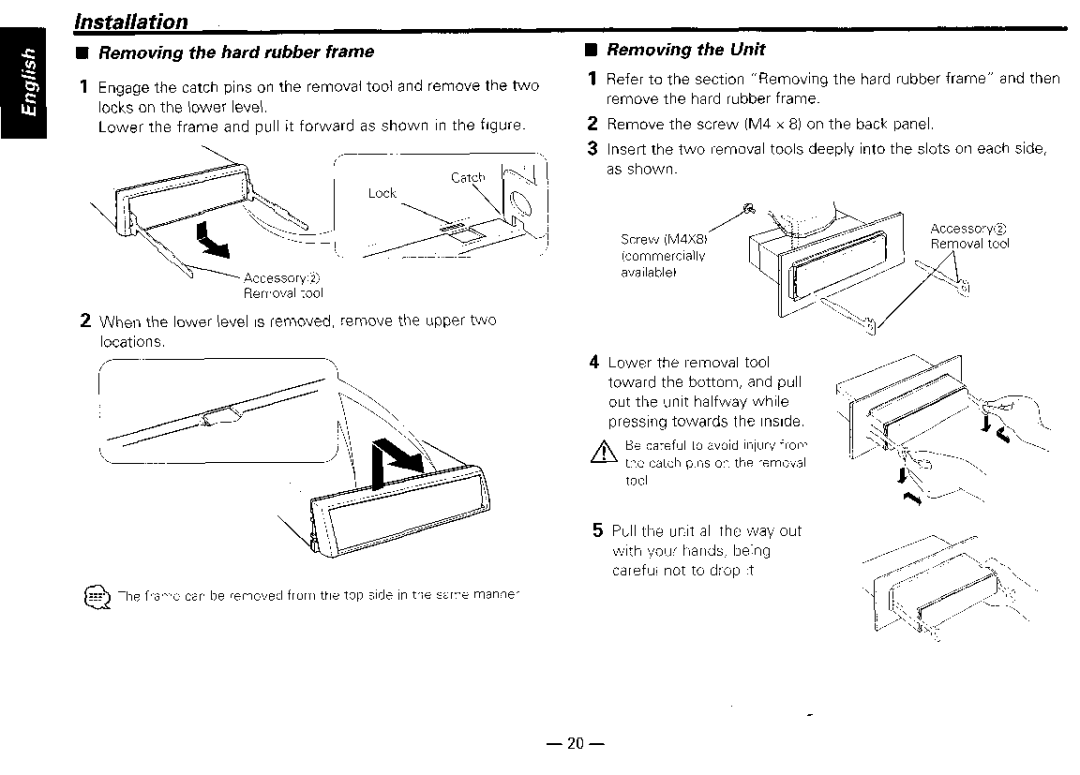
If you want to fasten the faceplate to the marn unrt so that It does not fall off,

screw in the provided screw (04X 16 mm) In the hole

shown below.

Never insert the taptrte screw (04 x 16 mm) I” any other screw hole A than the one specified If you screw it rn another hole, It wrll contact

and may cause damage to the mechanical parts rnstde the unrt

- 19-
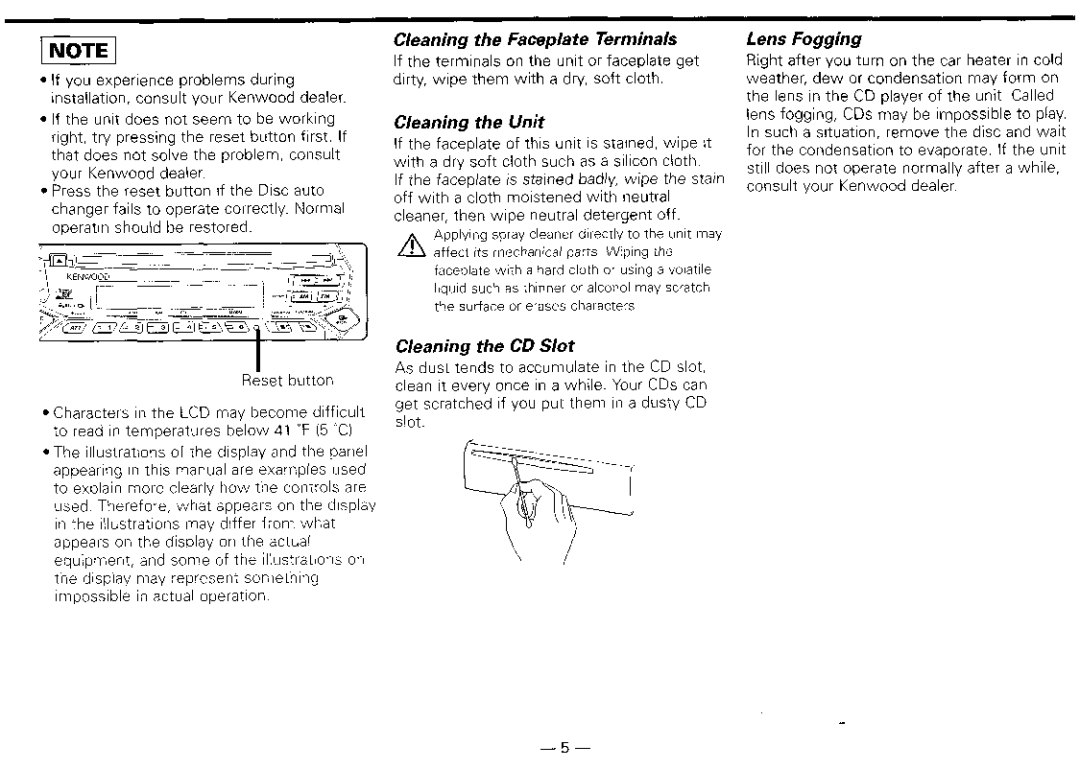
Image 19
Contents KDC-1 19S, KDC-217, KDC217S For your recordsSerial number Do!3EAccessories Installation Safety Precautions About CDs ..~Features Tuner featuresFCC Warning Location Bottom PanelDo not place any object between the faceplate and the unrt To prevent injury or fire, take the following precautionsAbout the disc changer to be connected Do Not Load 3-in. CDs in the CD slotReset button Cleaning the Faceplate TerminalsCleaning the Unit Cleaning the CD SlotHandling CDs CD cleaningWhen using a new CD CD accessoriesDisc General featuresSrci IsrciMID BAYTRE ‘5p-6 Adjust the minutes Press the ~rrl or I buttonKDC-219/KDC-2019V/KDC-2019/KDC-29MR/KDC-217/KDC-217S Tuner featuresSTjndicator Preset stgion number SRCAuto seek PresetManual Normal manual tuning Control Selecting the station ShownDISC-DI RDM CD/External disc control featuresIv indicator RDMindxator KDC- 7IS/KDC- 179s Tracknumber RDMindicator Tracktime SCNinghcatorChanger Album Repeat REP indicator Disc No. blinkRdmi Play Songs on All Discs Disc changer in random OrderSrci button Basic Operations of remoteATT button Basic Operations of remote Number of items Installation ProcedurePower control/Motor antenna Screwing the Faceplate on the Unit Installing in Japanese-Made CarsShown below Removing the Unit Removing the hard rubber frameTuner source Disc source Troubleshooting GuideAgain LOAd Messages shown below display your systems conditionExchanged Disc Changer Blink CD player Section SpecificationsSpecifications To change without FM tunerKenwood 858-1365-04 Acaution AattentionWarranty Card USA