CROSSOVER SETTINGS AND GAIN ADJUSTMENT
Your Directed Audio power amplifier needs to be adjusted carefully to achieve maximum performance. These are some guidelines to follow when fine-tuning the amplifier.
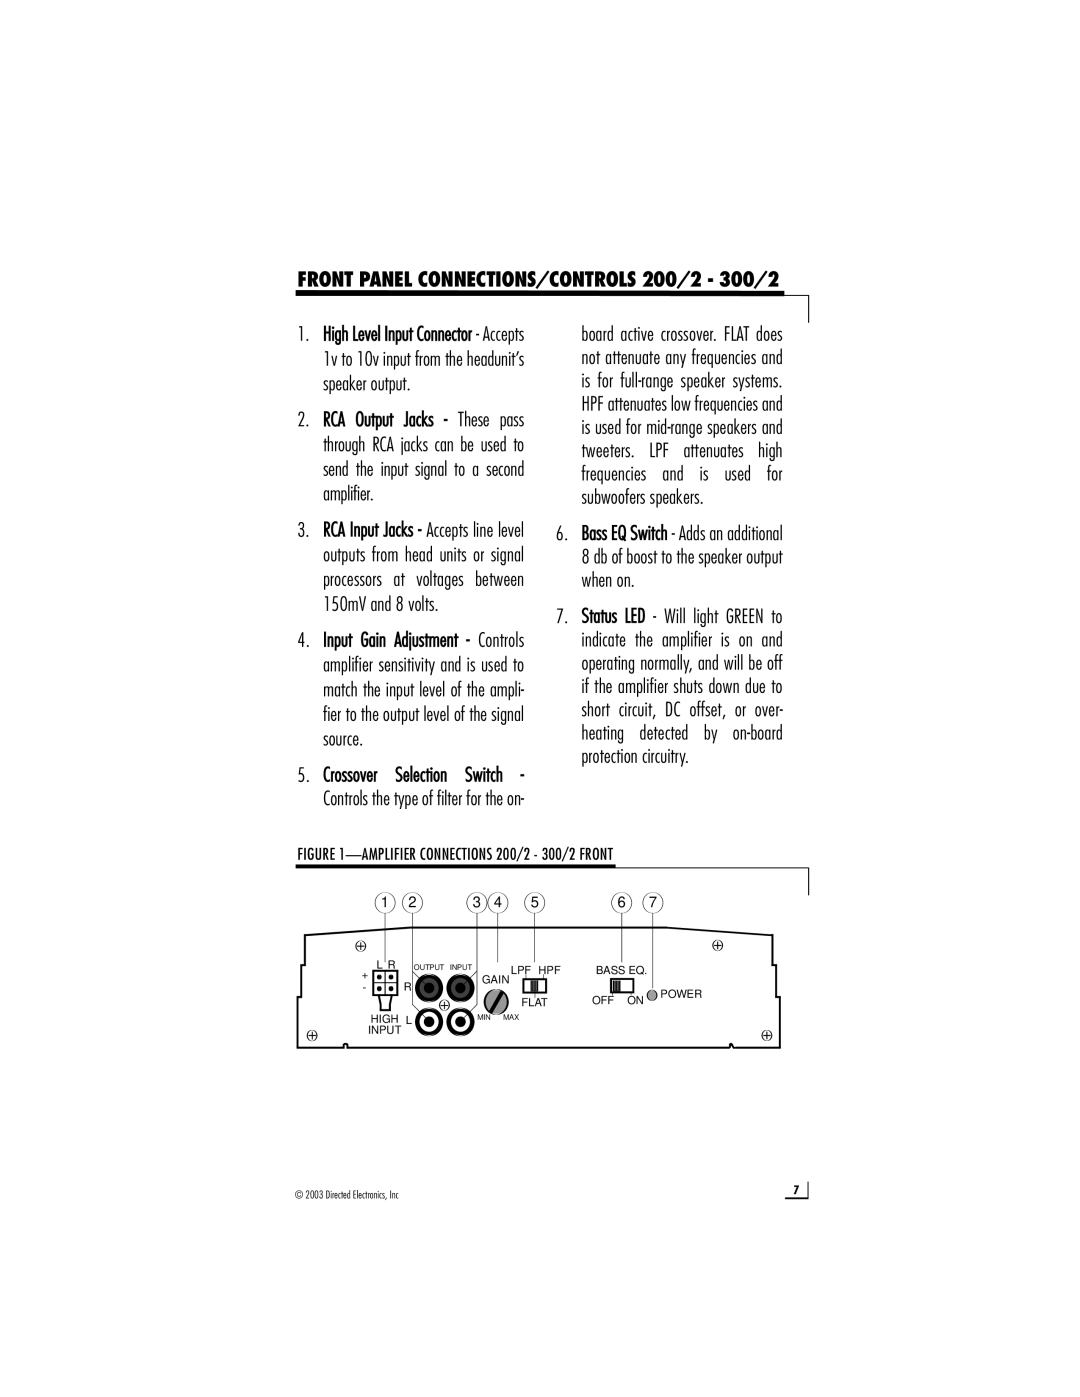
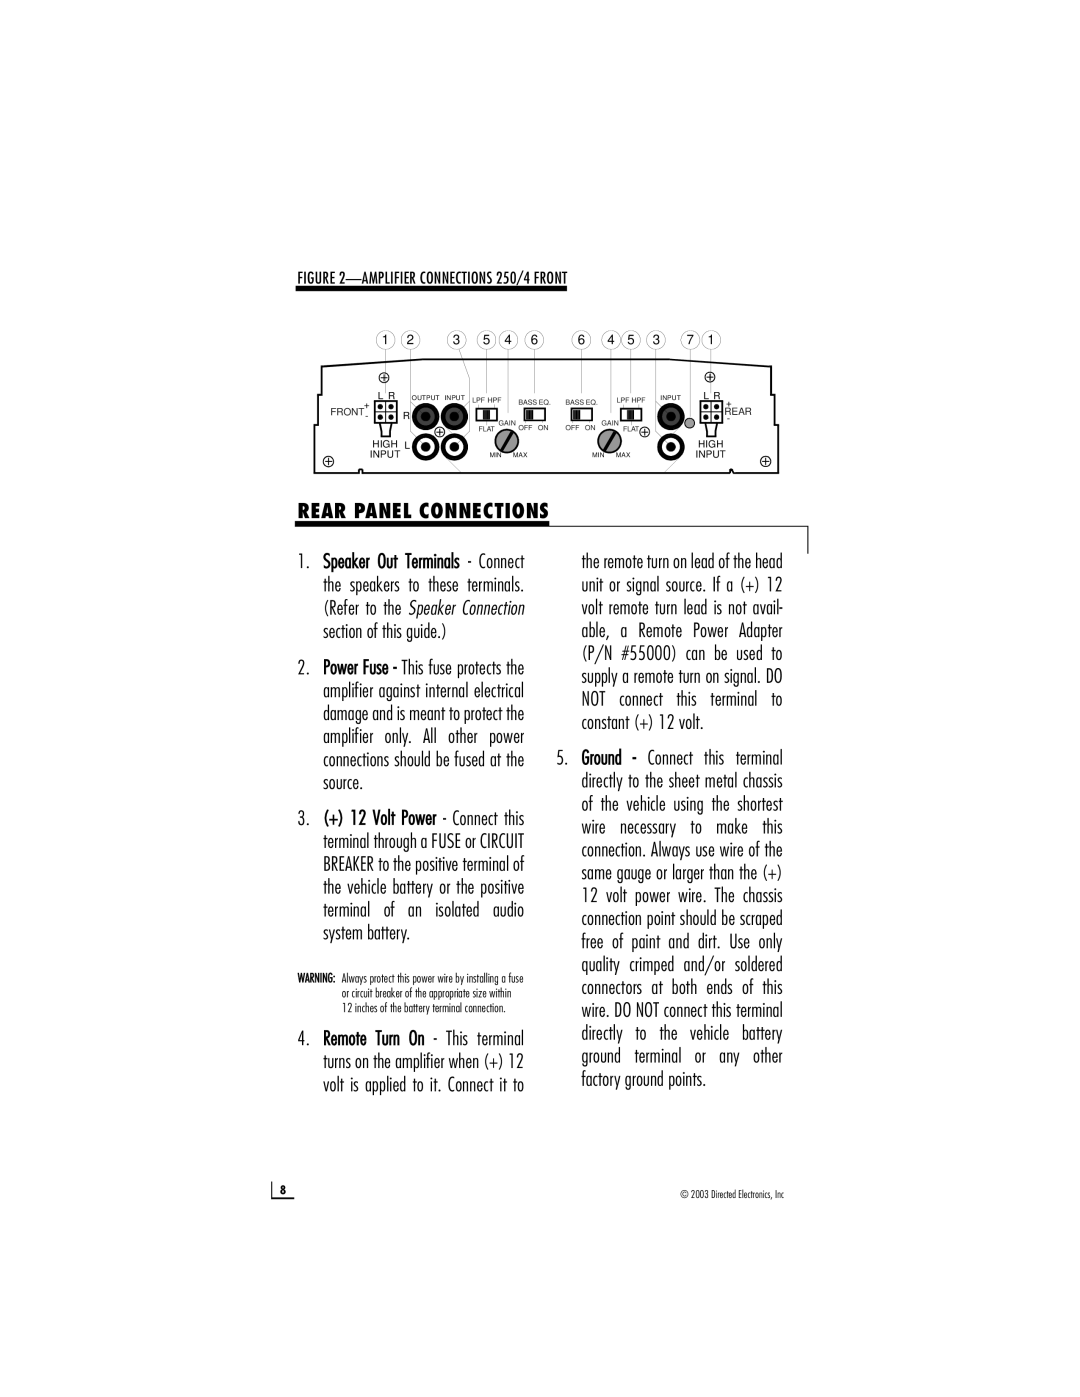
For full-range and simultaneous stereo/mono bass applications, the crossover selection switch should be set to FLAT. If the amplifier is driving your subwoofers, set the switch to LPF, and for mid-bass/midrange output, set to HPF.
The gain adjustment allows you to set proper signal match for clean, quiet ampli- fier operation. For full-range and simultaneous stereo/mono bass applications, start by playing some music you are familiar with. With the gain adjustment on the amplifier in the middle of its rotation, bring up the volume on your head unit to the 3/4 volume setting or until you start to hear distortion or clipping. If you hear distortion before you reach the 3/4 volume setting of your head unit, reduce the gain setting on the amplifier and start to raise the head unit volume again. When you can listen to the music at or slightly above 3/4 on your head unit without audible distortion, slowly raise the gain of the amplifier until distortion is heard, then back off the gain until the distortion is not audible. This setting will allow you to reach full output with all but the quietest of source material, while avoiding excessive noise in the system.
The same procedure should be used for adjusting the amplifier when the on-board crossover is set to LPF or HPF, but you will also have to take into consideration the effect that gain adjustment has on system frequency response and imaging. Again, plan on spending some time with music that you know, getting the gain and crossover settings the way you like. Test discs and analyzers may help with this process, but in the end it's your ears that count - listen to the music!
12 | © 2003 Directed Electronics, Inc |

