CD CHANGER OPERATIONS 

This section is ONLY FOR
We recommend that you use one of the
If you have another CD automatic changer, consult your JVC car audio dealer for connections.
•For example, if your CD automatic changer is one of the
Before operating your CD automatic changer:
•Refer also to the Instructions supplied with your CD changer.
•If no discs are in the magazine of the CD changer or the discs are inserted upside down, “NO CD” or “NO DISC” will appear on the display. If this happens, remove the magazine and set the discs correctly.
•If “RESET 1 - RESET 8” appears on the display, something is wrong with the connection between this unit and the CD changer. If this happens, check the connection, connect the connecting cord(s) firmly if necessary, then press the reset button of the CD changer.
Playing CDs
ENGLISH
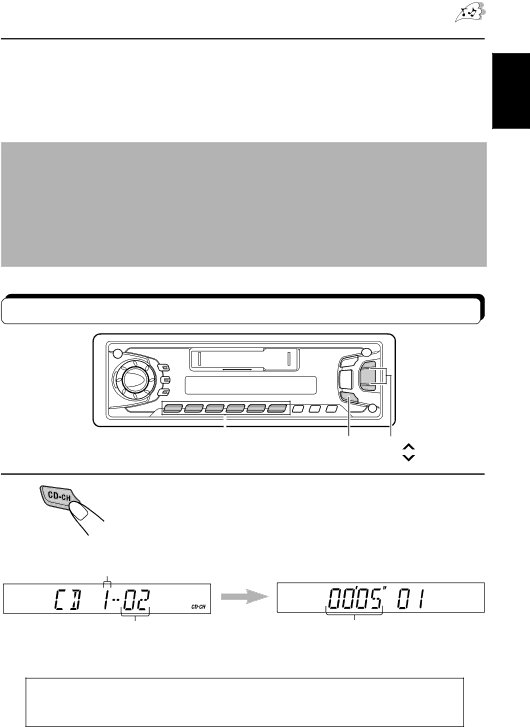
Number buttons | 1 ¢ |
| 4 |
1
Select the CD automatic changer.
Play back starts from the first track of the first disc.
All tracks of all discs are played back.
Disc number
Track number | Elapsed playing time |
| (The clock time is shown if you have pressed |
| DISP to see the clock time. See page 18.) |
Note on
When you press ![]()
![]()
![]()
![]() to turn on the power.
to turn on the power.
23