 Set up Voicemail and Additional Phones
Voicemail is included with your service. Dial “1” to set up and access. If you choose to use an answering machine instead, set it to fewer than 5 rings.
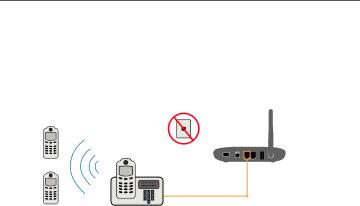
To place phones throughout your home, use a cordless phone system with multiple handsets. Wall jacks are not used with Wireless Home Phone.
Useful Tips
• Transferring a phone number can take up to five (5) days. During that time, you can make calls immediately on your Wireless Home Phone base. However, you must keep a phone plugged into your wall jack to receive calls on your old service until your transfer completes. Check transfer status at www.att.com/port.
See page 12 for details on transferring a landline phone number.
• The “Phone 2” port can be used to connect an additional phone or
10 | Getting Started |
• Your AT&T Wireless Home Phone base does not support incoming or outgoing fax service.
• Your AT&T Wireless Home Phone base does not support rotary or
Voicemail
Your Wireless Home Phone base comes with standard wireless voicemail. Follow the steps below to set up and use your voicemail.
Setup
Dial 1 on any home phone connected to the Wireless Home Phone base and wait four (4) seconds to connect to your AT&T wireless voicemail. Simply follow the voice prompts to complete setup. To
enable remote voicemail retrieval and for added security be sure to create a password during setup.
For more help on setting up your AT&T voicemail, go to att.com/ voicemailsetup.
Message Waiting
There are two indicators for a new message waiting: 1) the voicemail icon; and 2) an intermittent dial tone.
The voicemail icon ![]() on your Wireless Home Phone base flashes when a voicemail message is waiting. You will also hear an intermittent dial tone on any connected phone handset before placing a call.
on your Wireless Home Phone base flashes when a voicemail message is waiting. You will also hear an intermittent dial tone on any connected phone handset before placing a call.
Getting Started | 11 |