Electrical connections
Any electrical work required to install this appliance should be carried out by a qualified electrician.or competent person
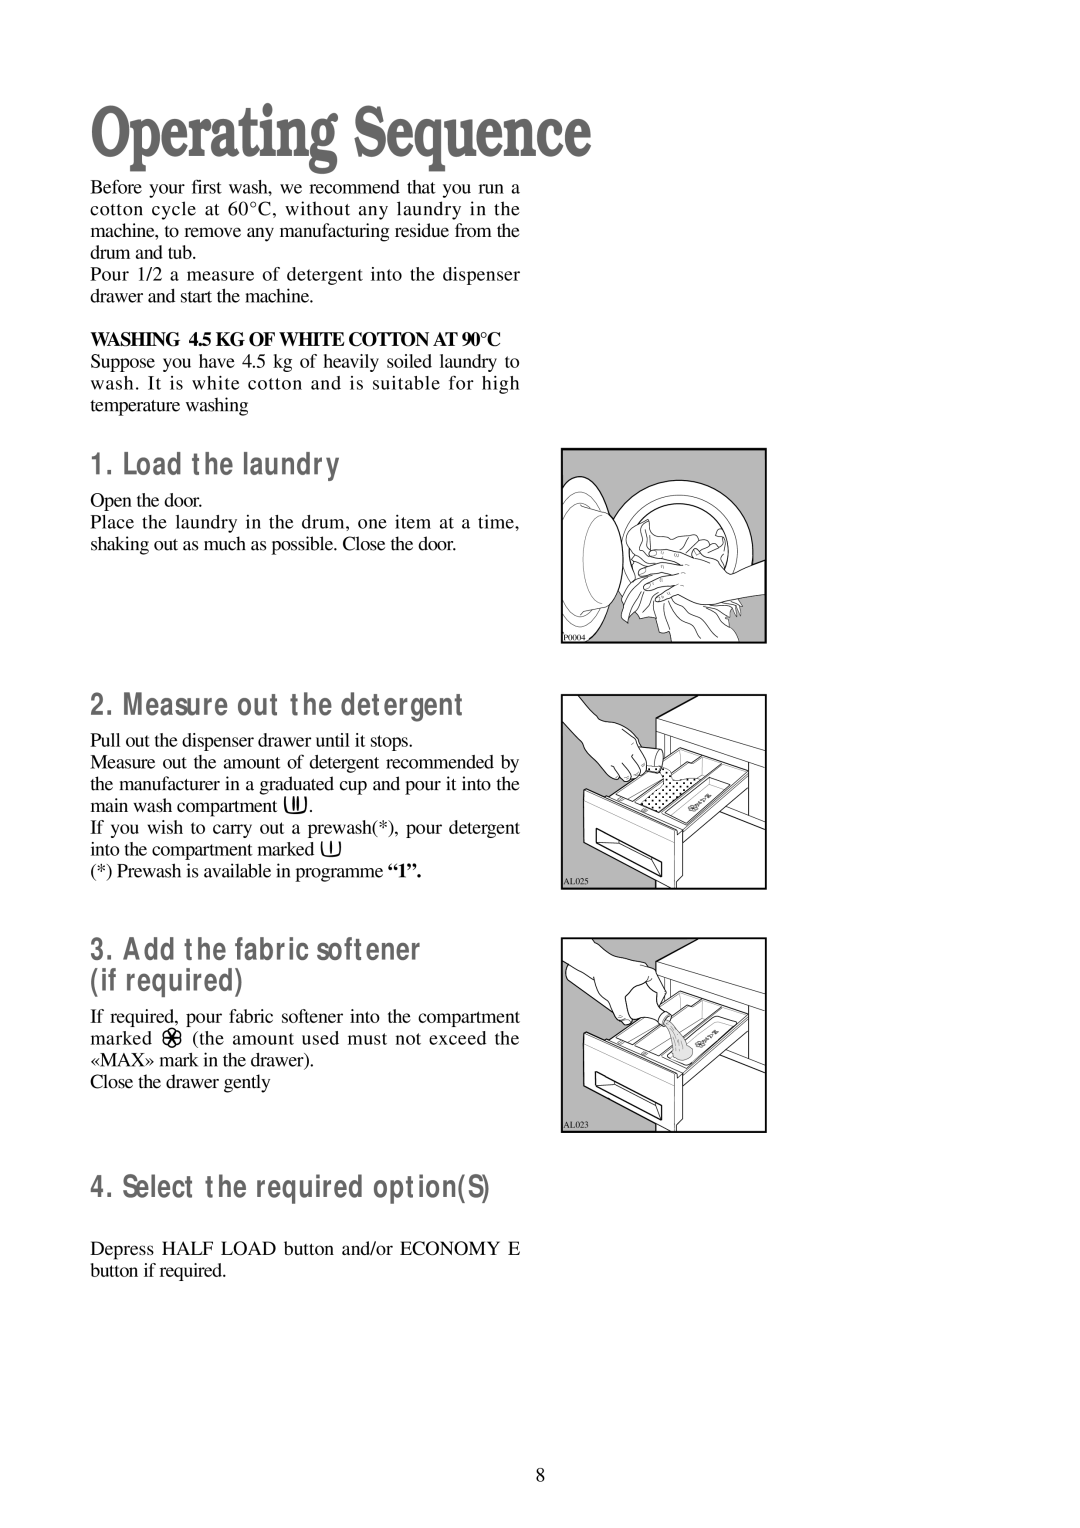
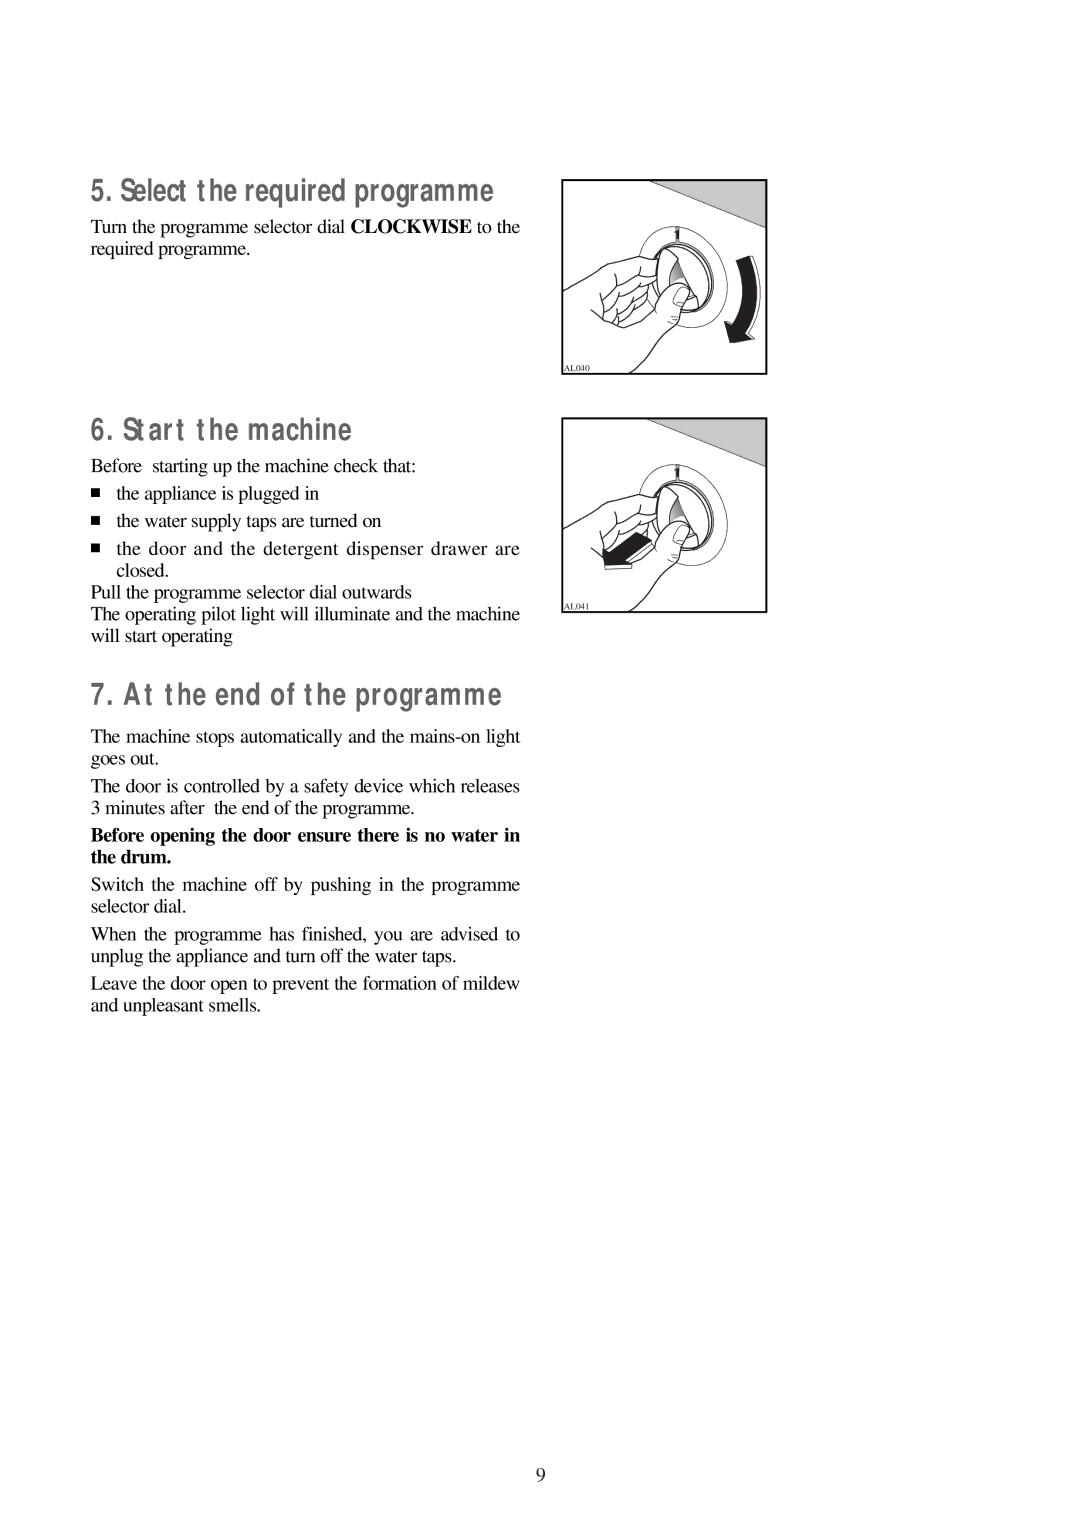
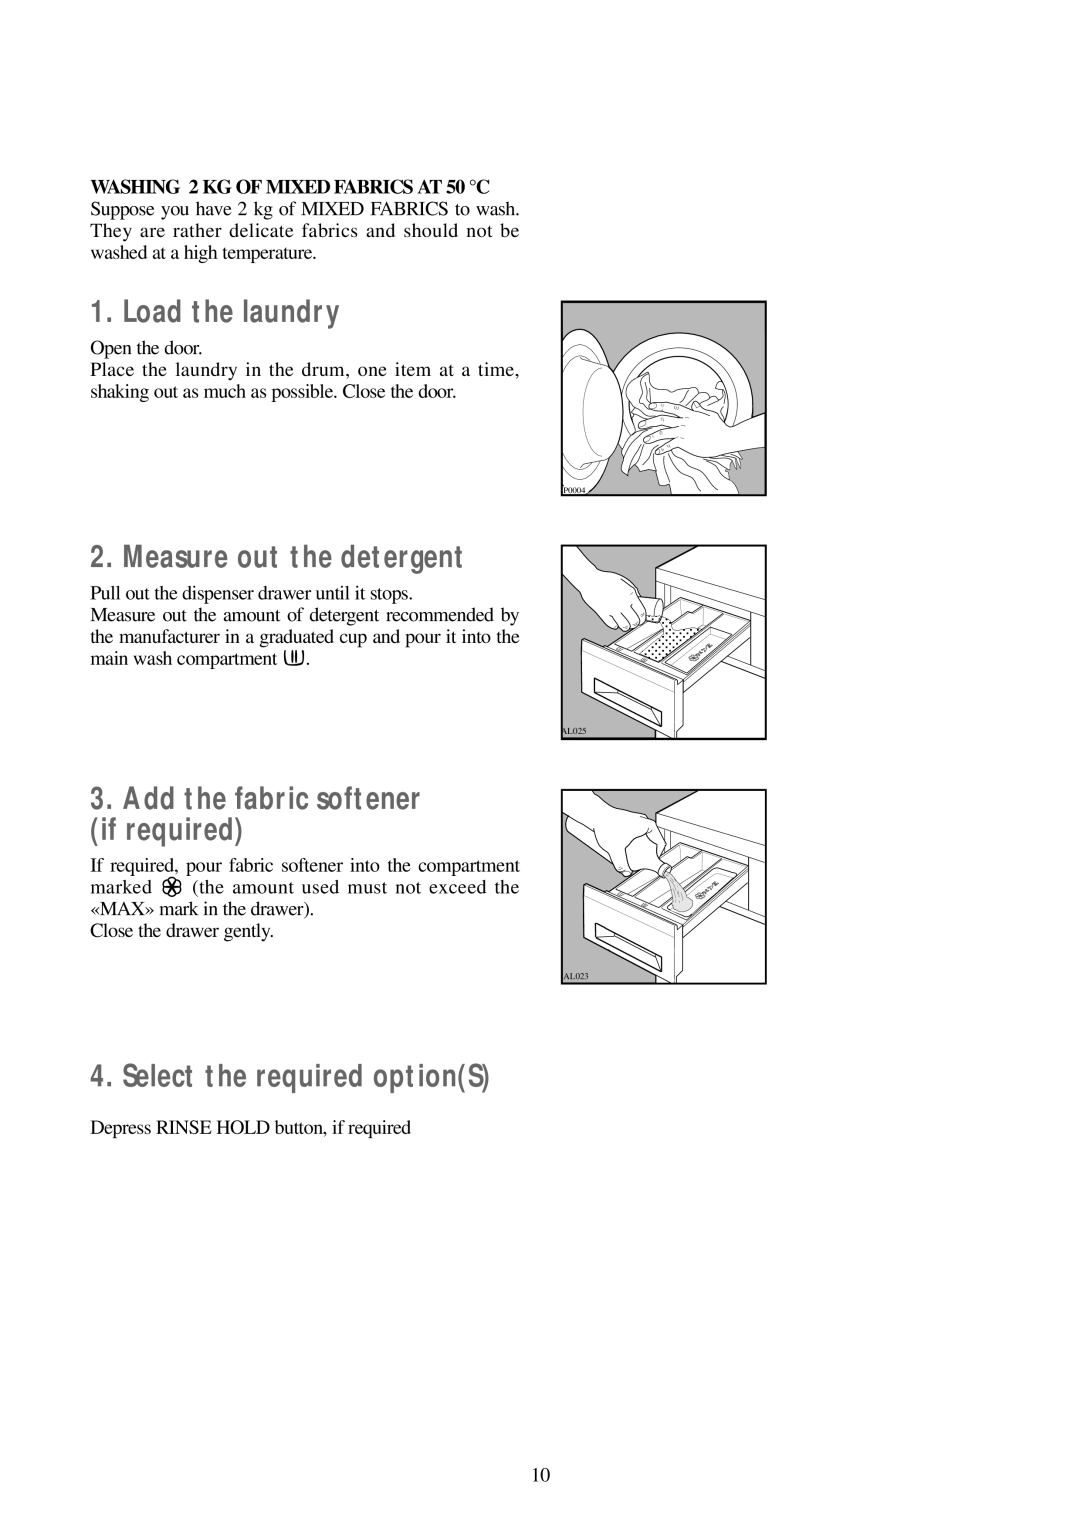
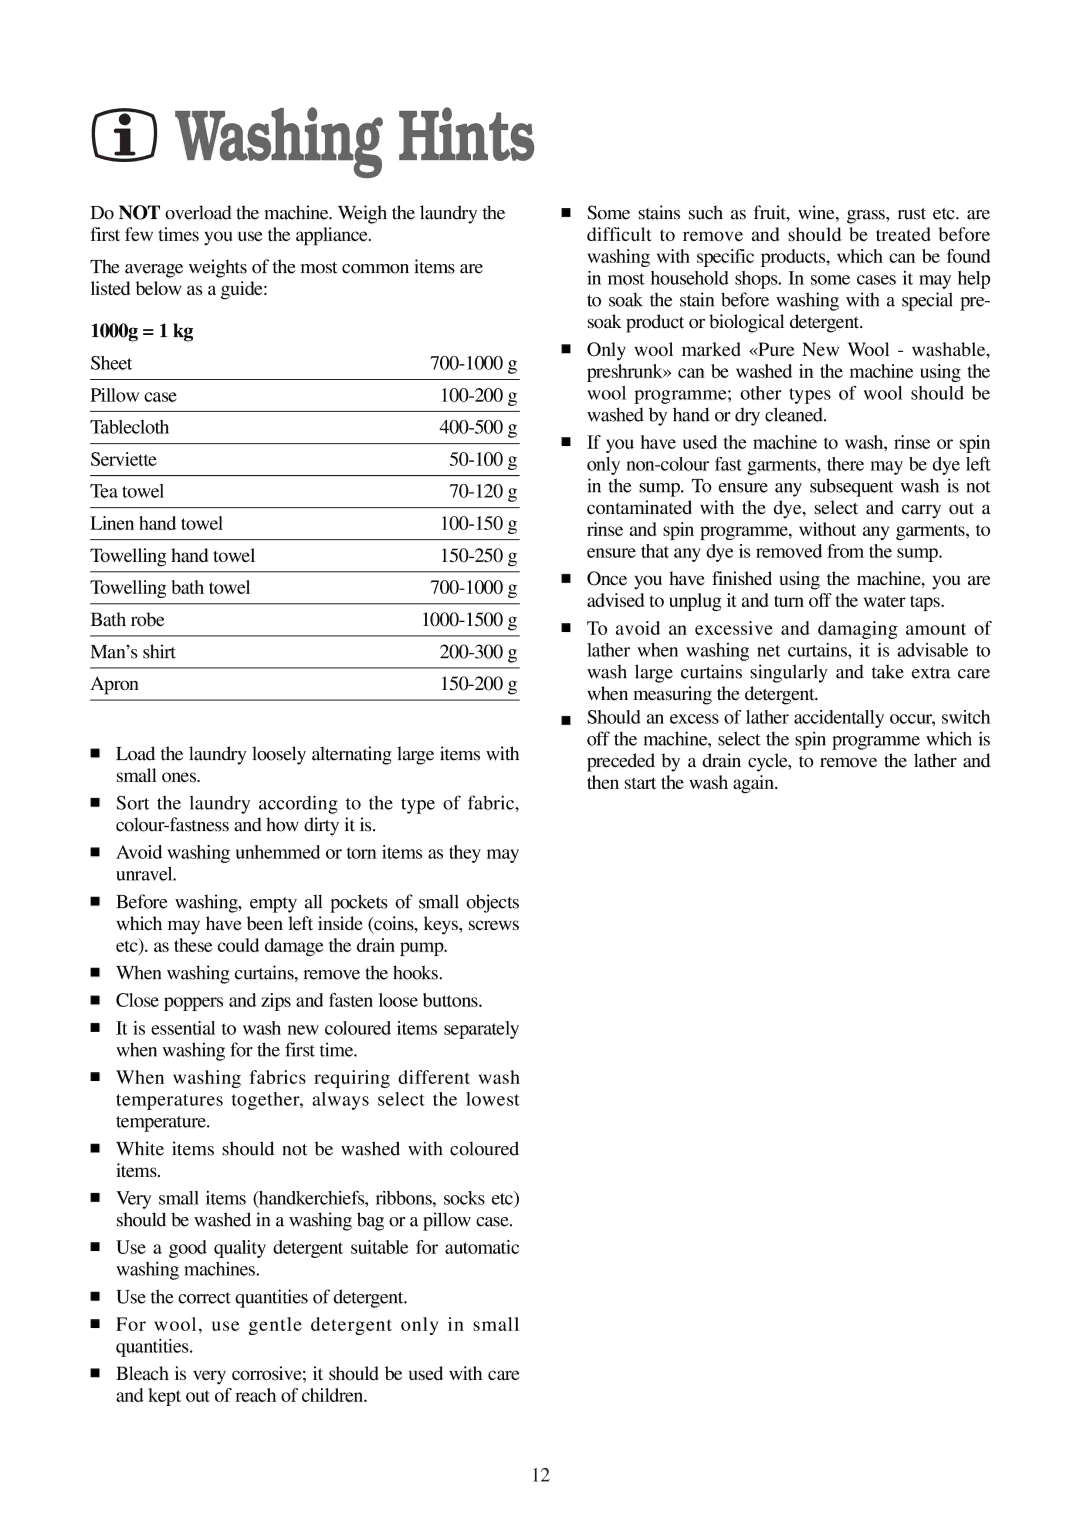
WARNING: THIS APPLIANCE MUST BE EARTHED.
The manufacturer declines any liability should this safety measure not be observed.
Before switching on, make sure the electricity supply voltage is the same as that indicated on the appliace rating plate(the plate is sticked to the rear of the appliance).
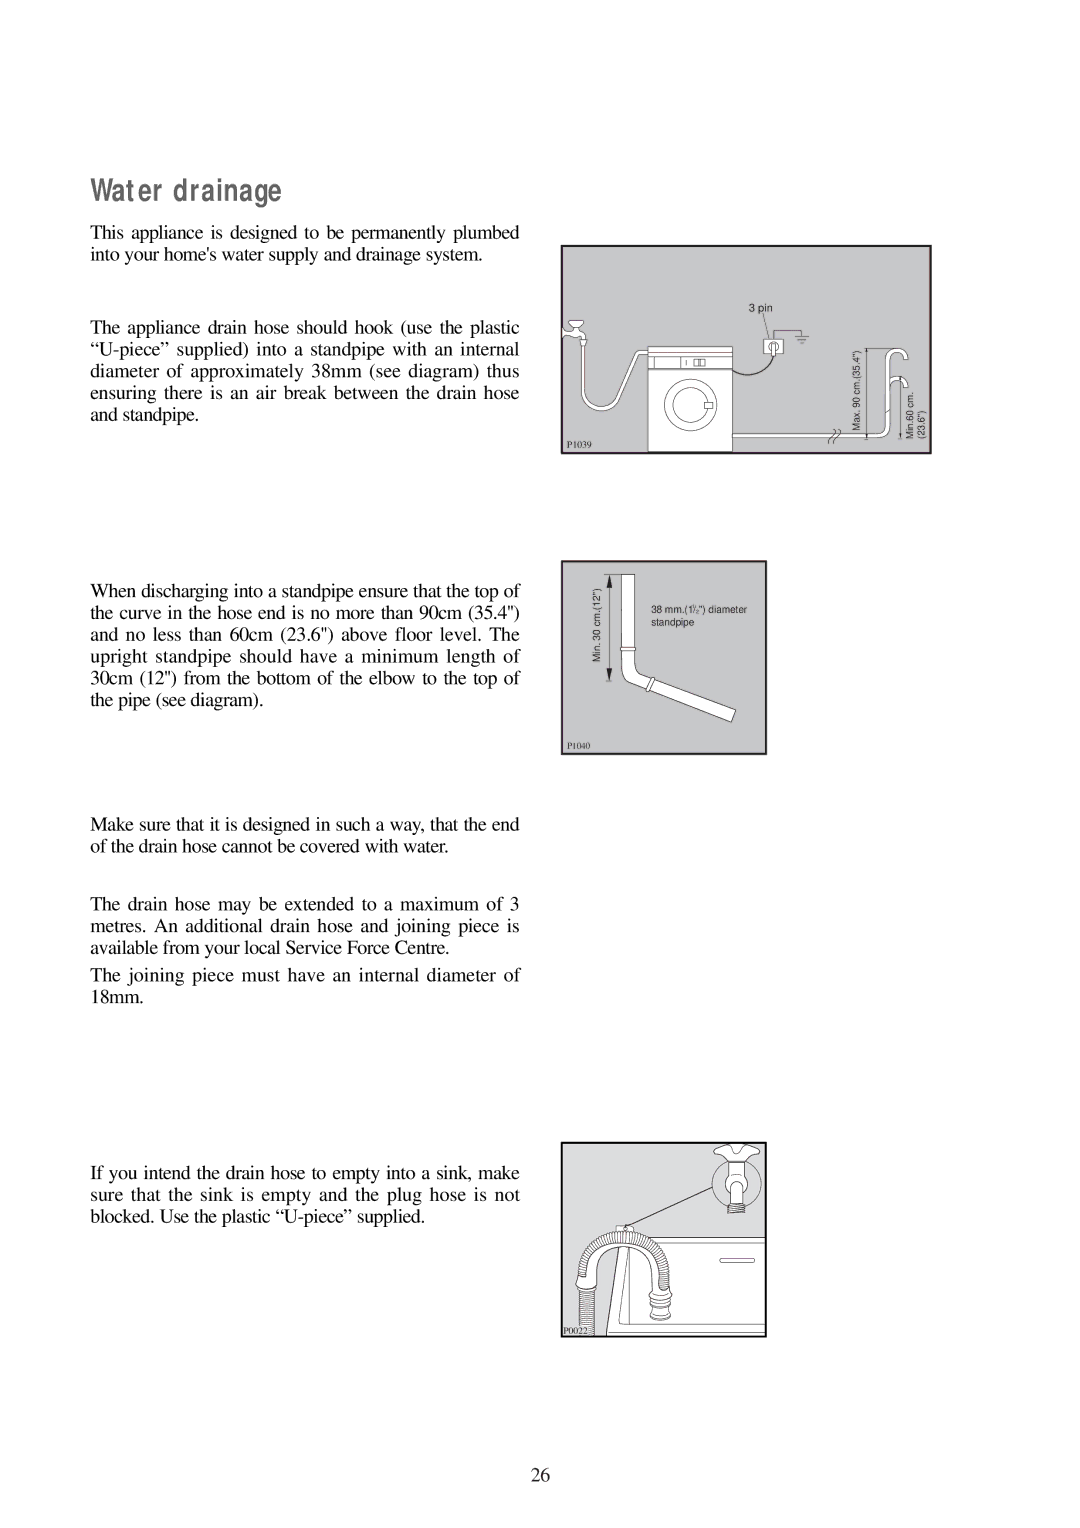
The appliance is supplied with a 13 amp plug fitted. In the event of having to change the fuse in the plug supplied, use a 13 Amp BS1362 fuse. Only ASTA or BSI approved fuses must be used.
Should the plug need to be replaced for any reason, proceed as described below.
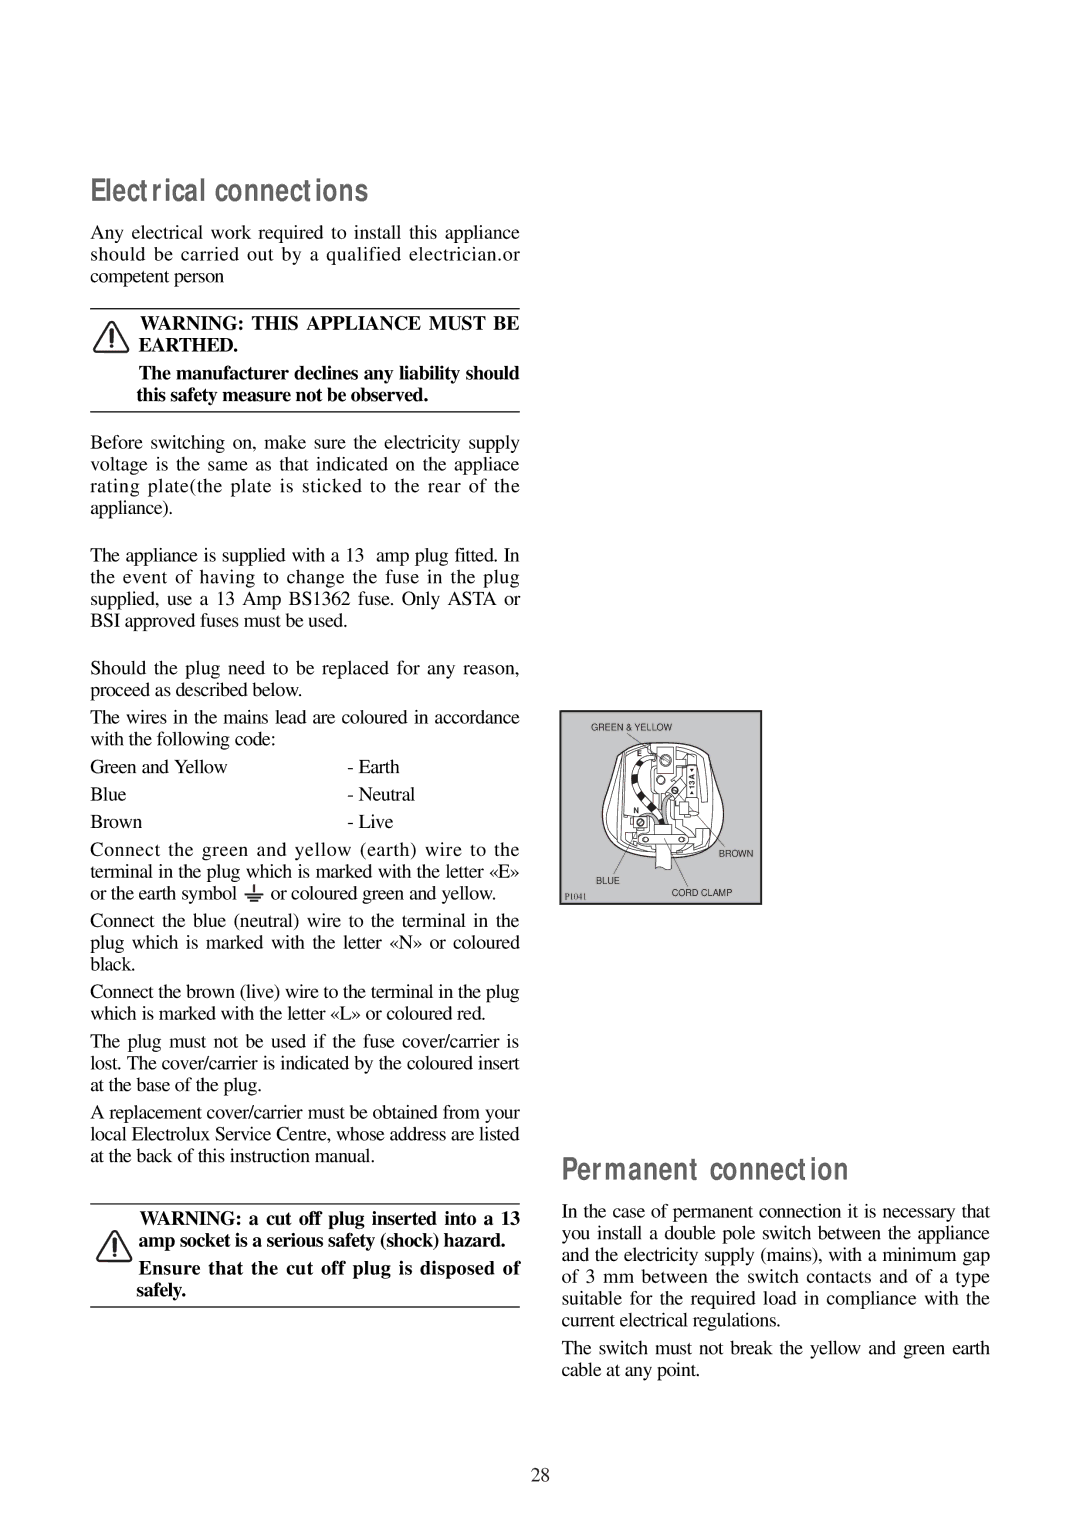
The wires in the mains lead are coloured in accordance with the following code:
Green and Yellow | - Earth |
Blue | - Neutral |
Brown | - Live |
Connect the green and yellow (earth) wire to the terminal in the plug which is marked with the letter «E»
or the earth symbol ![]() or coloured green and yellow.
or coloured green and yellow.
Connect the blue (neutral) wire to the terminal in the plug which is marked with the letter «N» or coloured black.
Connect the brown (live) wire to the terminal in the plug which is marked with the letter «L» or coloured red.
The plug must not be used if the fuse cover/carrier is lost. The cover/carrier is indicated by the coloured insert at the base of the plug.
A replacement cover/carrier must be obtained from your local Electrolux Service Centre, whose address are listed at the back of this instruction manual.
WARNING: a cut off plug inserted into a 13 amp socket is a serious safety (shock) hazard.
Ensure that the cut off plug is disposed of safely.
GREEN & YELLOW
E
A13
L
N
![]() BROWN
BROWN
BLUE
P1041 | CORD CLAMP |
|
Permanent connection
In the case of permanent connection it is necessary that you install a double pole switch between the appliance and the electricity supply (mains), with a minimum gap of 3 mm between the switch contacts and of a type suitable for the required load in compliance with the current electrical regulations.
The switch must not break the yellow and green earth cable at any point.
28
