Grizzly H3122 instruction manual Installing Strings, To install the guitar strings

Page 15
Machine Heads
The machine heads mount so the buttons are on the back side of the headstock.
To install the machine heads:
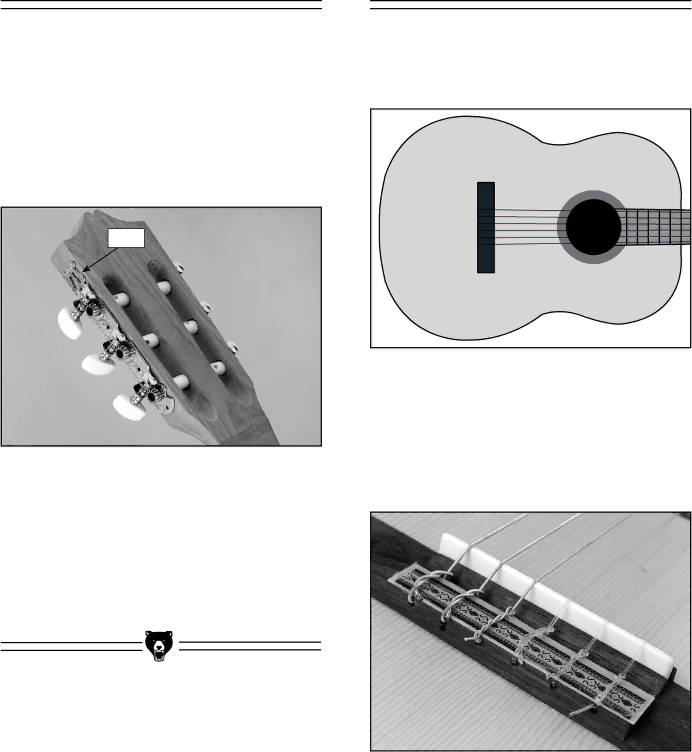
1. Slide the machine heads through the peg holes on the side of the headstock. Note— Make sure the lyre end of the machine head is positioned as shown in Figure 10.
Lyre
Figure 10. Correct tuning machine position.

4.Using a 116" drill bit, drill 516" deep holes straight through the screw holes in the machine heads.

5.Secure the machine heads to the guitar headstock with the included eight 516" wood screws.

Installing Strings

The correct position of the guitar strings are shown in Figure 11. The thin High E string is called the “1st” string and the thick Low E string is called the “6th” string.

6E

5 A

4 D

3 G

2 B

1 E

Figure 11. Correct guitar string position.

To install the guitar strings:

1.Slide the string ends through the holes in the bridge.

2.Tie the strings as shown in Figure 12.

Figure 12. Correct string knots.

(Continued)

H3122 Classical Guitar Kit

-13-

Image 15
Contents Classical Guitar KIT Page Table of Contents Safety Introduction 101 103 104 107 105 106 102 Parts InventoryRecommended Tools & Supplies SandingSupplies/Tools Guitar BodyBridge NeckFingerboardAssembly Neck to BodyTo attach the neck to the body To attach the fingerboard to the neck Fingerboard to NeckTo determine the correct bridge/nut loca- tions Bridge/Nut LocationsMasked bridge area Blocked sound hole Covered AreasPainting/Finishing To attach the bridge to the body Sound Hole DecalAttaching Bridge To attach the sound hole decalTo install the guitar strings Installing StringsDiscussed later in the manual String HeightCorrect 1st fret string heights Strings at the 1st fretTuning Important issues to consider when tuning a guitarTo tune the guitar Aftermarket Accessories Reference InfoGeneral Warranty & Returns Warranty Card BOX BELLINGHAM, WA Grizzly INDUSTRIAL, INC