Cleaning and Maintenance
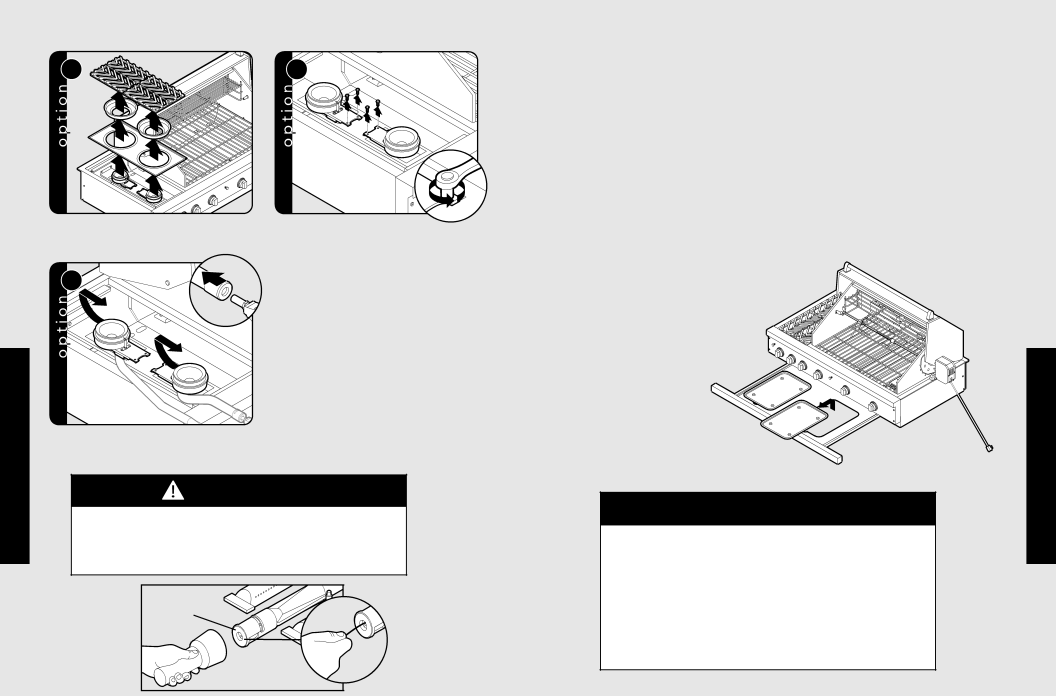
Removing Optional Side Burners for cleaning
1 | 2 |
Remove the grates, burner bowls, and | Remove bolts from side burners. |
grate support. |
|
3
Care | Lift side burners and separate air shutter | |
| ||
Product | from orifice. | |
WARNING | ||
|
Do not use flammable cleaning materials. Use a flashlight to inspect the burner inlet to ensure it is not blocked. If obstructions can be seen, use a metal wire coat hanger that has been straightened out. Shake out any debris through the air shutter.
Burner |
outlet |
26 |
Cleaning and Maintenance
TruSear™ Infrared Grill Burner (If Applicable)
When finished cooking, turn the control knob to the “HIGH” setting and allow the burner to burn for 5 minutes. This helps eliminate any drippings or debris that would otherwise remain on the burner, degrading the performance and reducing burner life. After the 5 minute
NOTE: When the TruSear™ infrared burner is not use, it must be covered withthe provided stainless steel cover for protection from outside elements such as rain.
Drip Tray
The drip tray pans should be
removed and cleaned after each use. Allow the drippings in the the drip tray
pans to cool completely before
removing. To remove the drip tray pans, simply remove the pans from the tray. Place the trays in hot, soapy water to clean. Wipe up any debris that may
have collected in the drip tray with a hot, soapy towel. Dry and
replace drip tray pans before next use.
![]() CAUTION
CAUTION
•Do not use a metal knife or any other metal tool to scrape stainless steel parts.
•Do not permit citrus or tomato juice to remain on stainless steel surfaces, as citric acid will permanently discolor stainless steel. Wipe up any spills immediately.
•Do not use abrasive cleaners, steel wool pads, or abrasive cloths on stainless steel, painted parts, or brass parts.
•Do not use brass cleaners on the brass option parts. They feature an epoxy coating.
27
Product Care