Contents
Mode Demploi
LllllqL!l
We Want You Listening For a Lifetime
Important Notice do not Modifythis Unit
Declaration of Conformity Procedure
For U.K. customers
Special Instructions for U.K. Model
For Canadian Customers
Discs that can be played back
This unit
ReWritablel
Discs that cannot be used for recording on this unit
To prevent a malfunction of this unit
Handling of discs
Using Headphones Copying
Using
Basic
Hddicdr
Structure About this manual
Yamaha
Front panel
Search/Skip
Erase
NnPlay/Pause
Analog REC Level control
Oqi FE
Remote control Oii0
REC
Timer REC
Input
Intro
Display
Video jack
Video OUT jacks S Video jack
AC inlet U.S.A. model only
Analog jacks Analog Line in REC jacks
Analog connections
Digital connections
Connecting a monitor
Installingbatteries
Connecting the power cable
Battery replacement
Total number of tracks Total time
When the disc information is read completely, the display
To start playback automatically using external timer
Now, please try various features of this unit
To copy from the HDD to CD-R/CD-RW discs
To record external sources on the HDD
To operate the CDR drive, press CDR
To operate the HDD drive, press HDD
RW Copying E38-49
Group
Data on the HDD
Track
Data on CDs
Display while recording onto the HDD
Display while playing the data on the HDD
Display while playing a CD
Display while recording onto a CD-R or CD-RW disc
To skip tracks
To start playback
To stop playback
To stop playback temporarily Pause
When selecting Style All
Setting the play style
Searchingby elapsedtime Time Search
To cancel the Single Repeat setting
When selecting Style Group
Group for making a setting
Repeatingplayback of a track Single Repeat
Repeatingplaybackof the selected groupFull Repeat
To cancel Full Repeat setting Random Play setting
Playingbackrandomly RandomPlay
Playingbackonlythe beginning partsof tracksIntro Play
To cancel the Intro Play setting
Removing tracks from the book- mark list
Adding tracks to the bookmark list
Playing back tracks in the book- mark list
List of groups or tracks
List of setting items
Display during copying
Display During Recording
Copyingall tracksona CD
Output of the signals during copying
Press E/DDto start copying
IIj FEe
@.Press Copy once
Copyingselected tracks on a CD
Mode Multijog
Setting the HDD copy mode
Multi Synchro Multi-synchronized copying mode
Selectinga targetdisc
Settingthe HDDcopymenu
Copy Level
Copy Method
Copy Speed
Recording input audio source
Program starting time Program ending time
Using an external timer to record
ExampleTo record the program that starts at 900 and ends at
Carry out steps 1 and 2 in Recording input audio source P.31
Setting for a timer recording
When recording a digital input source
Adjusting the recording level
When recording an analog input source
Mode Multi JOG
Setting the HDD recording mode
Multi JOG Menu
Setting a condition for synchronized Recording
ITI
Adding track markers during recording Manual track marking
When copying onto a new CD-R or CD-RW disc
When copying onto a CD-R or CD-RW disc without
Copyingall tracks in a groupto a disc
Press Copy twice
Press /DDto start copying
When a disc is selected
Copyingselected tracks on the HDD
Buttons, or * on the remote control to select
Mrk
Copyinghigh quality sounds Audio Master Quality Recording
When copying has been completed, the operation
Press /nq to start copying
Full Auto Full auto-synchronized copying mode
Setting the CDR copy mode
Copy Method
Setting the CDR copy menu
4x Copy
Imaging Speed
Total number of tracks Total time Press Copy three times
Set the original CD in the disc tray
Text
Press /nn to start finalization
When starting finalization
During finalization
Erasing all tracks
Erasing last tracks
Erasing TOC
Press pD to start erasing
Initializing a CD-RW disc
Cursor button operations in the edit menu
Edit menu Menu content Selectable during Playback
Enteringcharactersin the edit menu
Entering the title characters by using Multi JOG knob
Correcting the characters
Press the Multi JOG knob to confirm the selected character
= Press Complete
Press Multi JOG knob Enter on the remote Control
=111IlilqiII=llhl
Edit Stored
Press Complete
Press Clear
Album Rename
Album Copy
Group to be copied from Album to be copied to
Album to be moved
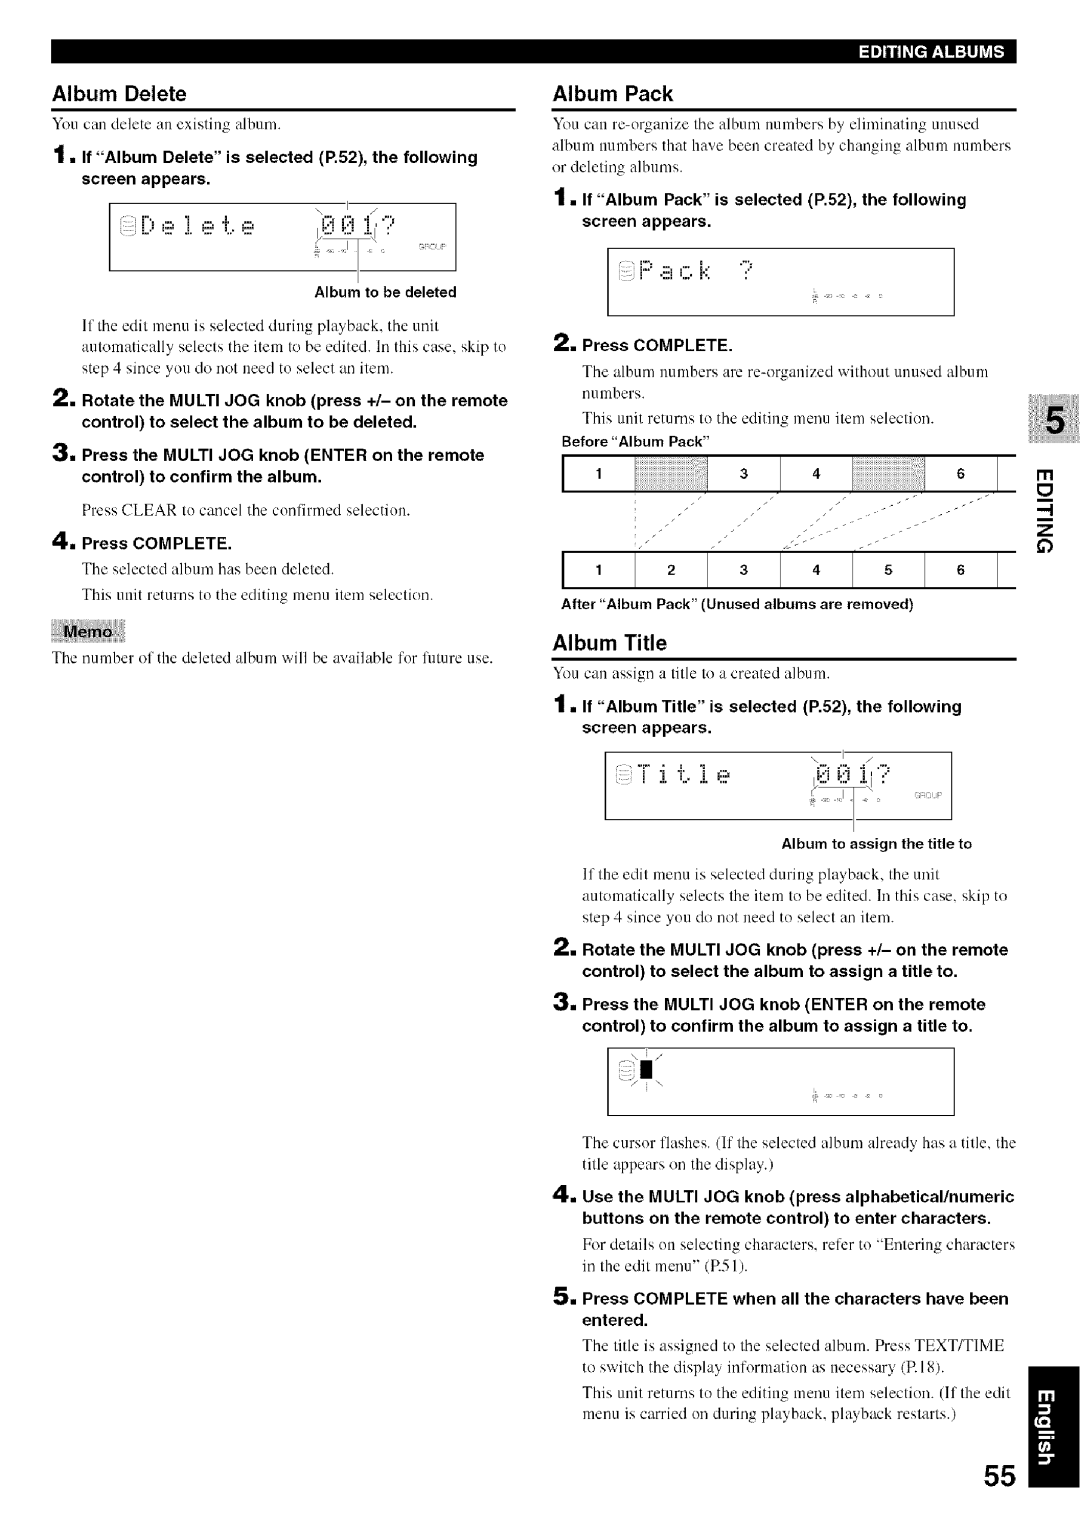
Album Delete
Press Complete when all the characters have been Entered
=1,11IIlqinl=llh# Album Pack
Album Title
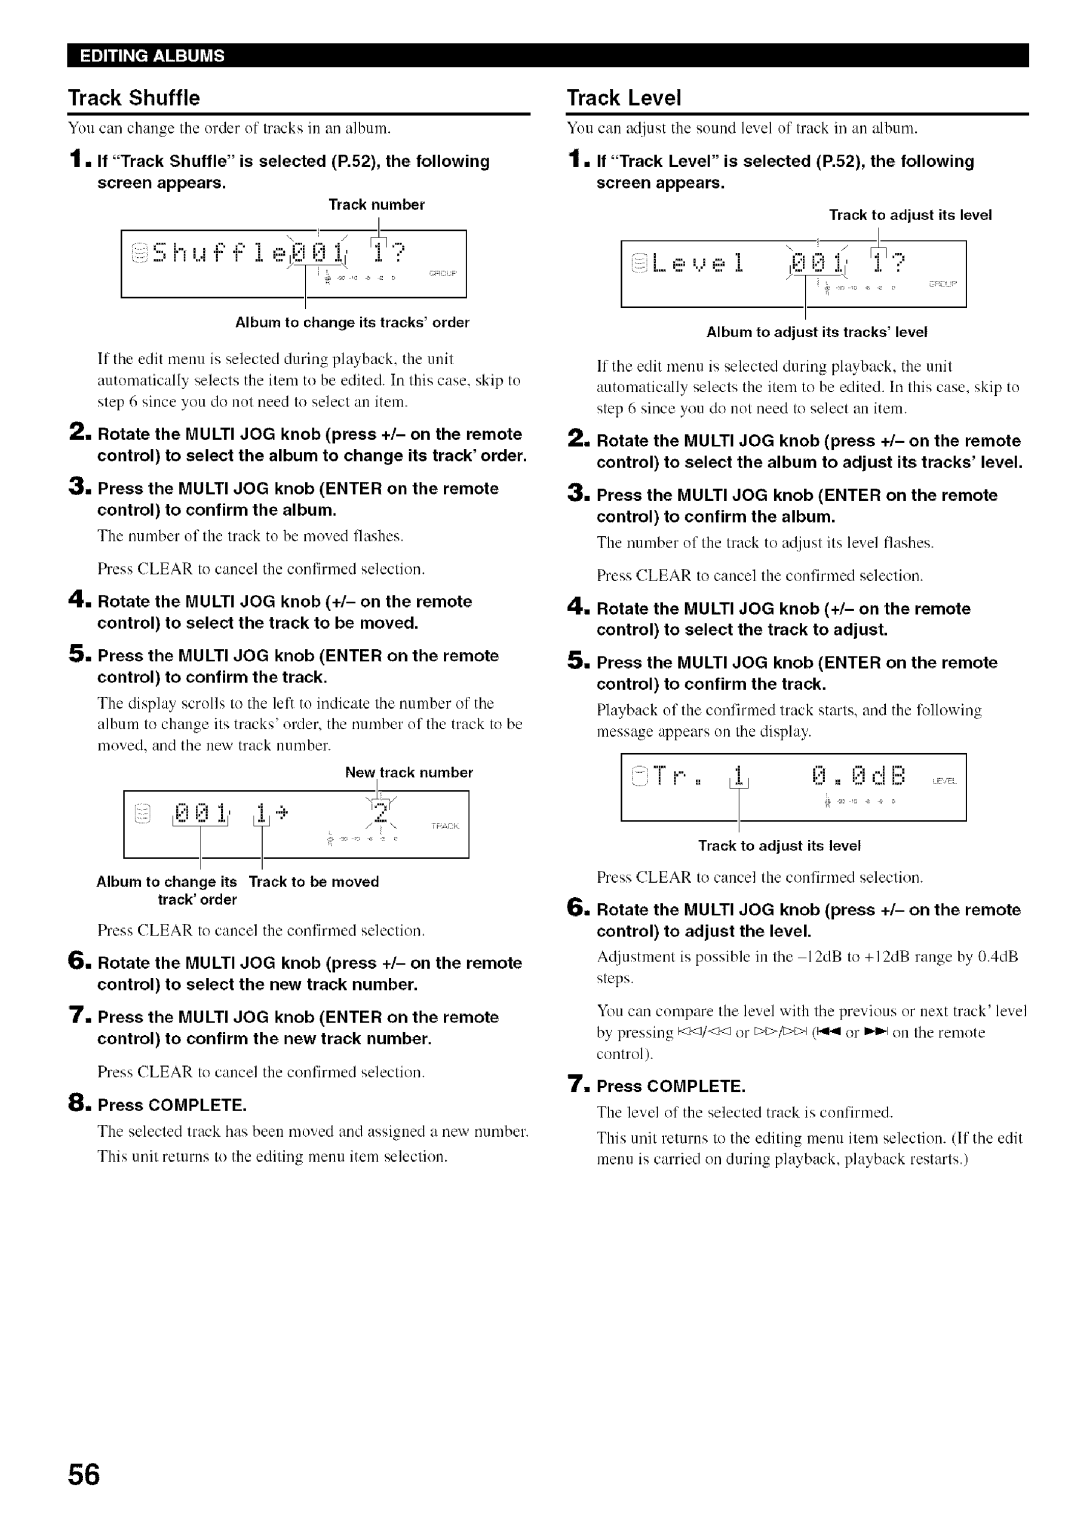
Track Level
Album to adjust its trackslevel
Album to change its tracksorder
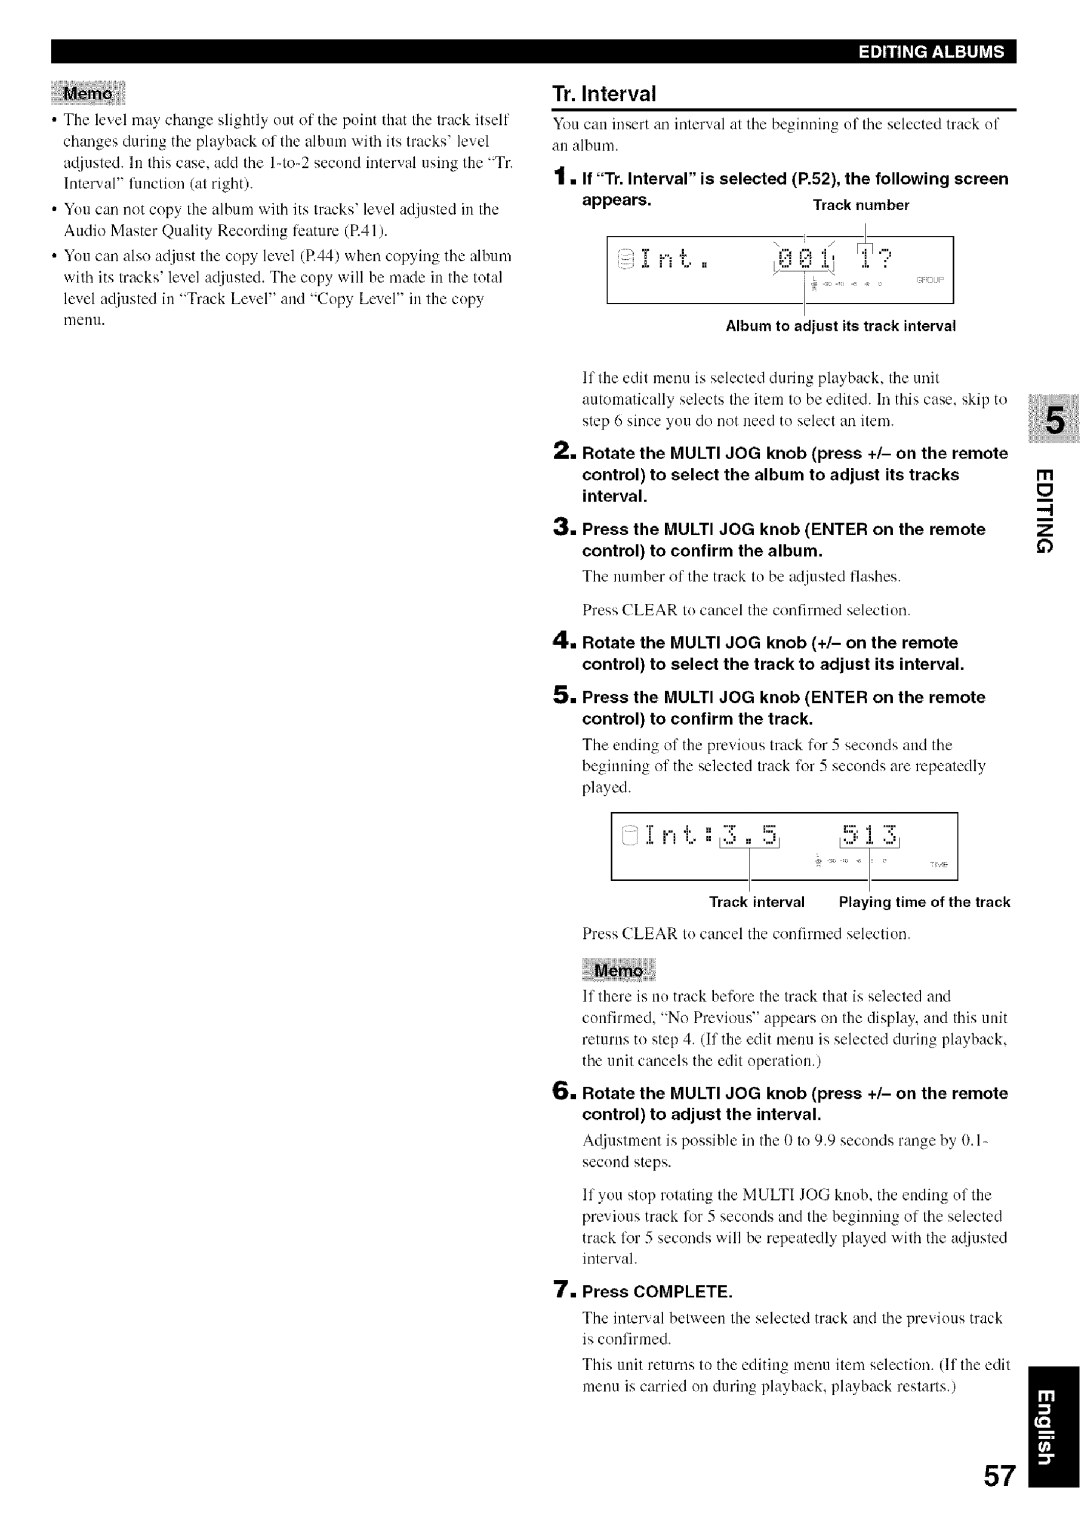
Track interval Playing time of the track
Llllfiil=lihW Tr. lnterval
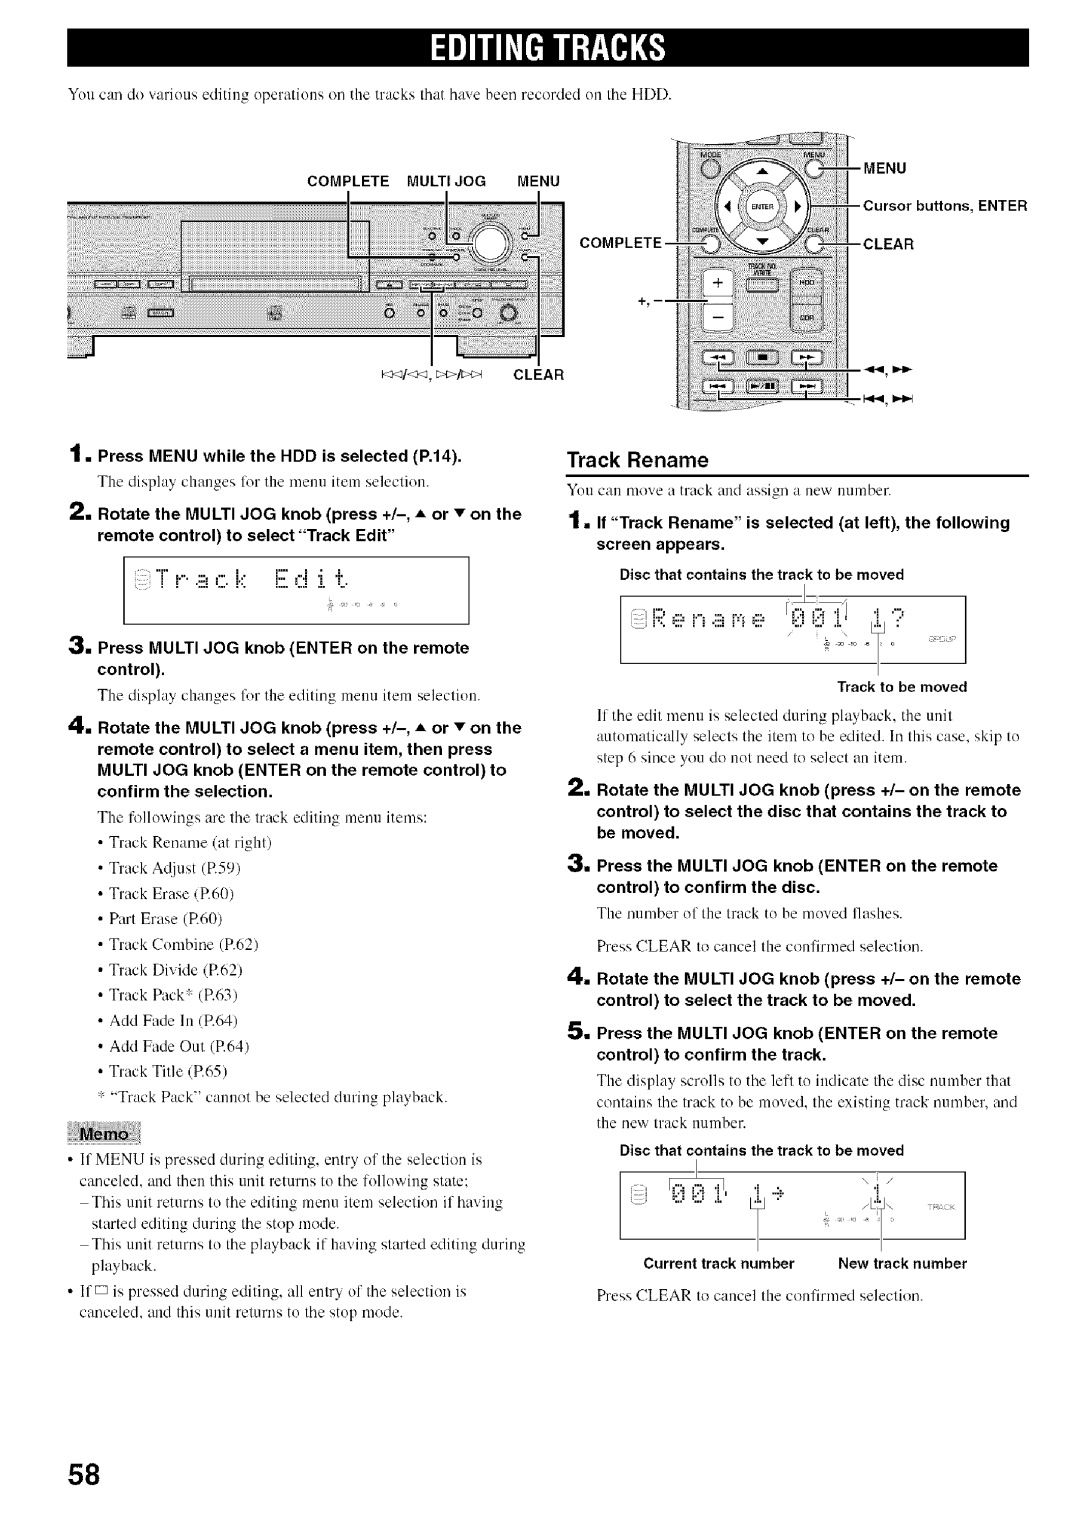
Track to be moved
Track Rename
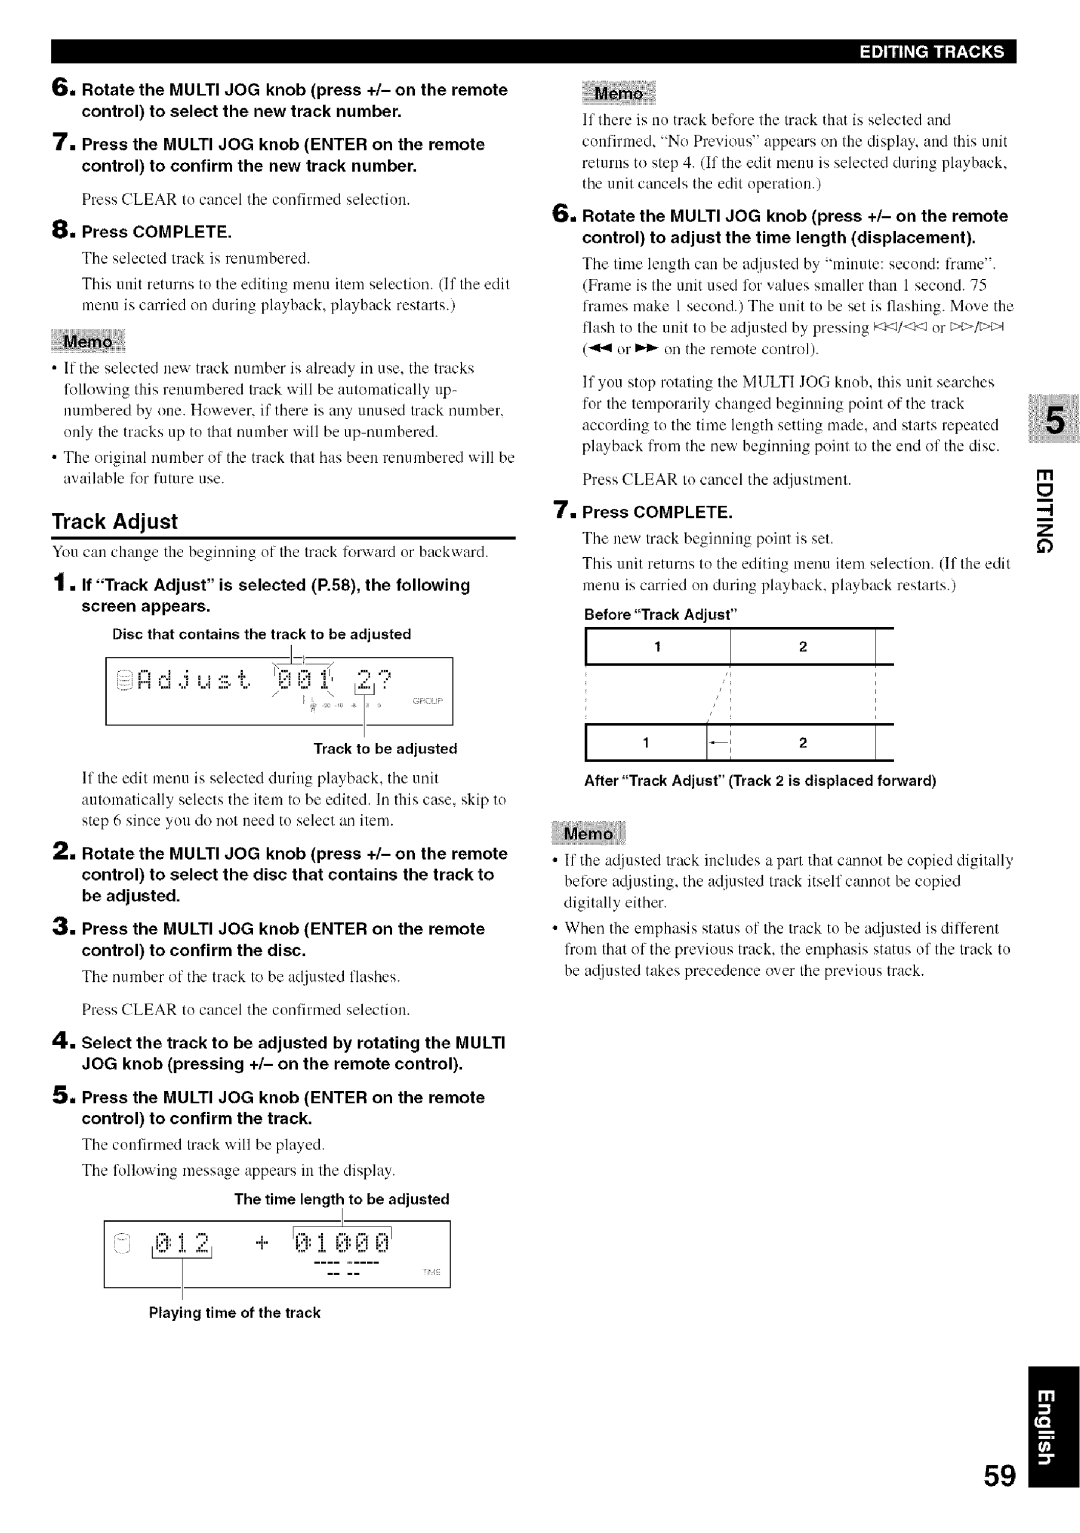
Time length to be adjusted
Track Adjust
Before Track Adjust
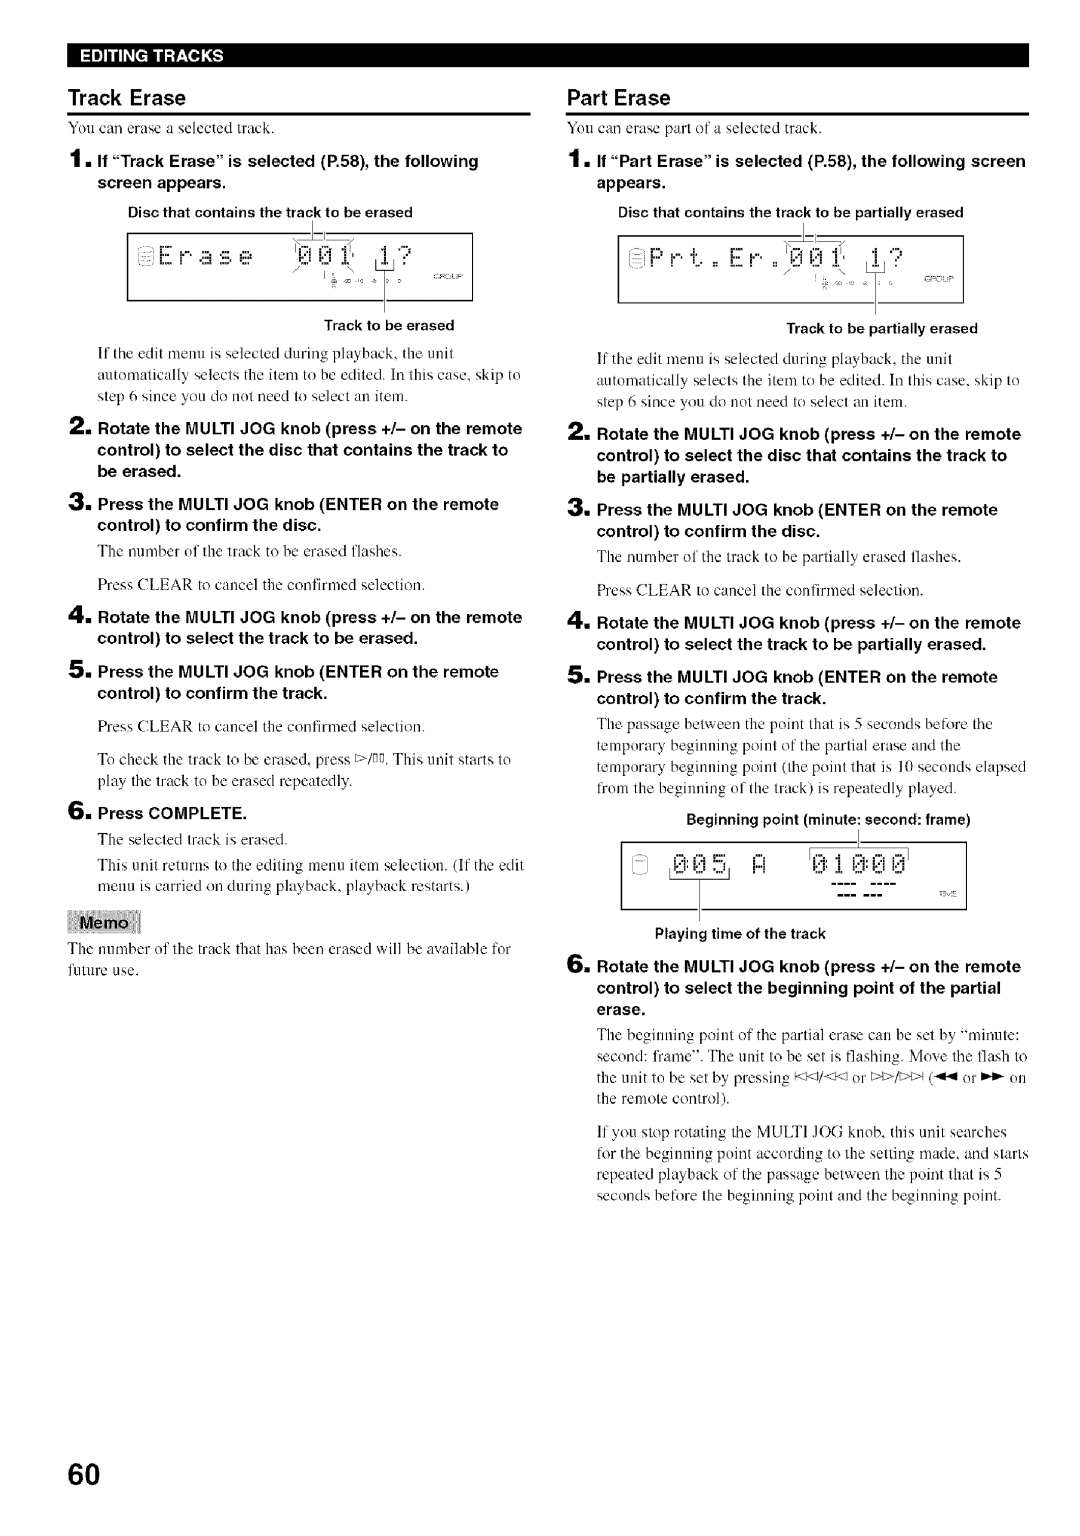
Part Erase
Track Erase
Track to be erased
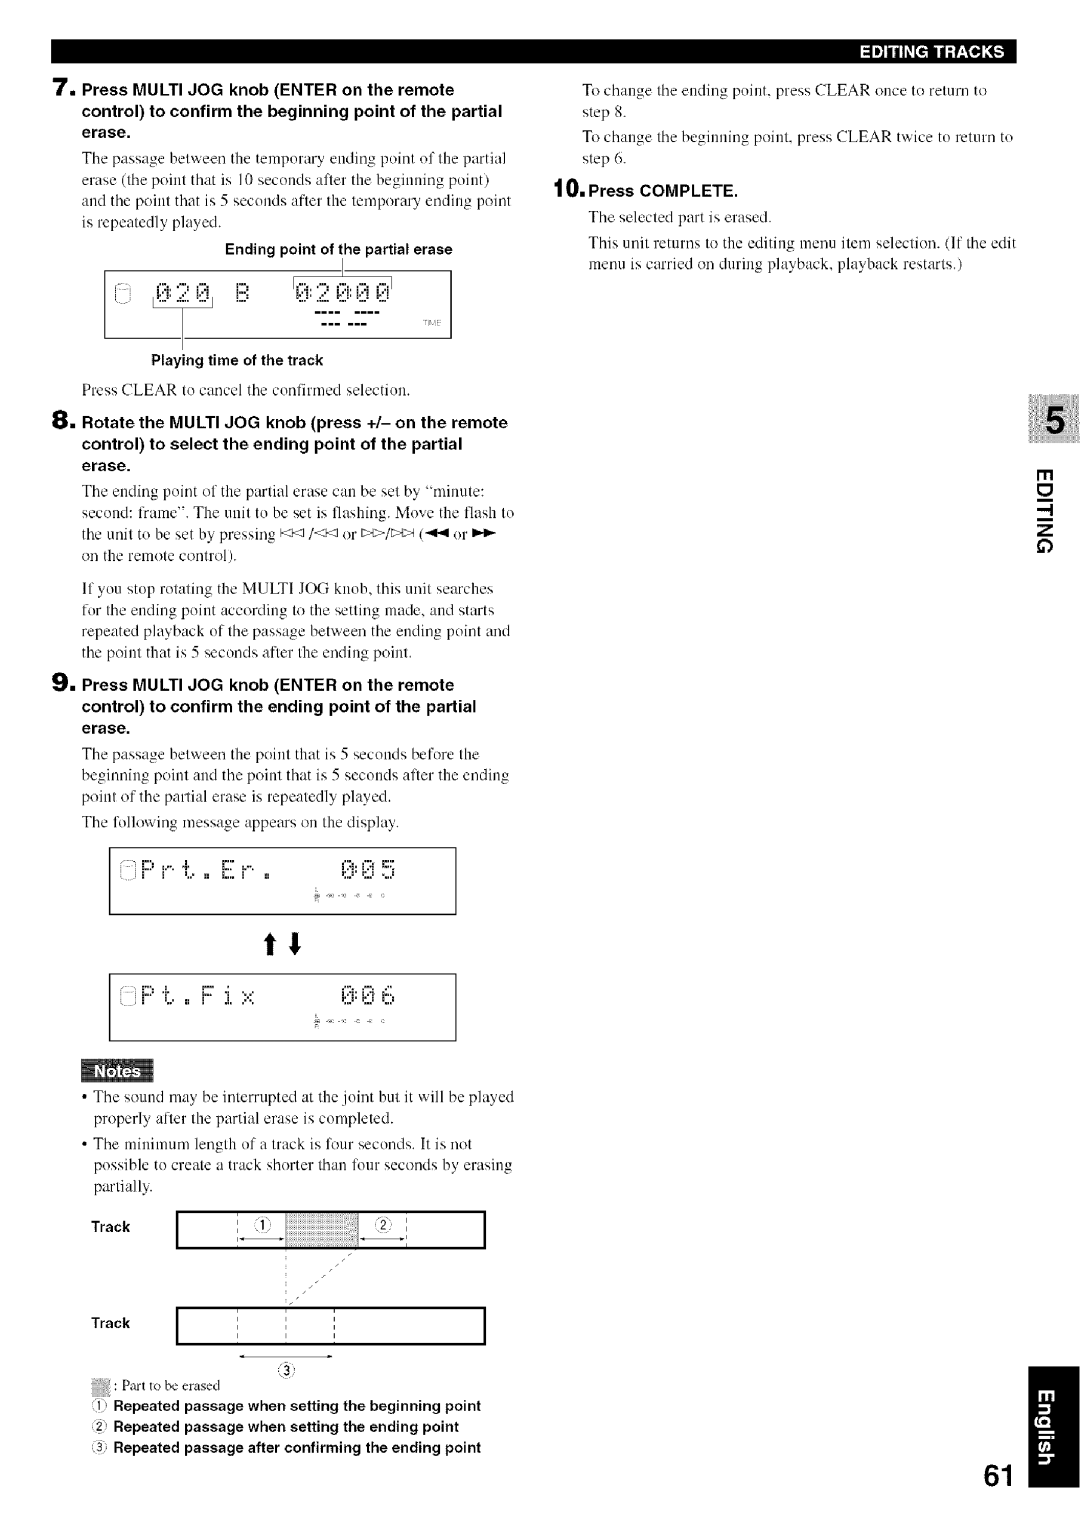
If the edit menu is selected during playhack, the unit
Ending point of the partial erase
Iiiili
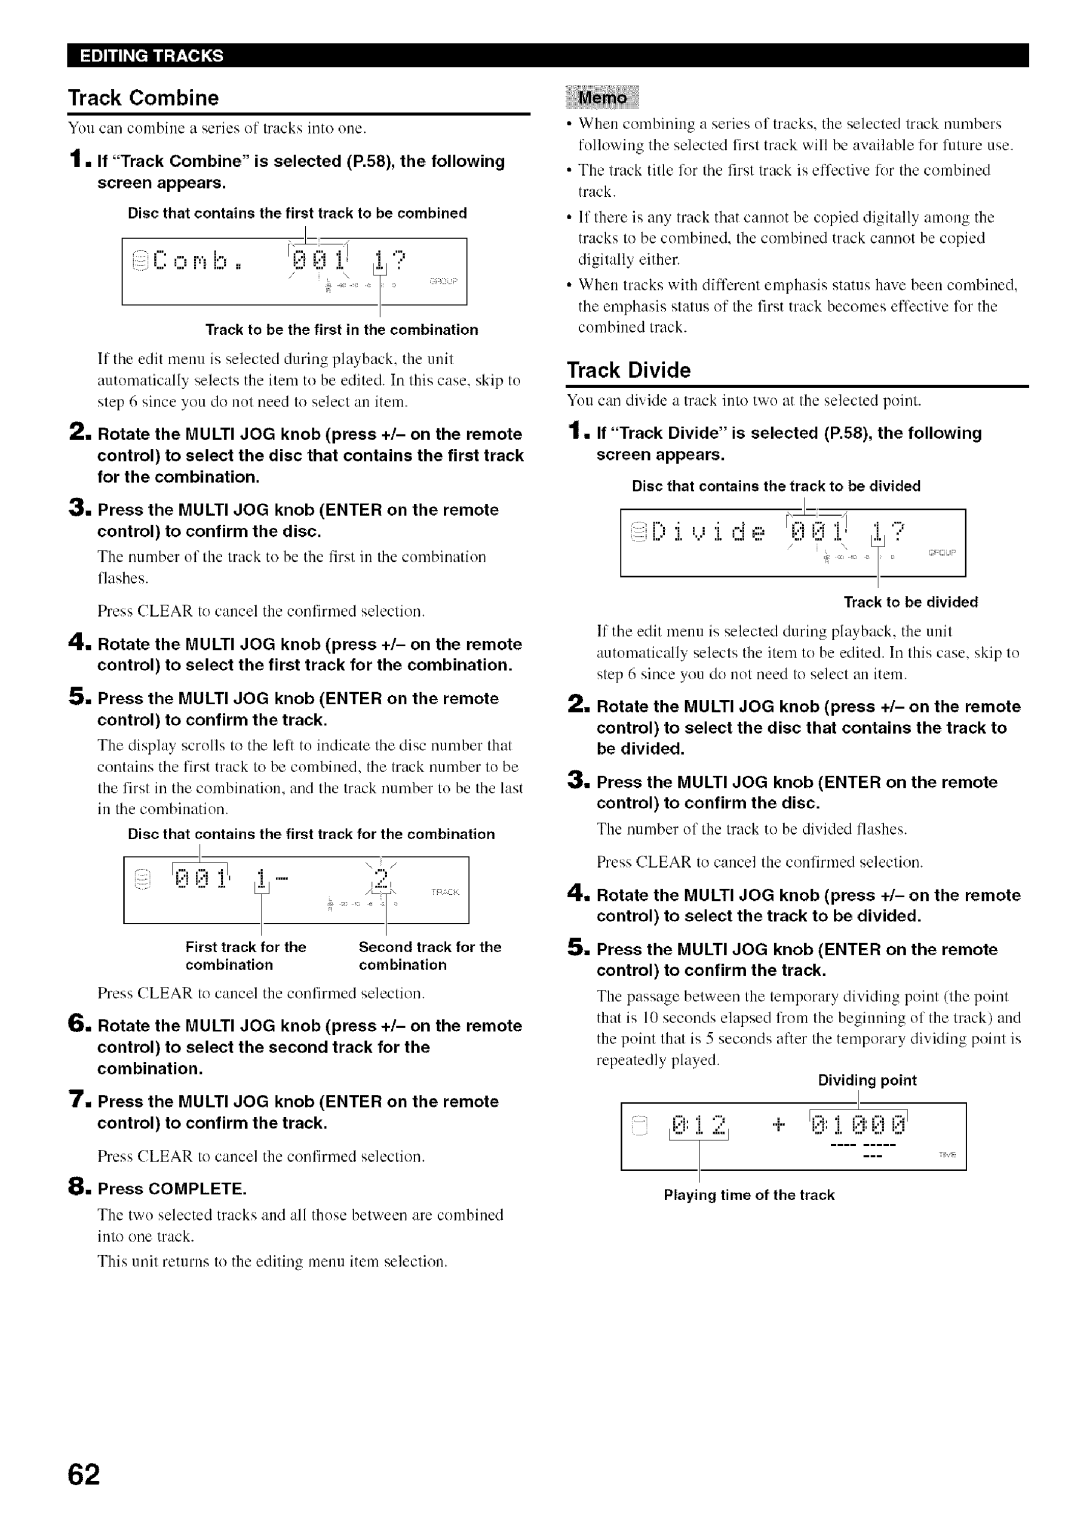
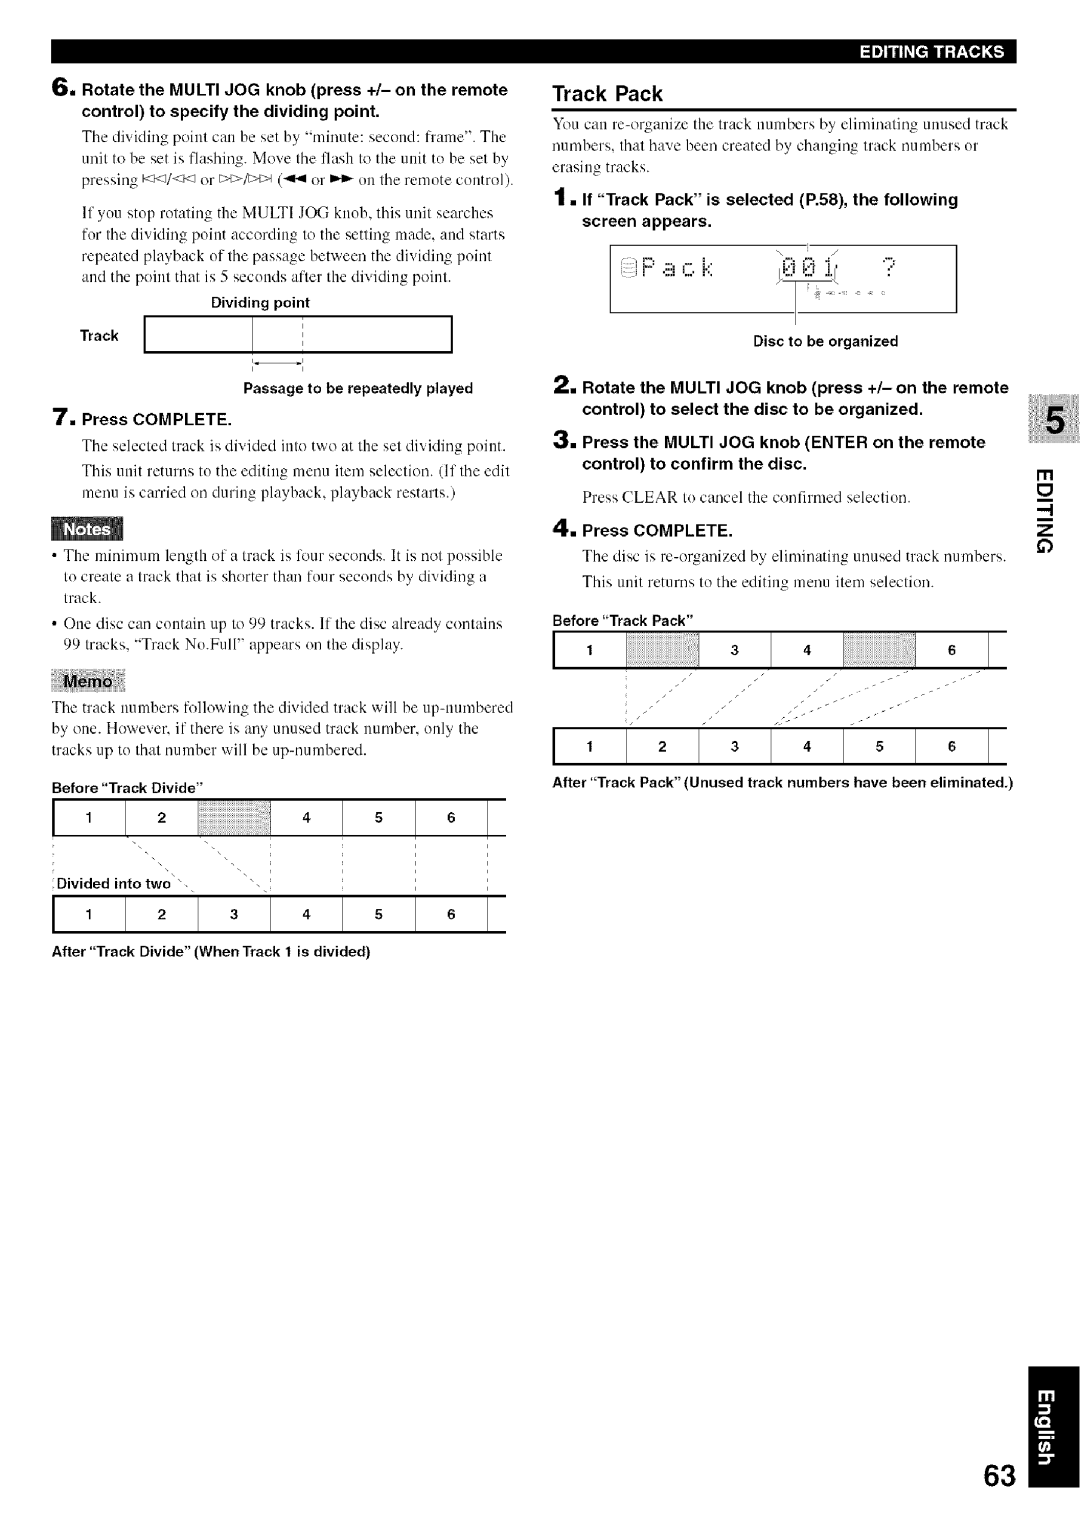
Track Divide
Track Combine
Track to be divided
Dividing point
If Track Pack is selected P.58, the following Screen appears
Track Pack
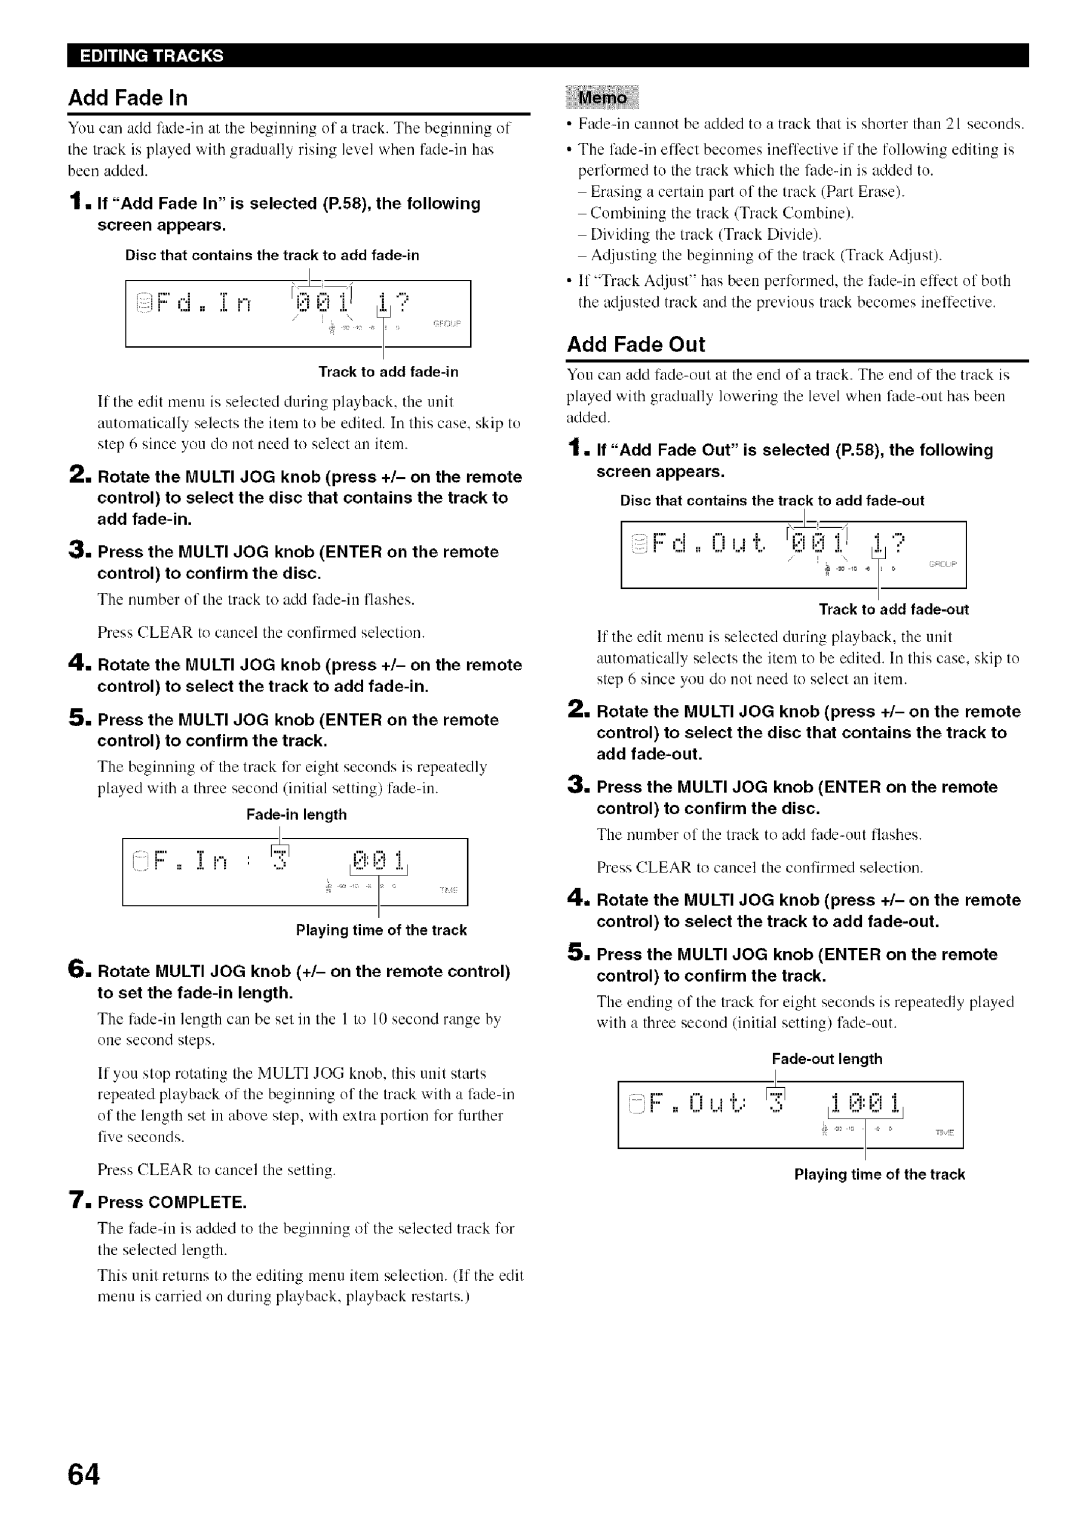
Add Fade Out
Add Fade
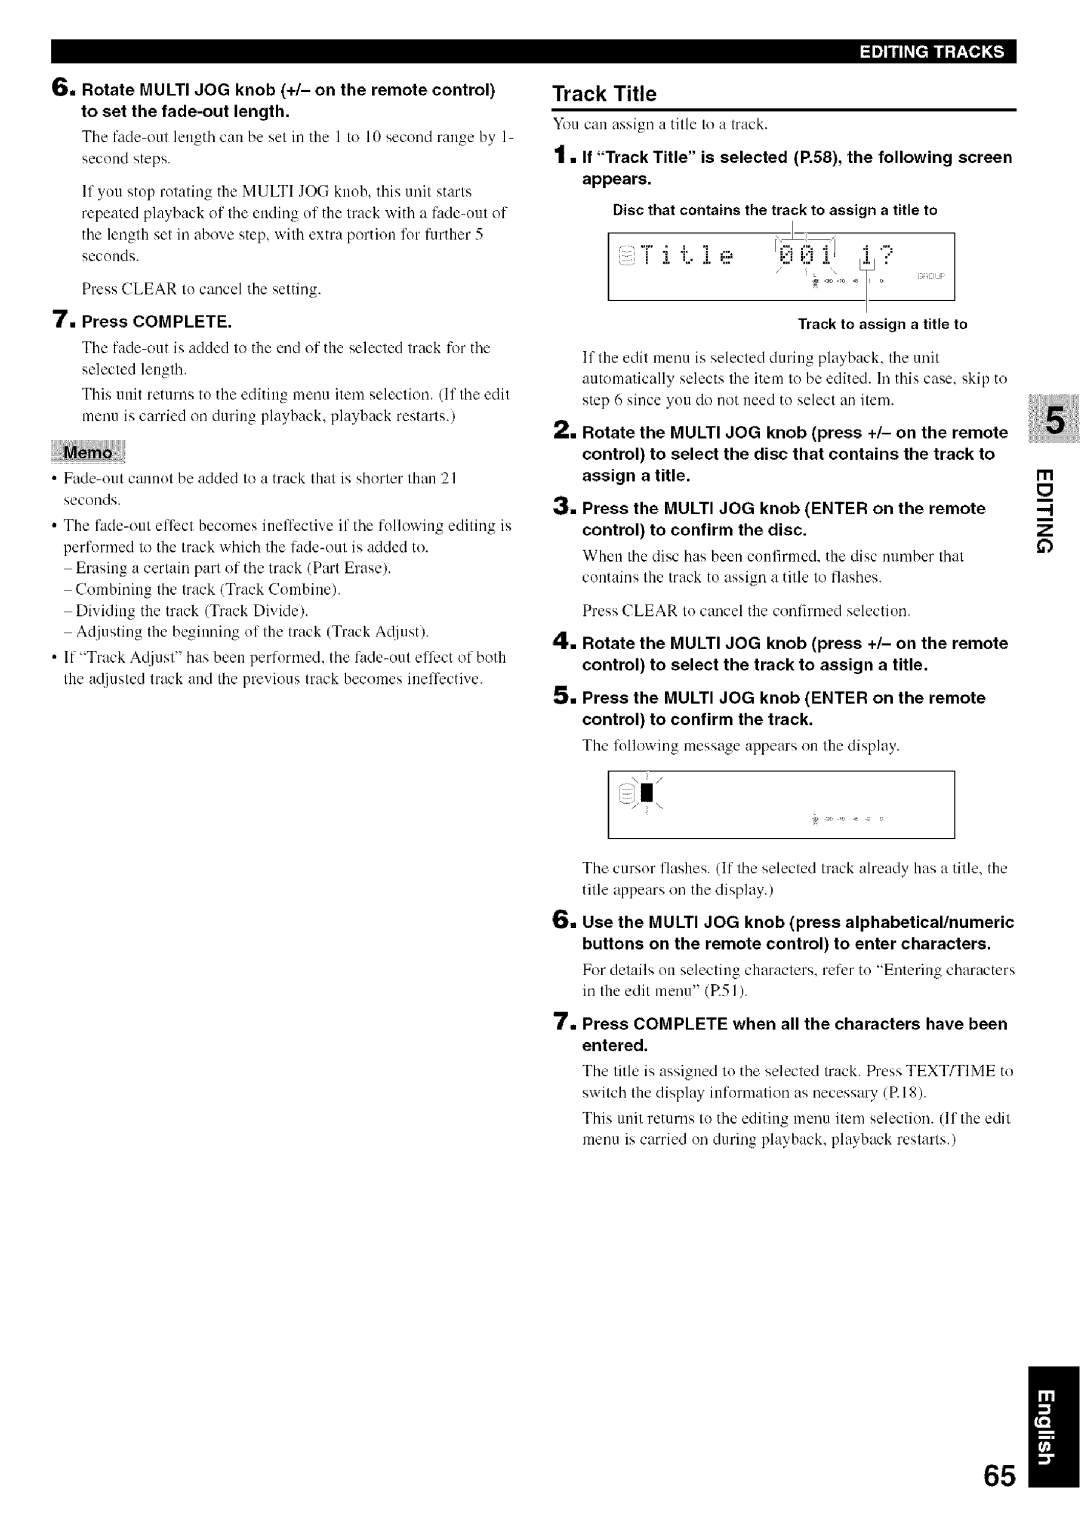
Track to assign a title to
Track Title
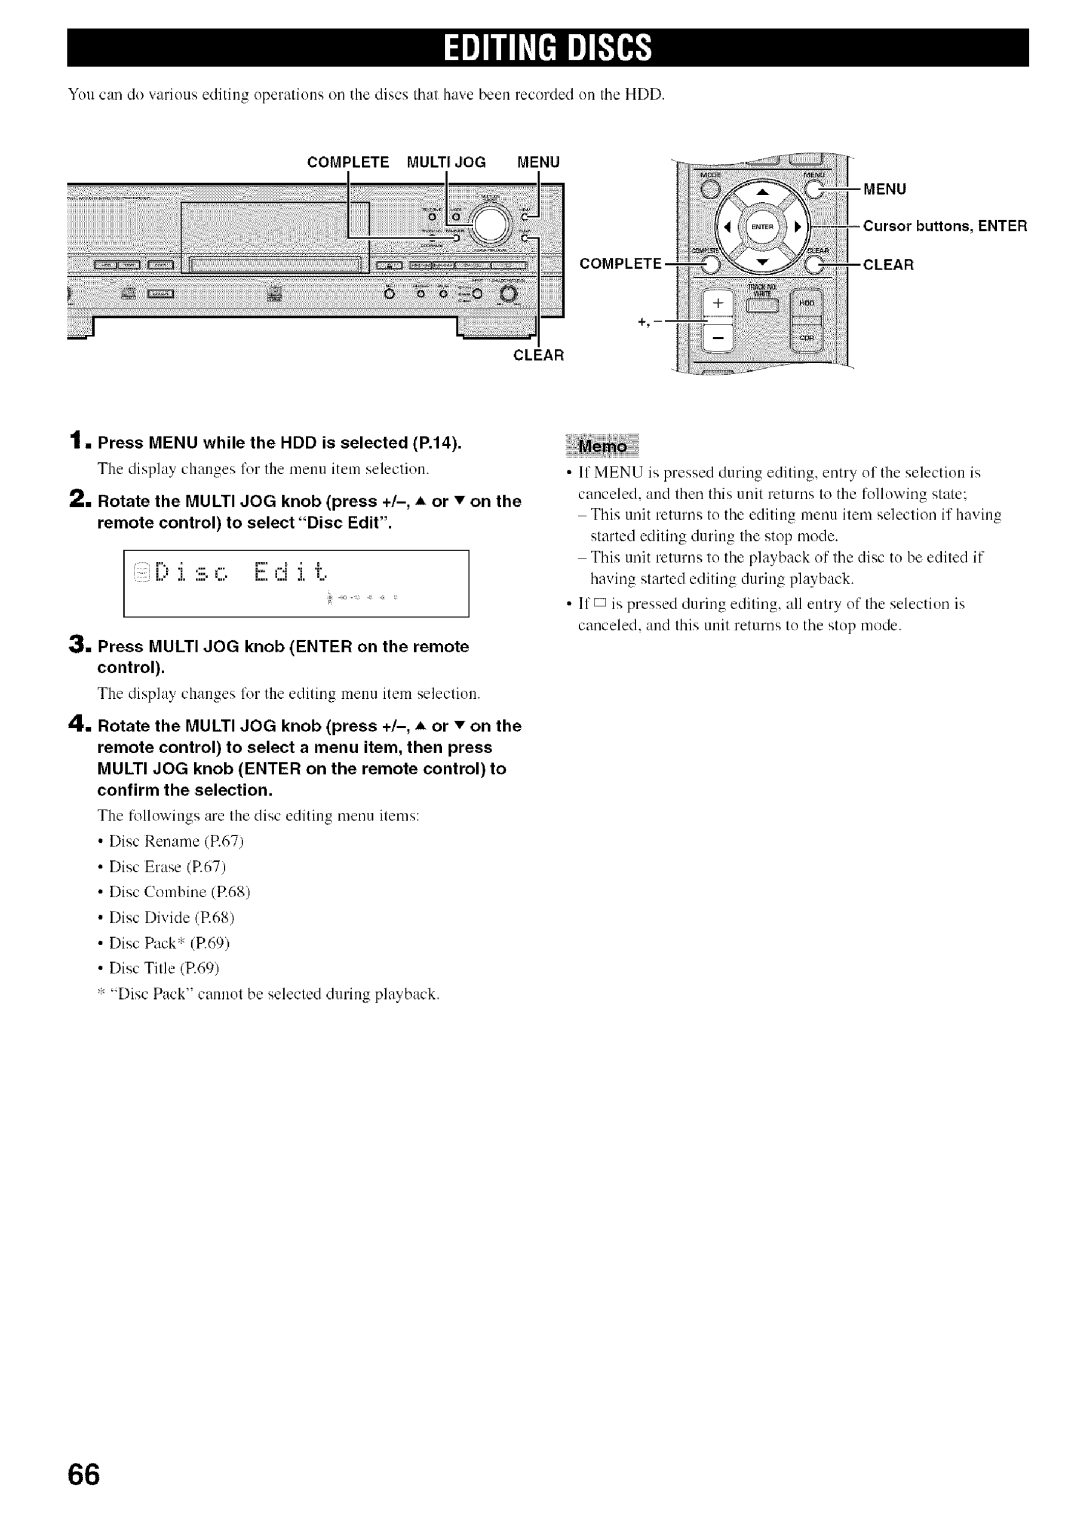
Display changes for the menu item selection
Press Menu while the HDD is selected P.14
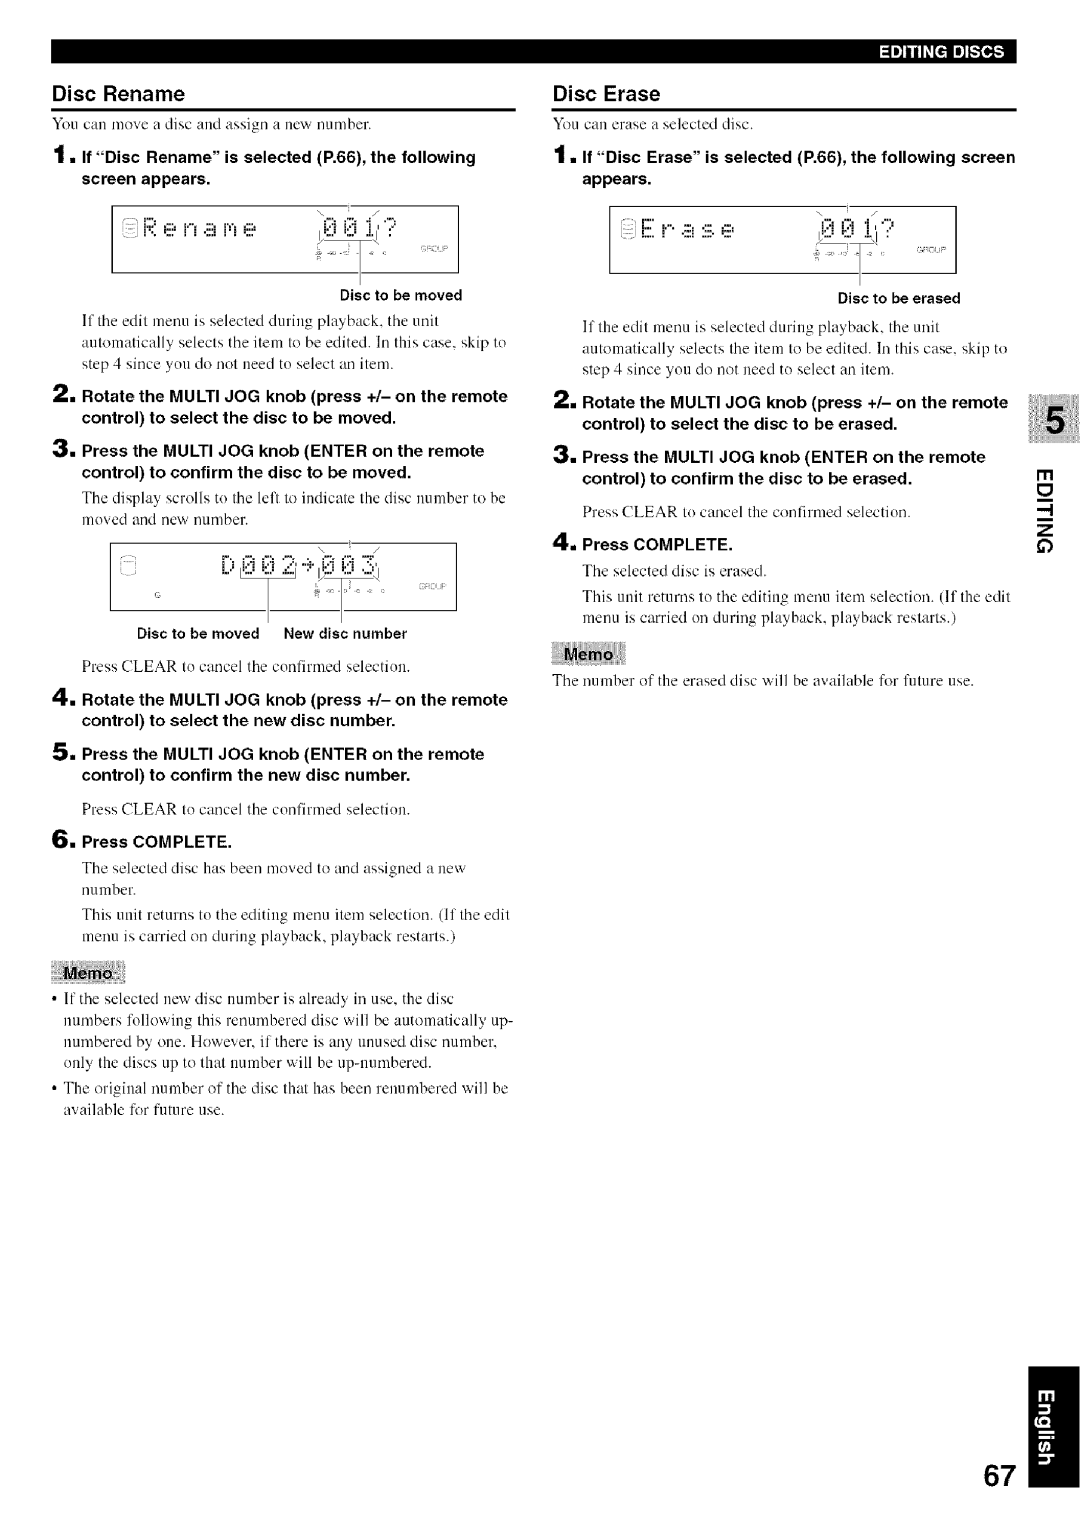
Disc Erase
Disc Rename
Yucan move a disc and assign a new nmnber
Disc to be moved
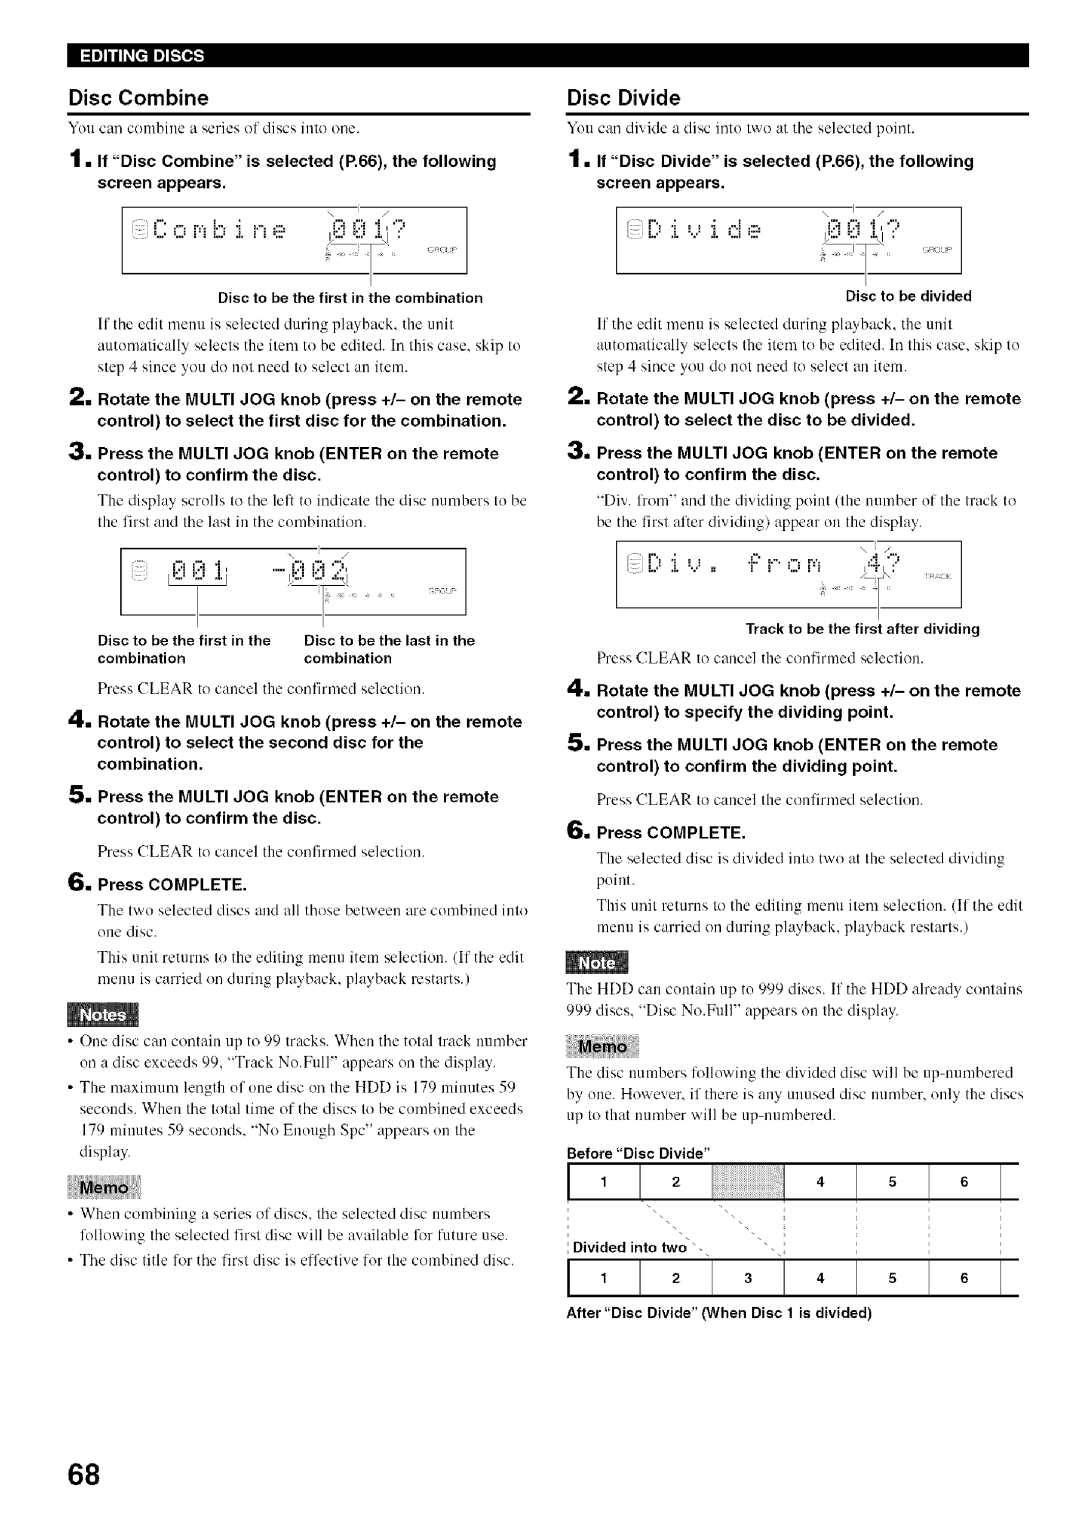
Disc Divide
Disc Combine
IIIRtIFPf
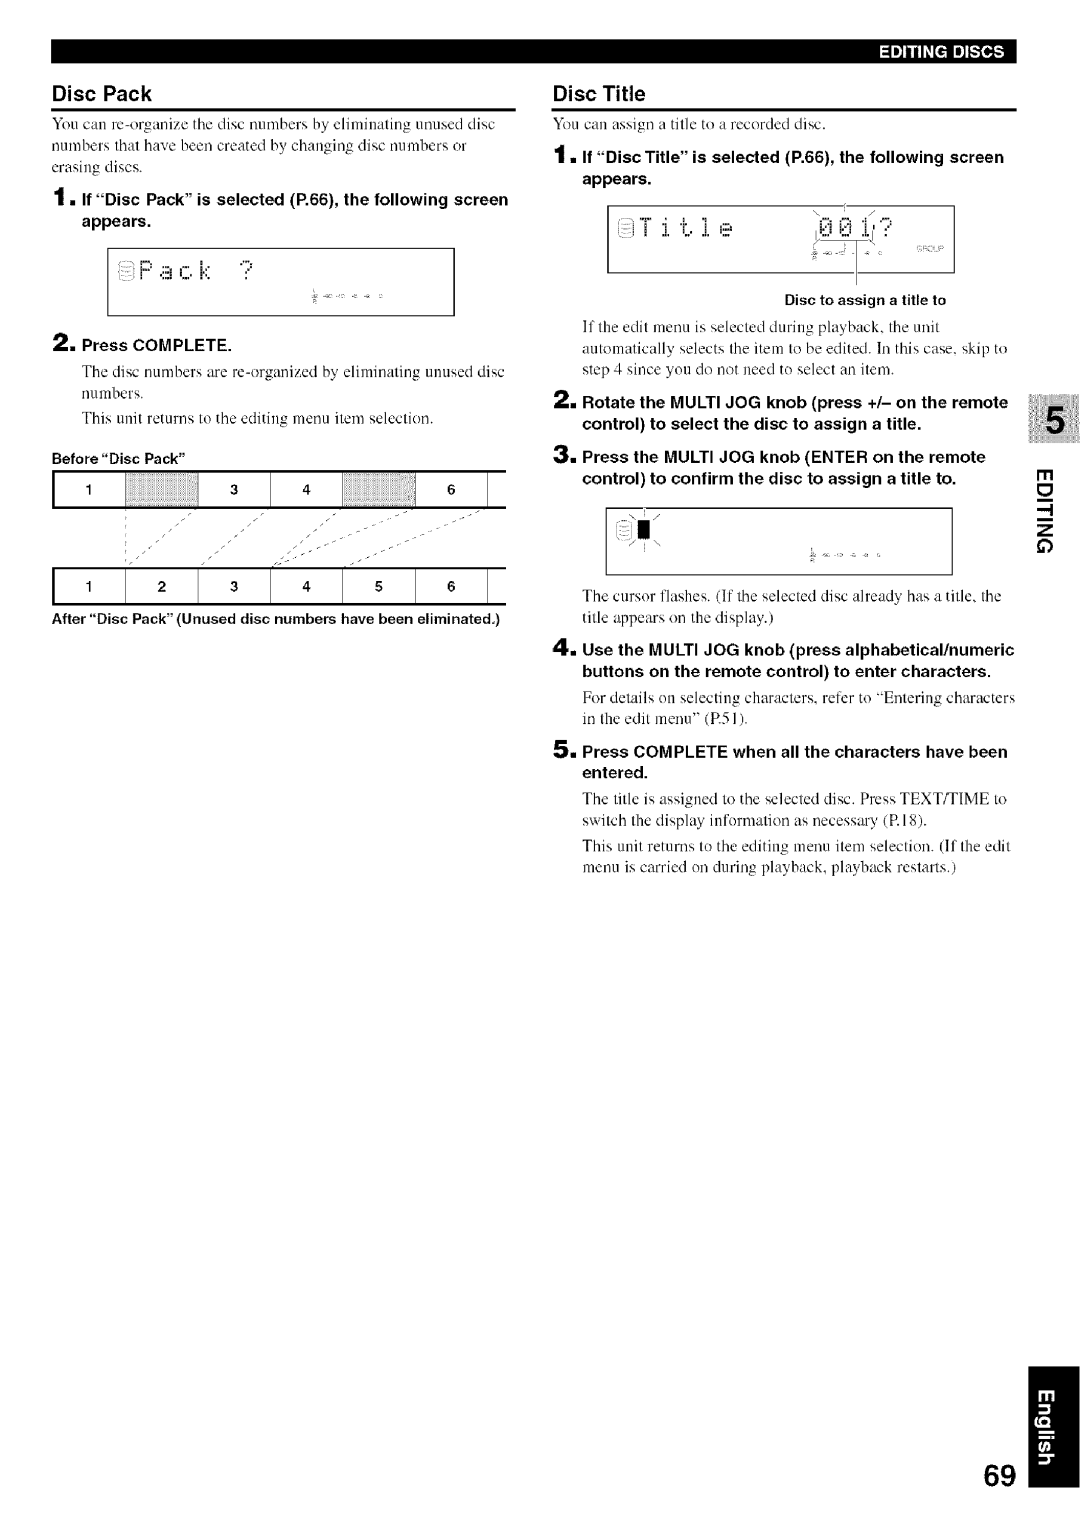
Disc Pack
If Disc Pack is selected P.66, the following screen Appears
Disc numhers are le-organizedby eliminating ulmsed disc
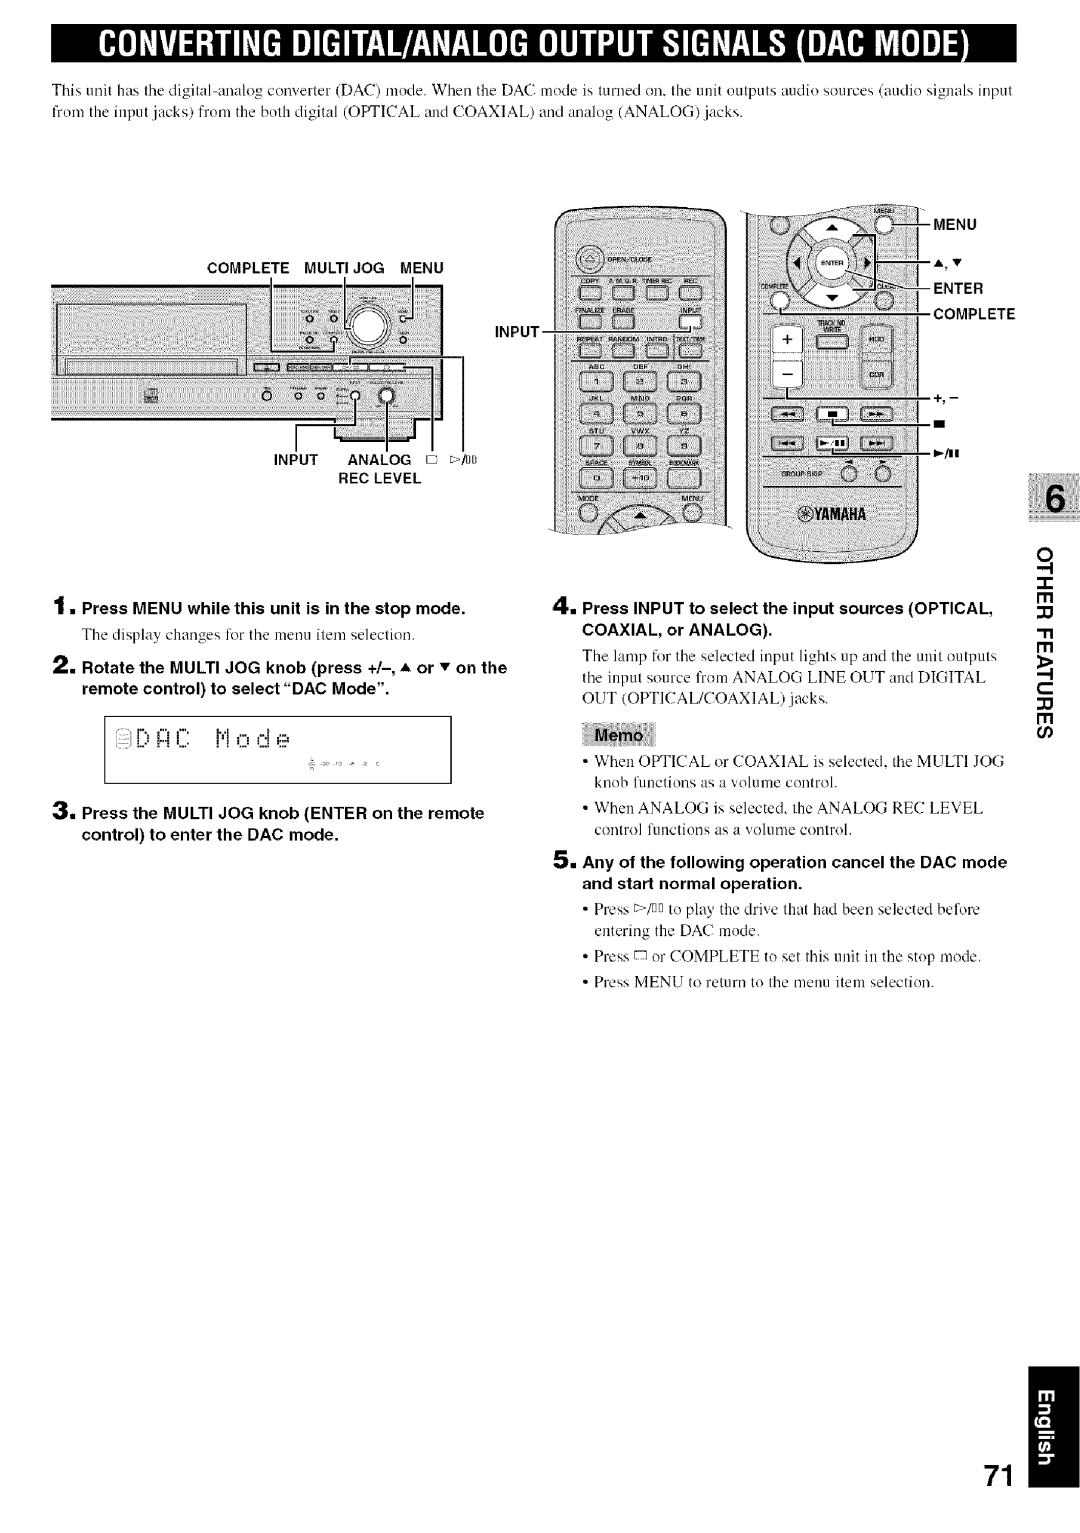
Multi Jogmenu Menu Enter Complete
COAXIAL, or Analog
Remote control to select DAC Mode
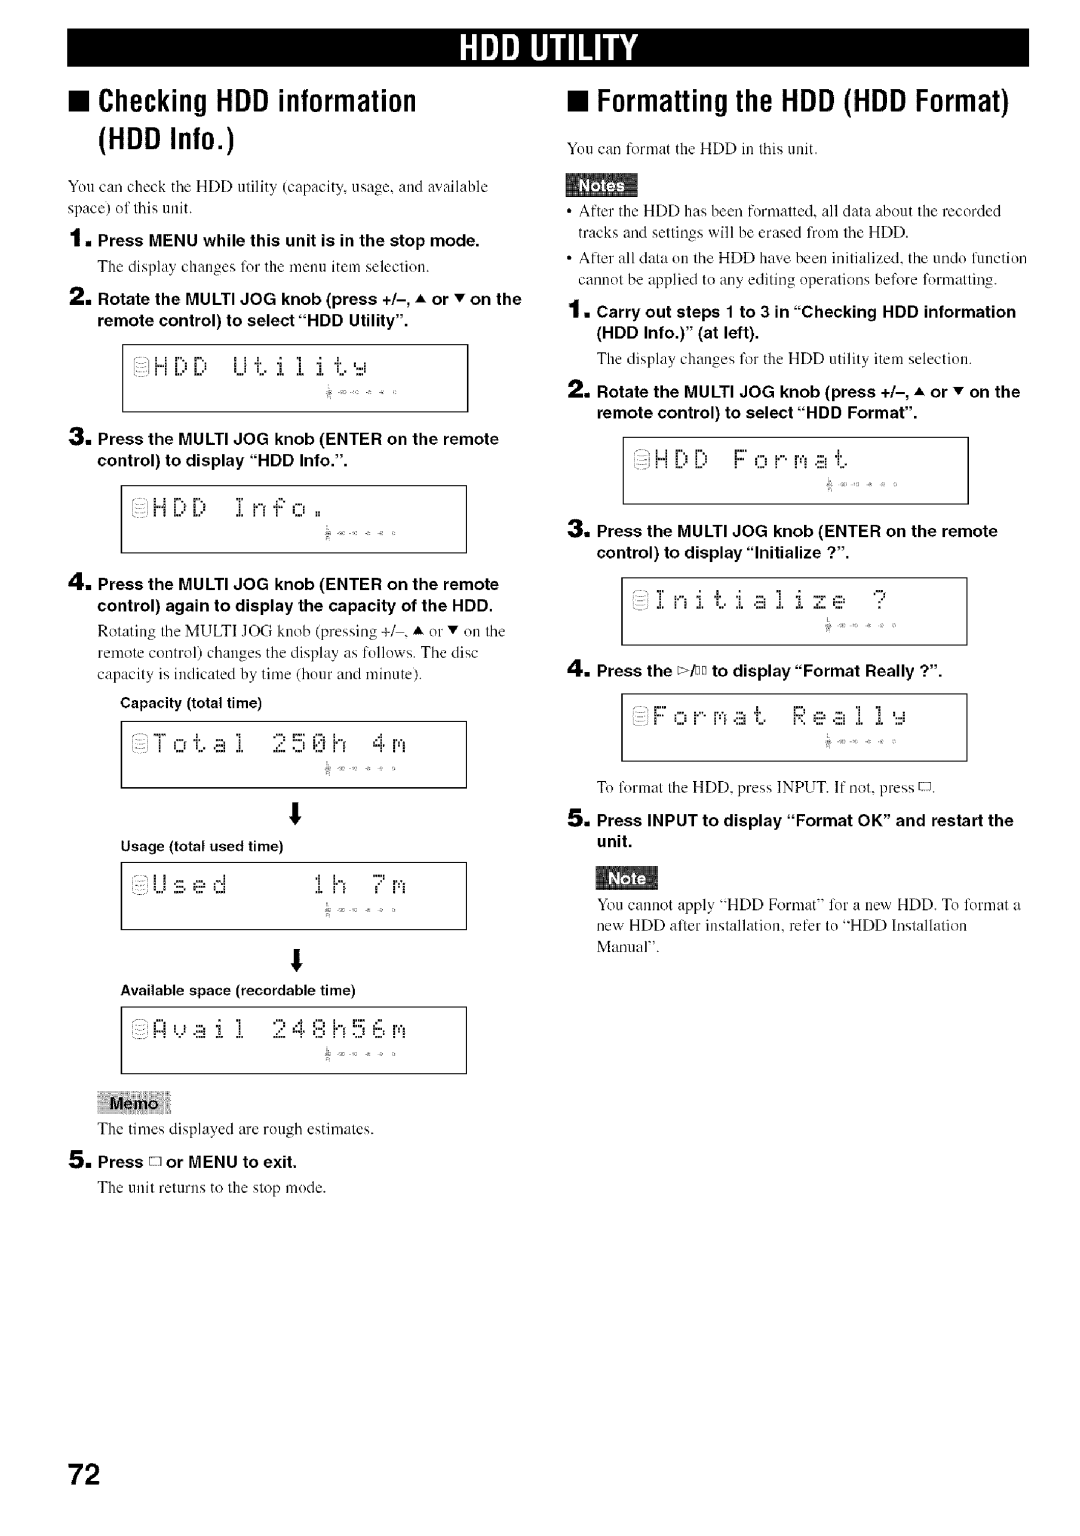
Formatting the HDD HDD Format
CheckingHDDinformation HDD Info
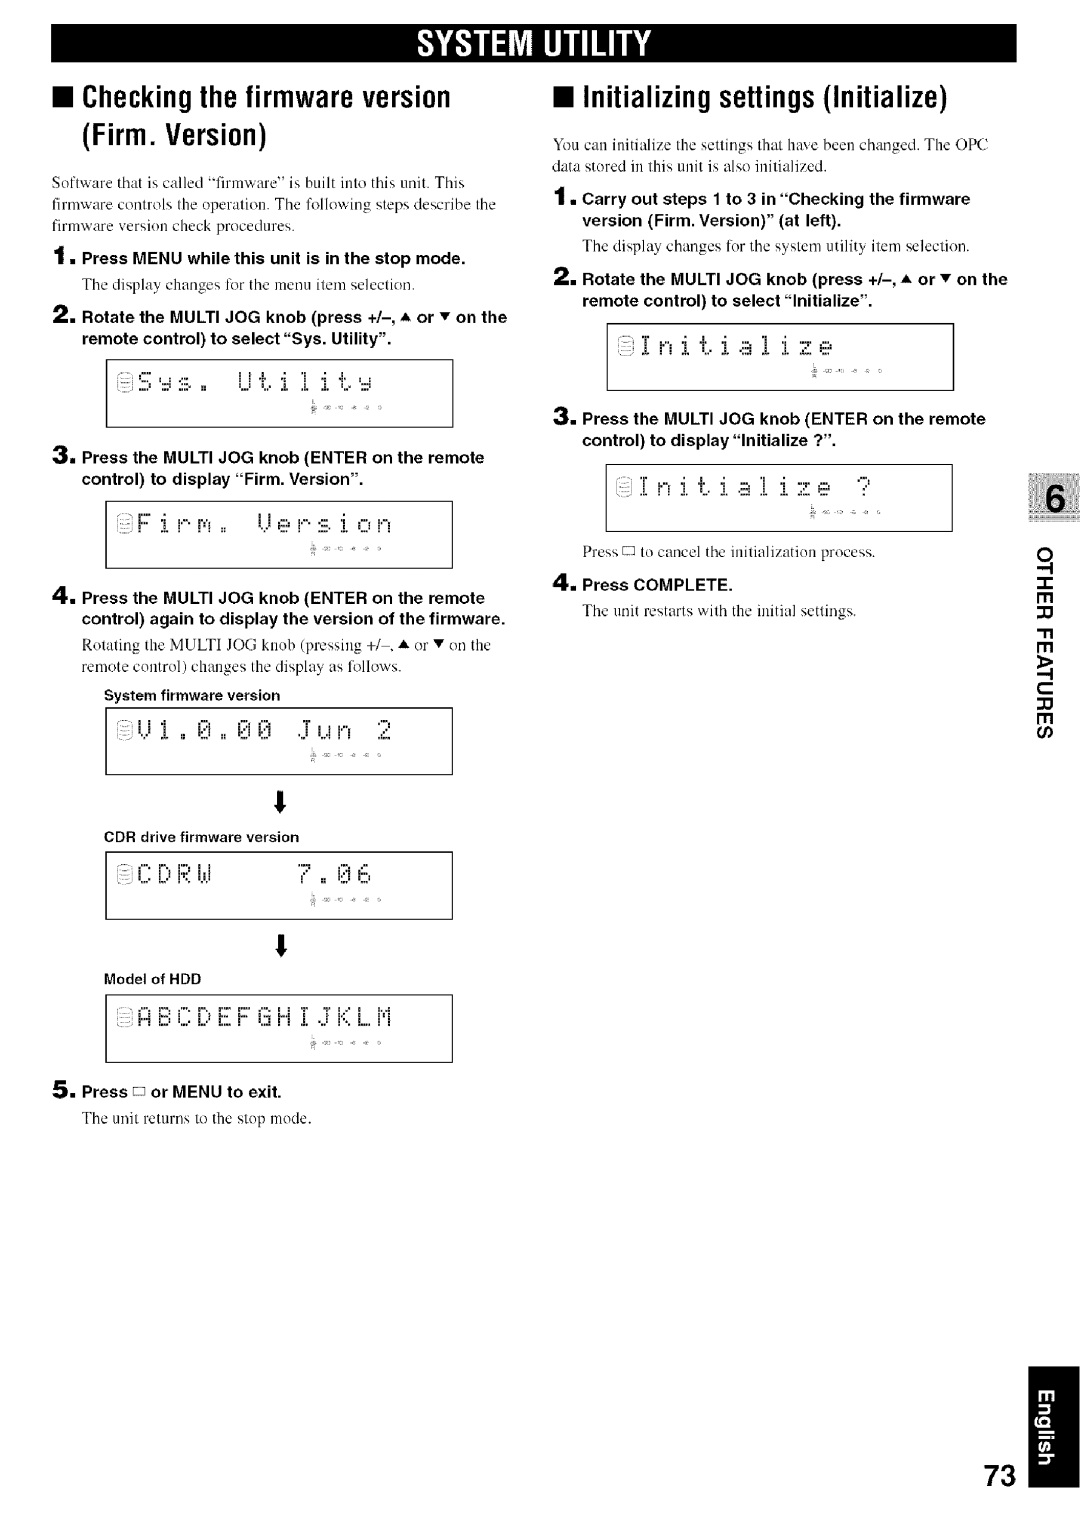
Checkingthe firmwareversion Firm. Version
InitializingsettingsInitialize
System firmware version
CDR drive firmware version
Press D or Menu to exit
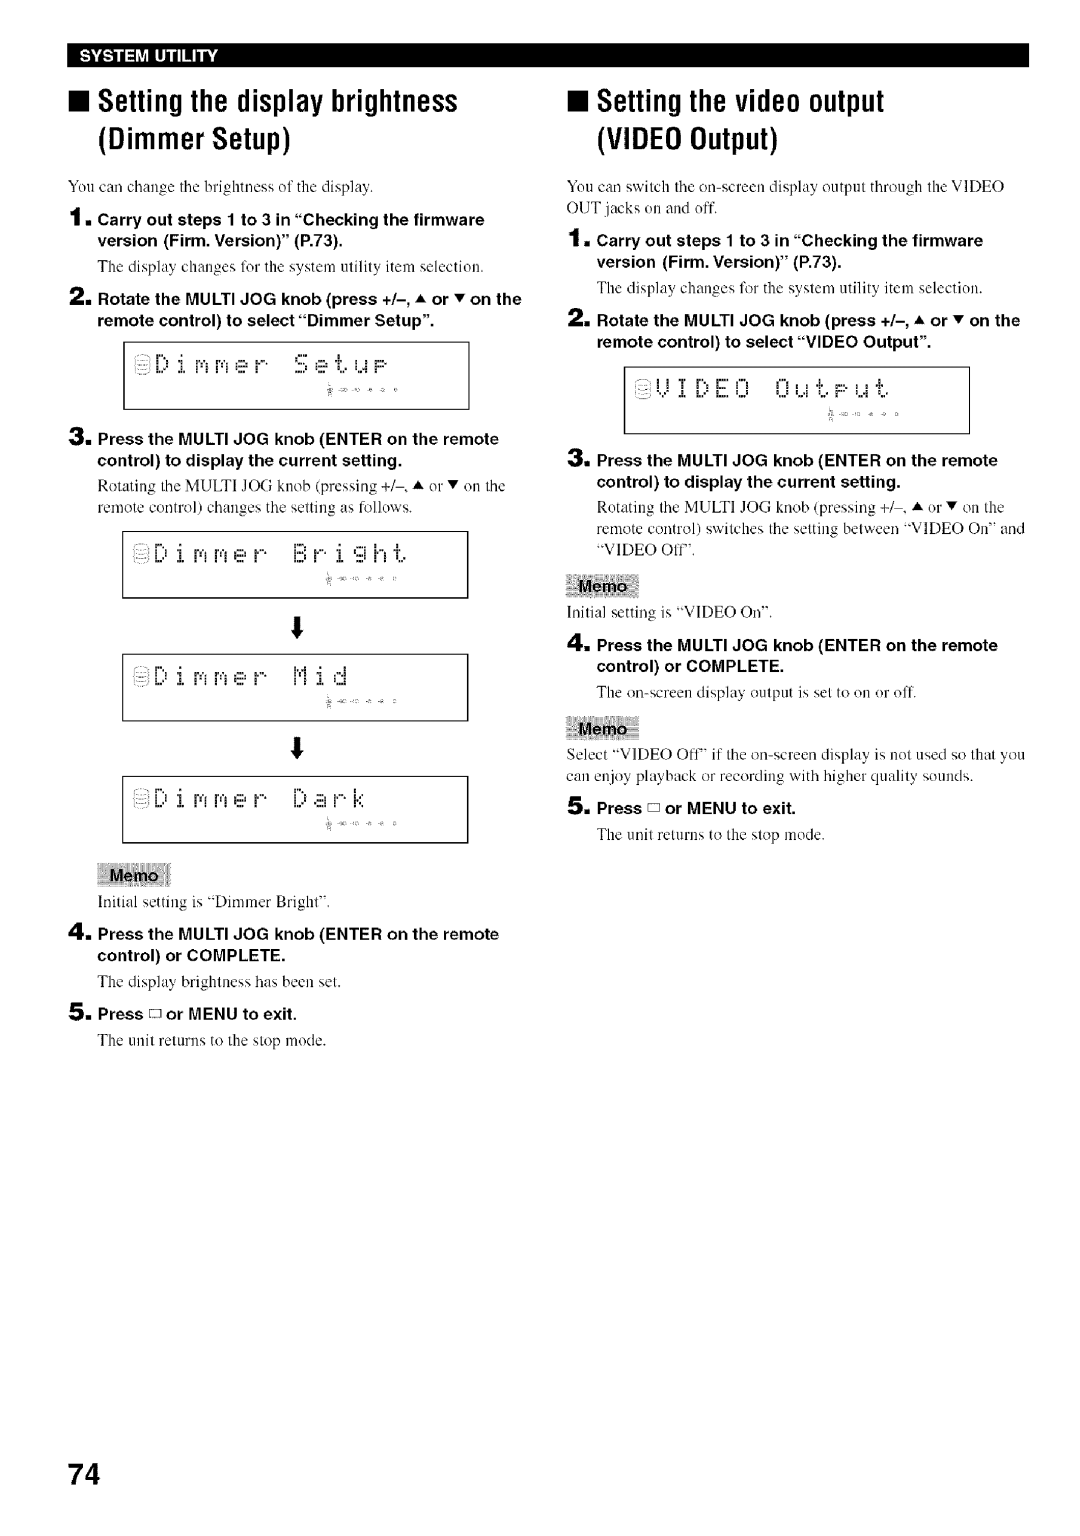
Settingthe videooutput VIDEOOutput
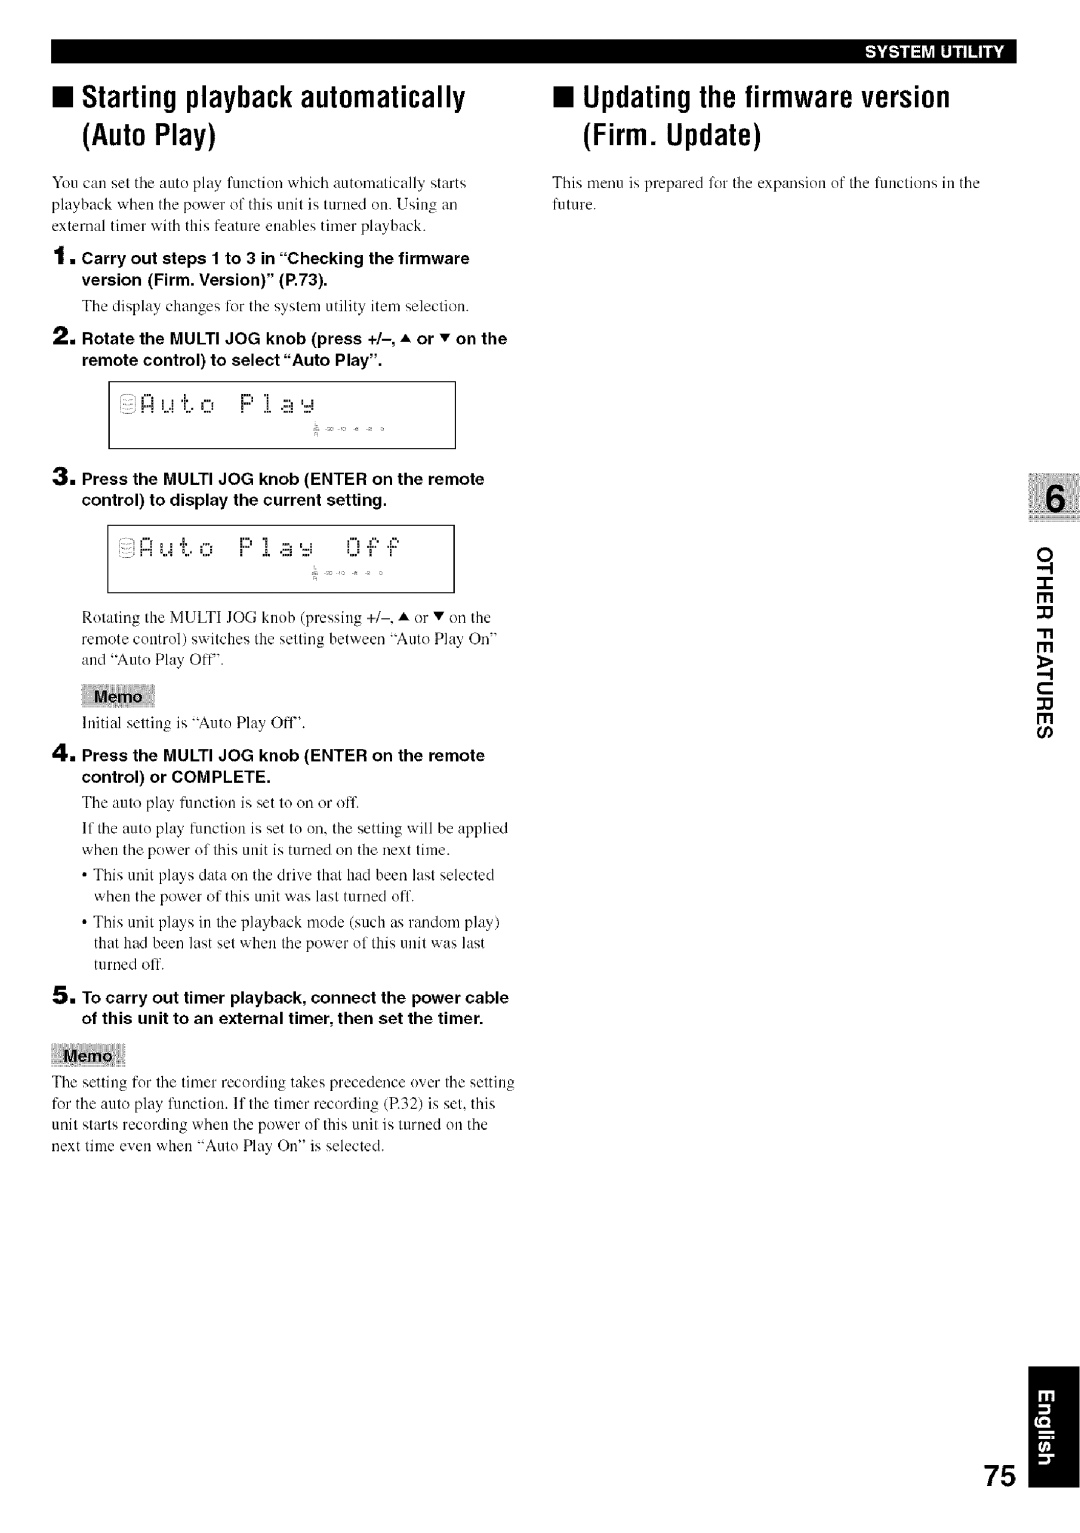
Startingplaybackautomatically Updating the firmware version
AutoPlayFirm.Update
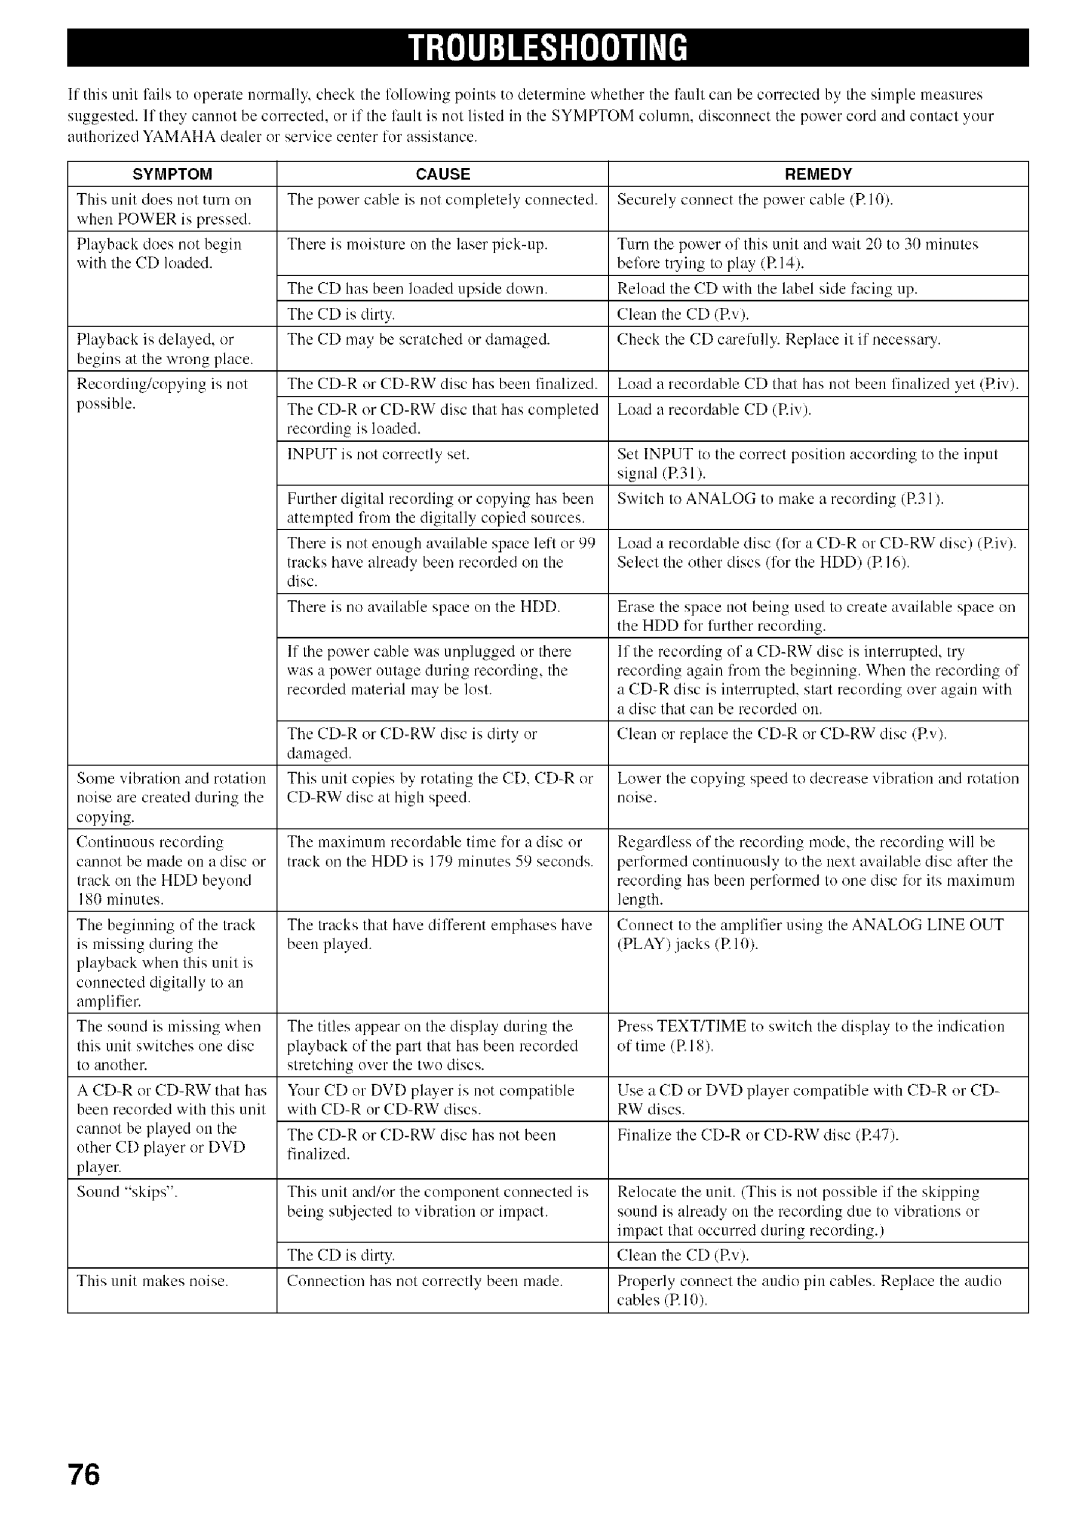
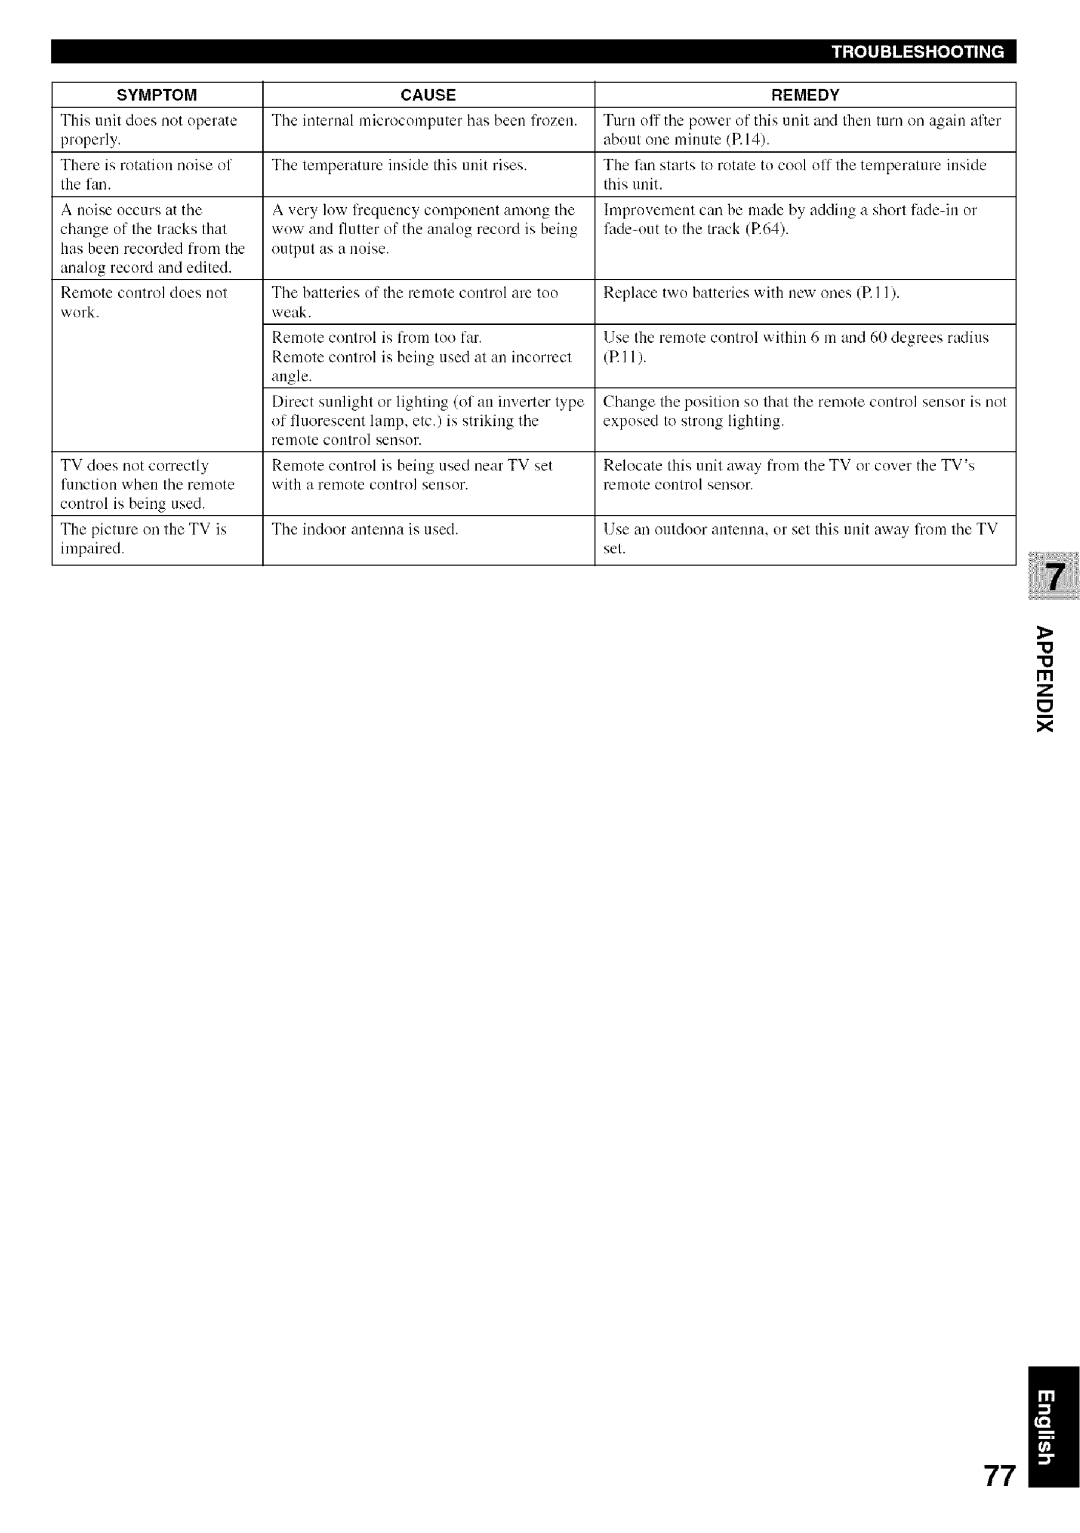
Cause
Symptom
Remedy
EliJ liB,,,-oIol i J
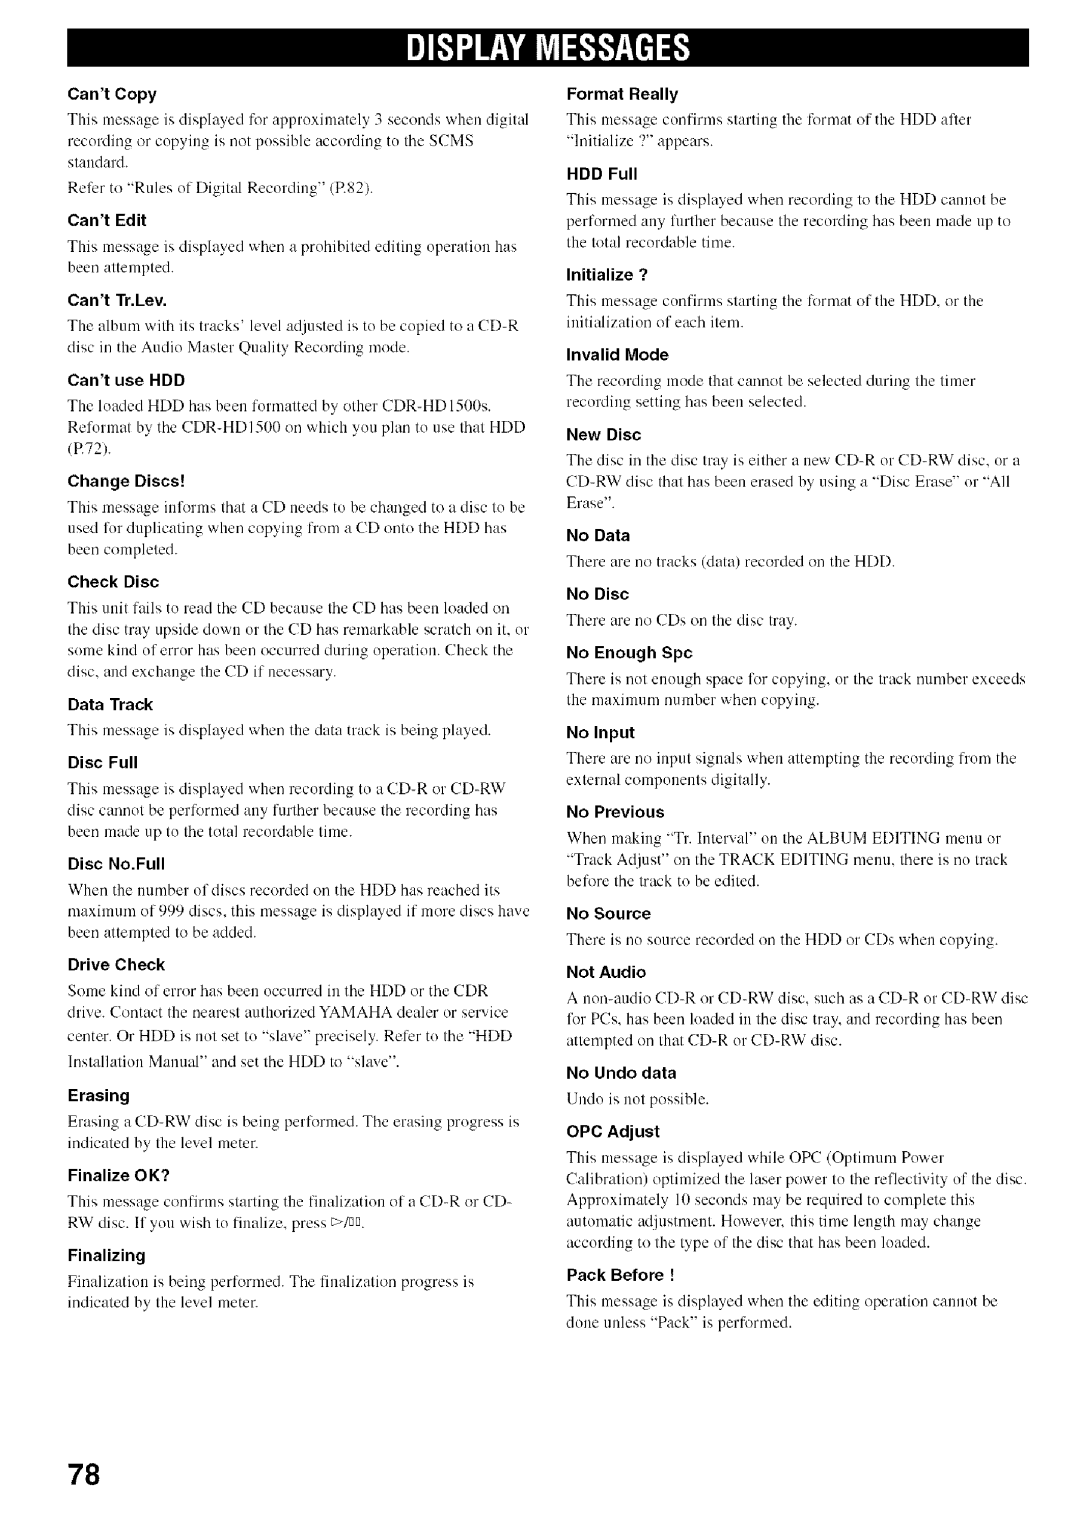
OPC Adjust
Invalid Mode
Cant Edit
Cant Tr.Lev
Reading
Timer Standby
Standby
Track No.Full
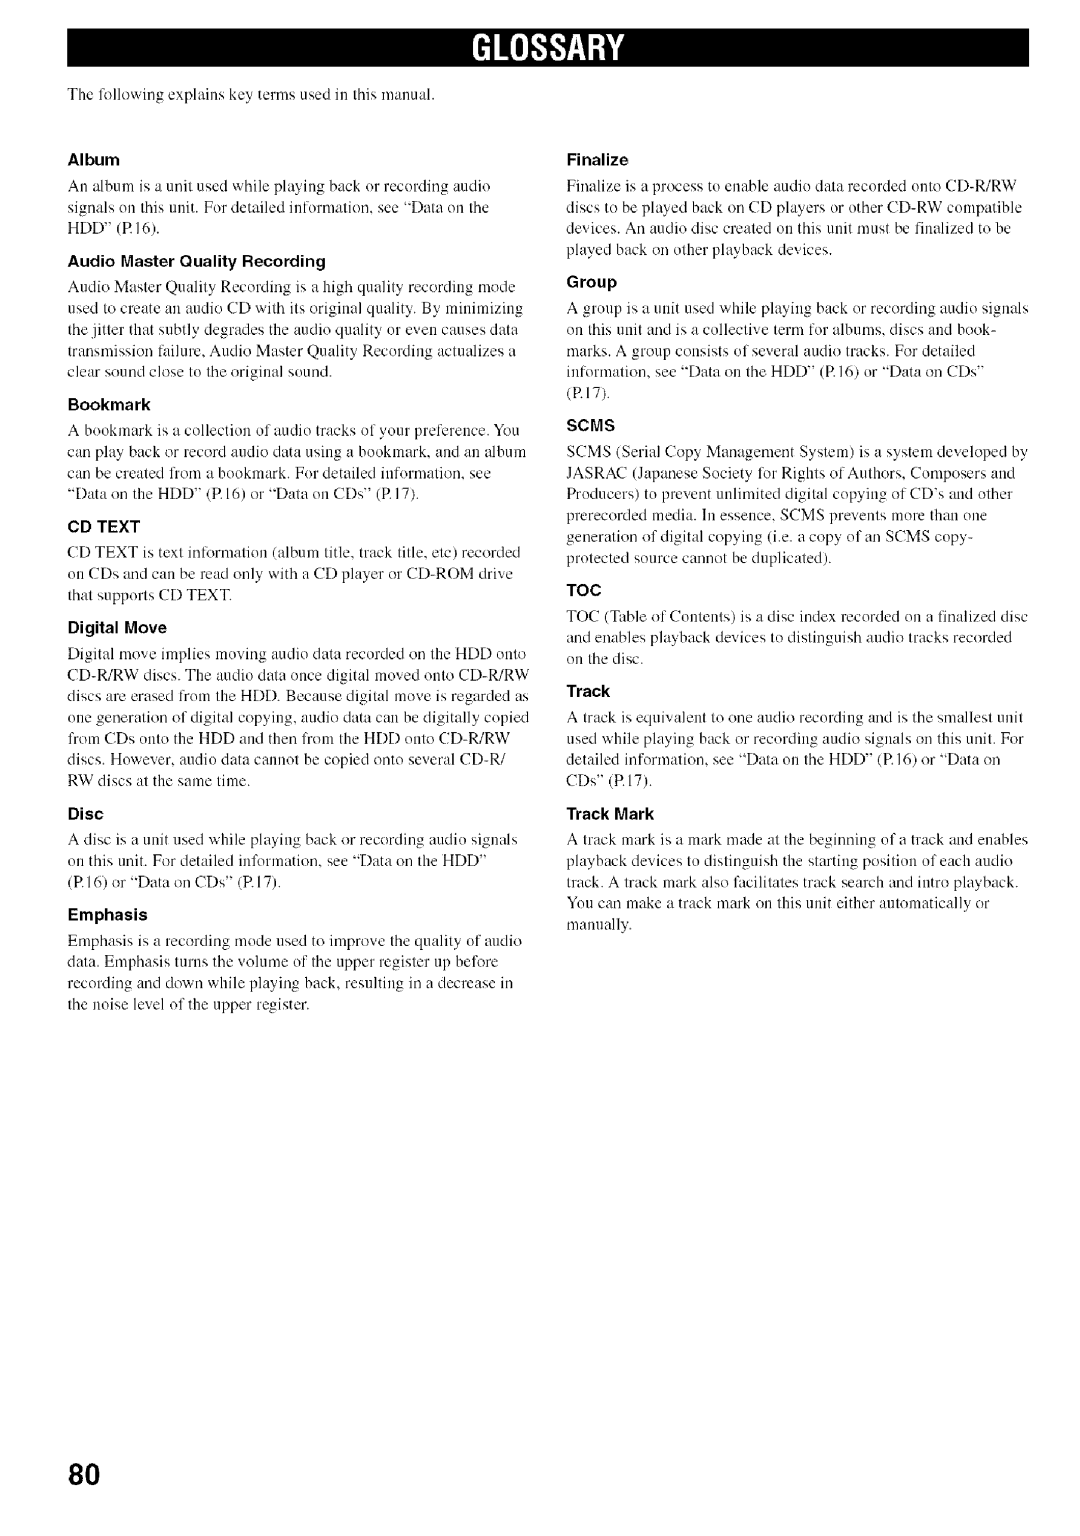
Emphasis
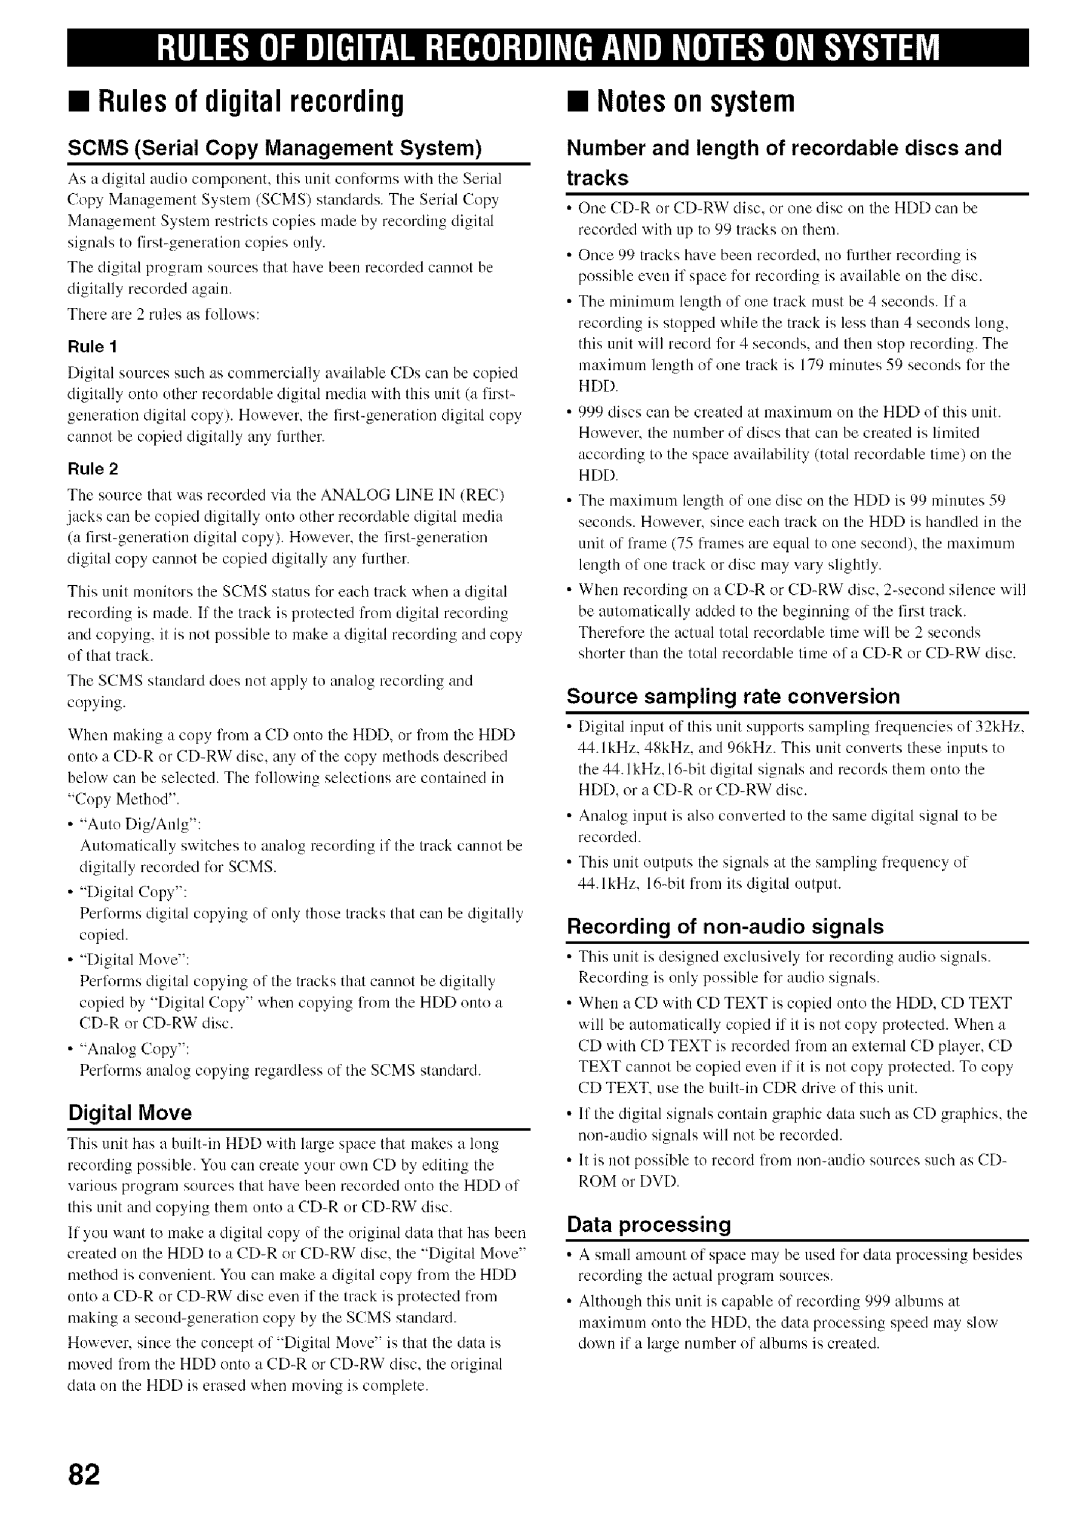
Digital Move
Finalize
Scms
52-57
Menu
Rules of digital recording
Laser Diode Properties
Audio Performance
Inputs
Outputs
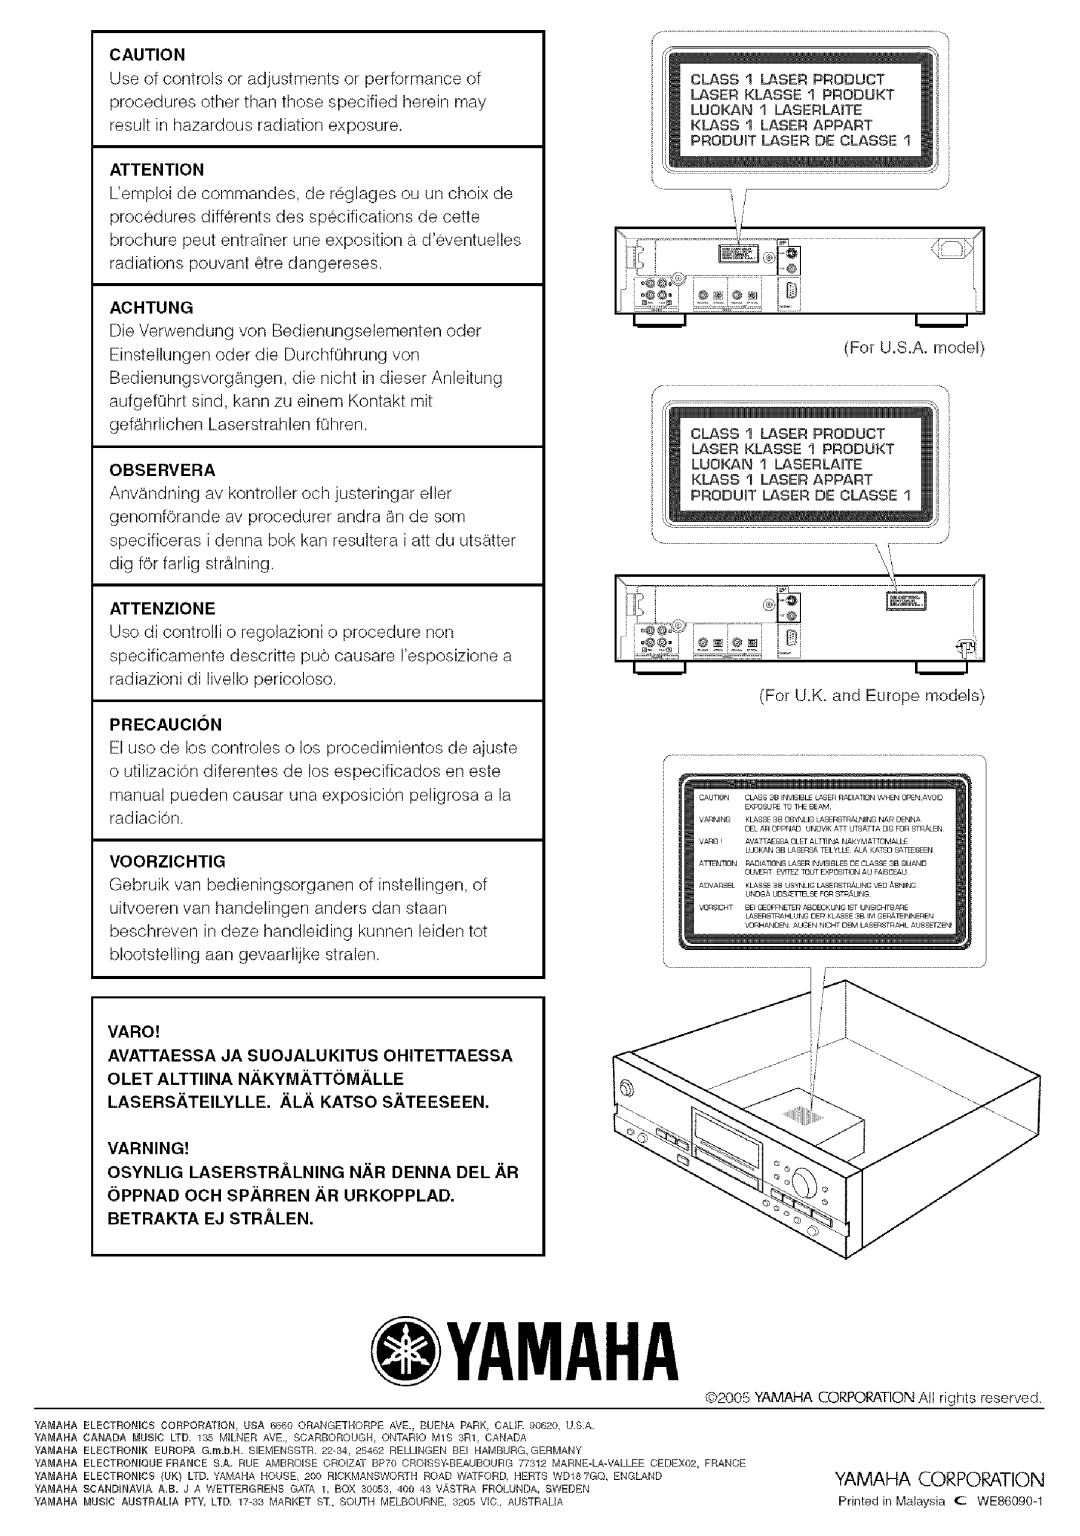
Observera
Achtung
Attenzione
Precaucion
