P 2/ 5
 Repair
CAUTION: Disconnect the charger from the power source for safety before repair/ maintenance! DC18WA has two different kinds of specifications. Distinguish them by name plate “DC18WA” and “DC18WA U” and follow each insturction. Do not use the different parts in repair.
[1]DISASSEMBLY/ASSEMBLY FOR DC18WA
[1]-1. Terminal unit and Charger case complete
DISASSEMBLING
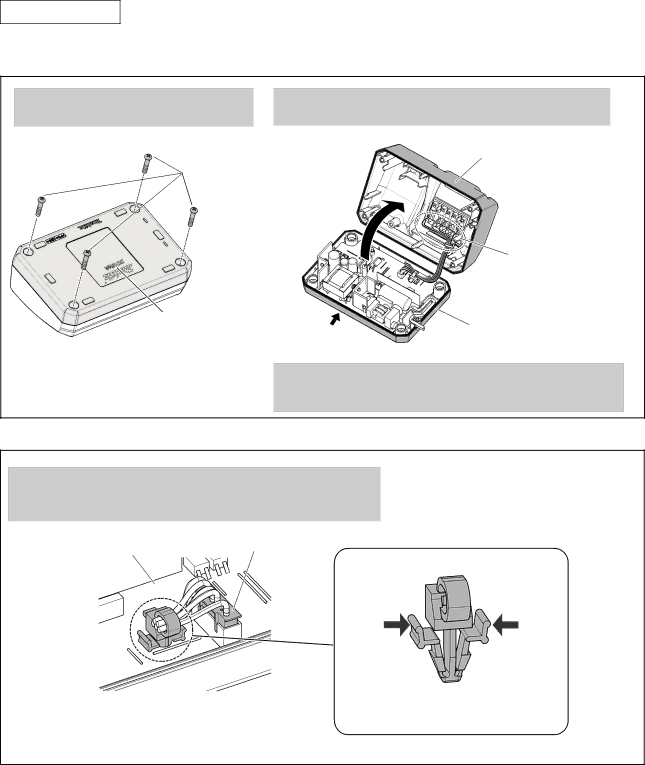
Replace Charger case complete as drawn in Figs. 1 and 2.
Fig. 1
1.Turn Charger upside down and remove four tapping screws.
2.Turn Charger over again and open Charger case complete from rear side.
Charger case complete
Tapping screws
Terminal unit |
Indication of DC18WA | *Open from | Charger case cover |
| ||
|
| |
| this side |
|
Note: Terminal unit is fully integral with Charger case complete.
When it is necessary to replace Terminal unit, replacing
Charger case complete and Charging condition label is required.
Fig. 2
3.When replacing Charger case complete;
(1)By pinching Push mount tie, remove it from Charging circuit.
(2)Remove Connector from Charging circuit.
Charging circuit | Connector |
Push mount tie
Pinch both levers of Push mount tie when pulling it off from Charger circuit.