Assembly
Before beginning assembly, carefully read the following information and instructions:
¥Place all parts in a cleared area and remove the packing materials; do not dispose of the packing materials until assembly is completed.
¥Assembly requires the included air pump.
¥Read each assembly step before you begin.
¥During assembly, make sure that all parts are ori- ented as shown in the drawings.
1.Before beginning assembly, be sure that you have read and understand the information in the box above and on the previous page.
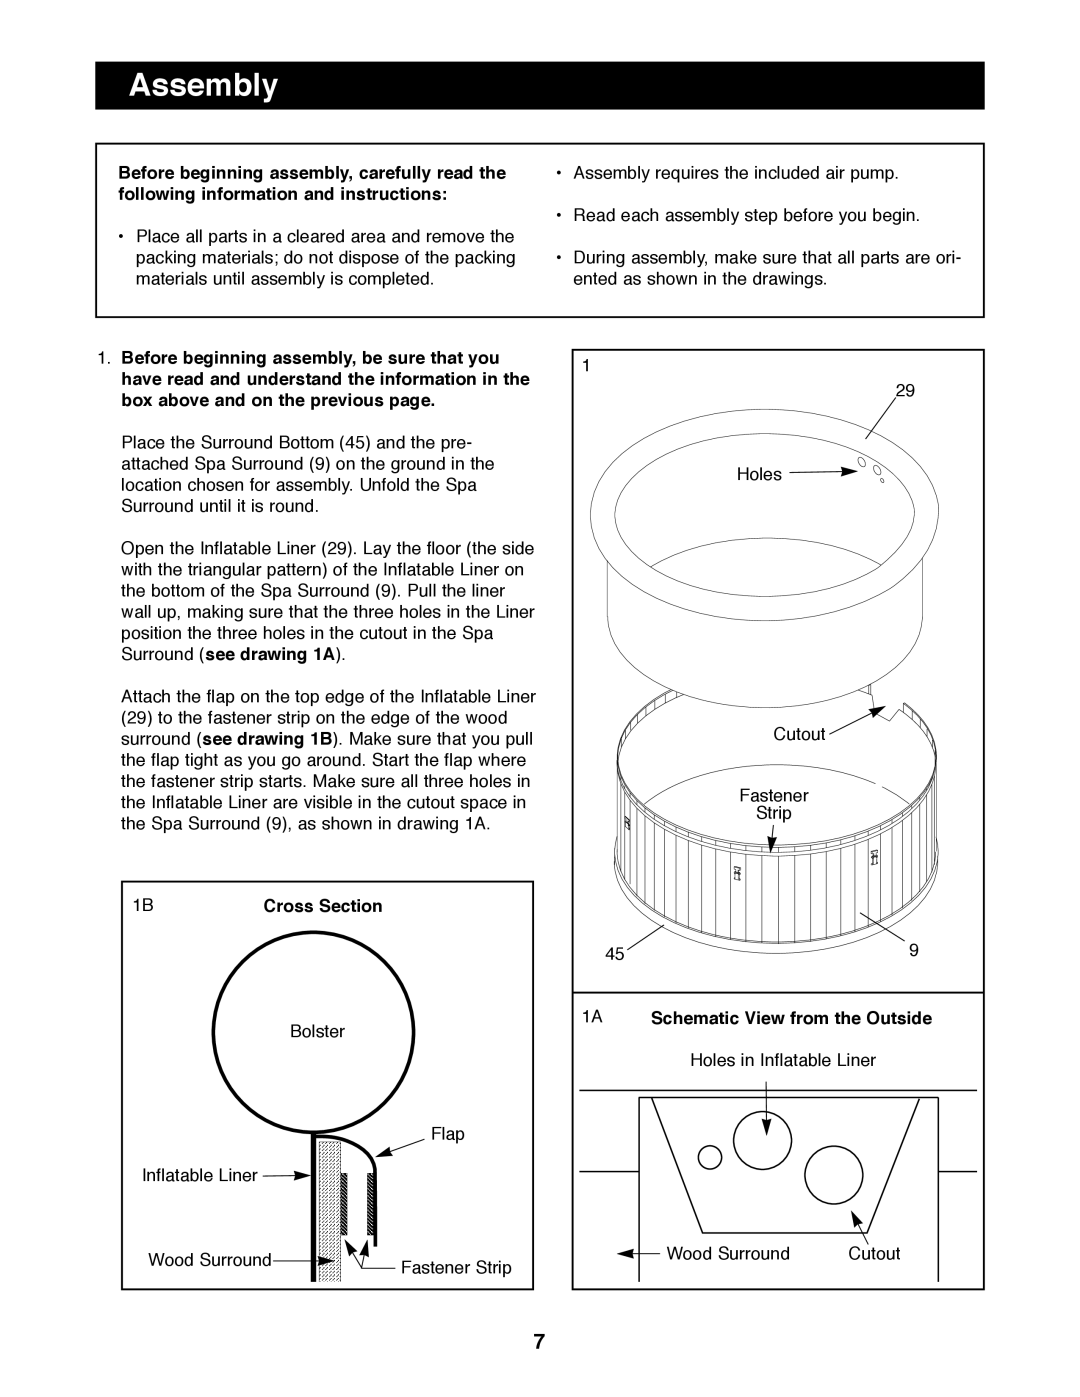
Place the Surround Bottom (45) and the pre- attached Spa Surround (9) on the ground in the location chosen for assembly. Unfold the Spa Surround until it is round.
Open the Inflatable Liner (29). Lay the floor (the side with the triangular pattern) of the Inflatable Liner on the bottom of the Spa Surround (9). Pull the liner wall up, making sure that the three holes in the Liner position the three holes in the cutout in the Spa Surround (see drawing 1A).
Attach the flap on the top edge of the Inflatable Liner (29) to the fastener strip on the edge of the wood surround (see drawing 1B). Make sure that you pull the flap tight as you go around. Start the flap where the fastener strip starts. Make sure all three holes in the Inflatable Liner are visible in the cutout space in the Spa Surround (9), as shown in drawing 1A.
1B |
| Cross Section |
Bolster
Flap
Inflatable Liner ![]()
Wood Surround![]()
![]() Fastener Strip
Fastener Strip
1 |
|
|
|
| 29 |
| Holes |
|
| Cutout |
|
| Fastener |
|
| Strip |
|
45 |
| 9 |
1A | Schematic View from the Outside | |
| Holes in Inflatable Liner | |
| Wood Surround | Cutout |
7