Using Your X-Bench Work Station – No Assembly Required
1. Opening the X-Bench
a. The
Fig. 1a | Pins are not |
| engaged in |
| hole, unit is |
| now open. |
b. After the table has been opened, the knob must be turned back into the locked position before extending the legs or placing the table upright. To lock the table in place, twist the main knob back into the closed position. Once the main knob is in the closed position, the user can now safely extend the legs and then place the table upright.
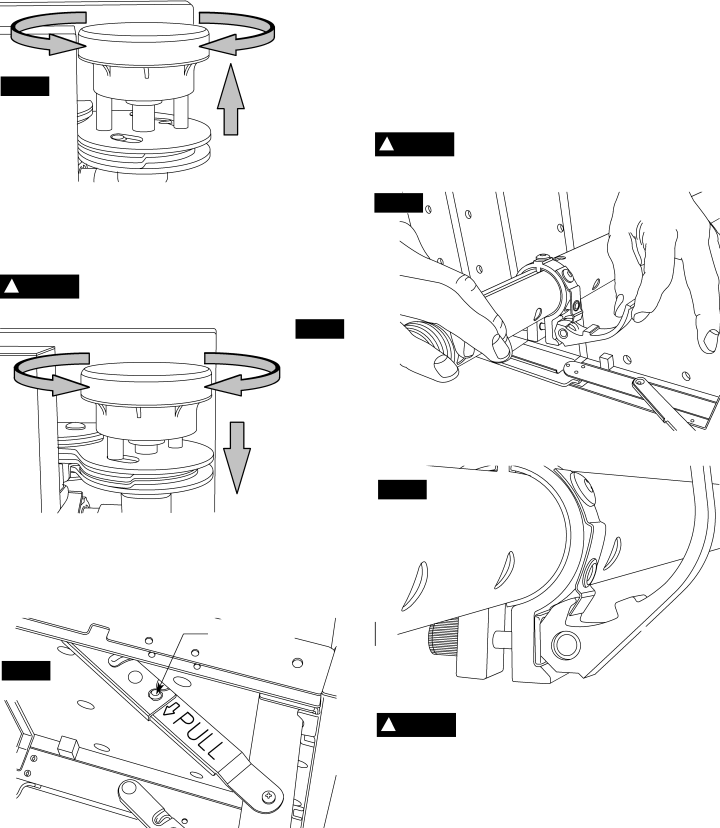
3. Adjusting Leg Height
a. With the table still on its side or inverted, the user can adjust the table height to his/her preference. In order to adjust the table height the user must:
b. Fully open the leg locking lever. By positioning the lever in the open position (Fig. 3), it will allow the user to adjust the leg to a desired height marked on the leg. After the leg is positioned at a desired height, the user must close the lever locking mechanism to half way and allow the pin to snap into the lock position. You can visually make sure the pin is depressed correctly and ensure the leg cannot slide at this point. (Fig. 4).
If the pin is not depressed into the hole, the leg clamp will be very difficult to close. Damage may occur to the leg clamp if too much force is applied without the pin being in the correct location.
!WARNING Each leg lock pin must be fully engaged and clamped fully closed before use. Table may
collapse if leg locks are not secure..
Fig. 3
!WARNING
(Fig. 1b).
Table lock must be in the locked position, the bench may collapse in use if not fully locked.
Fig. 1b
Pins are
engaged in
hole, the
table is now
locked.
Fig. 4
2. Extending the Legs
a. Once the table is opened and the main knob is in the locked position, the user can now extend the legs of the work station. While the table is on its side or inverted, extend the legs completely and make sure the leg braces are straightened and locked. The pin will lock in place to ensure that the leg brace is fully secured (Fig. 2).
Pin is shown in the
locked position.
Fig. 2
Pin is fully
depressed = leg
is locked in
position
!WARNING Table must be level and stable for use. If the lever does not close completely or is difficult to
depress, this means the pin is not in the correct location. You MUST adjust the leg to position the pin into the correct height marking (Fig. 5). Close the clamp fully with pin in hole before use. Table must be level and stable for use.
5.