Statistics prove that most common acci- dents among table saw users can be linked to kickback. Kickback is typically defined as the
1.Use your blade guard and splitter.
2.Never for any reason place your hand behind the blade. Should kickback occur, your hand will be pulled into the blade.
3.Inspect splitter for alignment between it and your blade.
4.Never use the fence as a guide for crosscutting.
5.Never attempt freehand cuts.
6.Use a pushstick or featherboard to main- tain control of your workpiece.
7.Feed cuts through to completion.
8.Stand to the side when ripping.
9.Ensure your fence and miter slot are par- allel to the blade.
If you do not have a clear understanding of kickback and how it occurs, do not operate this table saw.
Safety Accessories
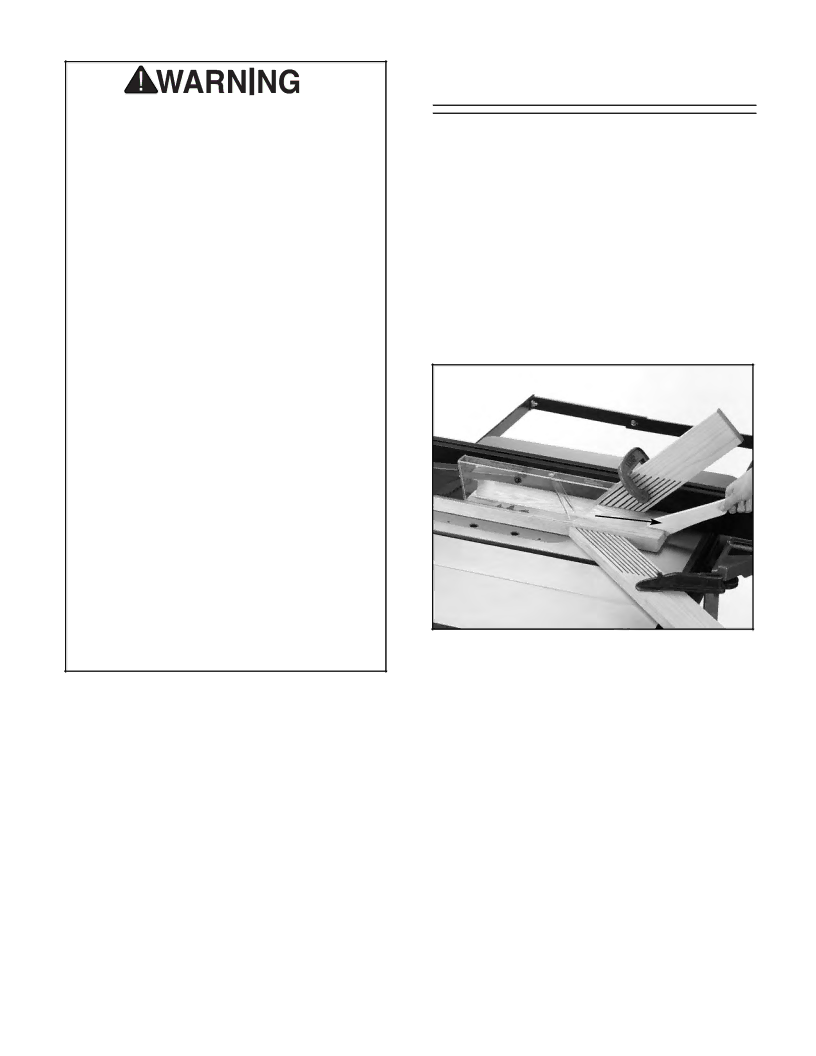
Push Sticks
The use of push sticks, particularly when cutting small or narrow workpieces, provides a double benefit for saw operators. The push stick pro- vides added leverage, enabling the operator to keep the workpiece firmly supported against the fence and table. At the same time, the push stick keeps the operatorÕs hand safely away from the rotation of the saw blade. See the template at the end of the manual for construction details, or pur- chase one from the Grizzly catalog. See Figure 1.
Figure 1. Push Stick
Zero Clearance Table Inserts
Ideal for use when ripping thin strips or making bevel cuts, these prevent tearout and jammed blades by supporting material close to the blade. Use the standard table insert as a template when creating additional inserts from wood or plywood. Blade slot inserts can be custom cut for specific blade angles by raising the running blade into an uncut insert at the angle you desire. Be sure to make an additional slot for the blade splitter. Grizzly also carries a wide selection of table inserts in the Grizzly catalog. Be sure to hold the insert firmly in place with a piece of wood when creating slots. Never hold the table insert with your hand while cutting new slots. See Figure 2.
G7209/10 14'' Table Saw |