DeWalt Complete Guide to Power Tool Maintenance and Adjustments for DW369

Page 15

service personnel. Always use identical replacement parts. (Refer to Brushes for brush replacement information.)

Brushes

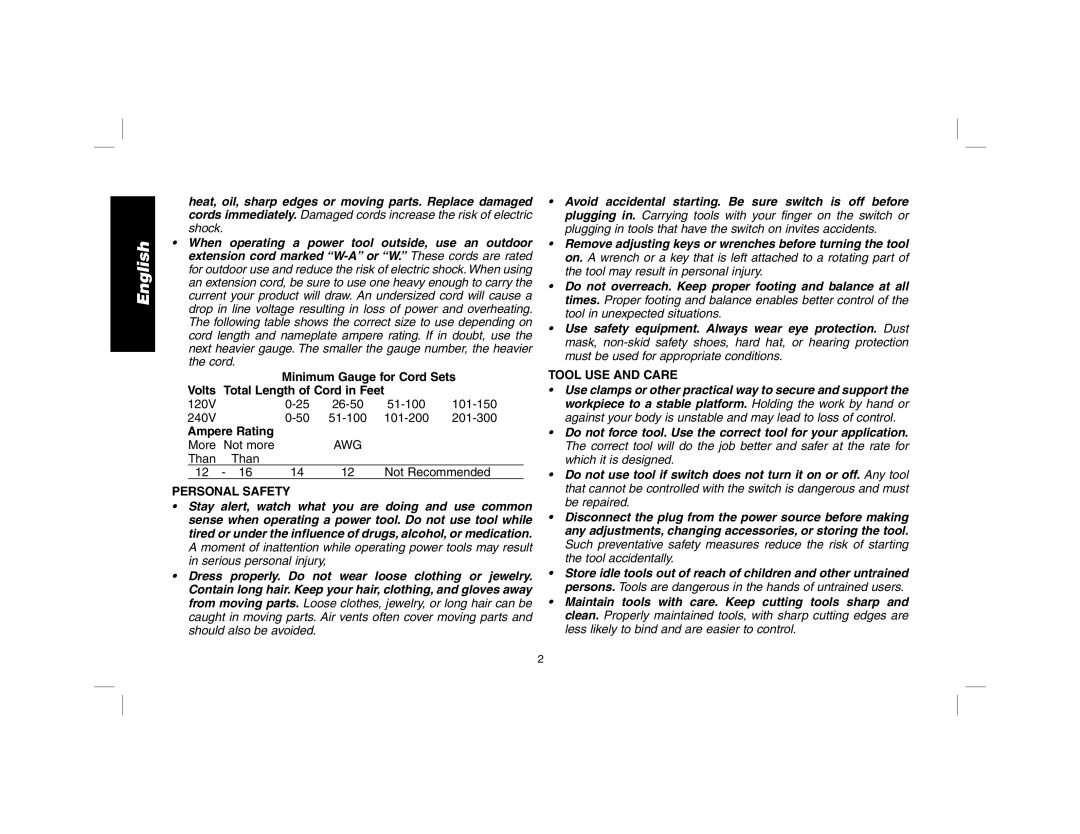
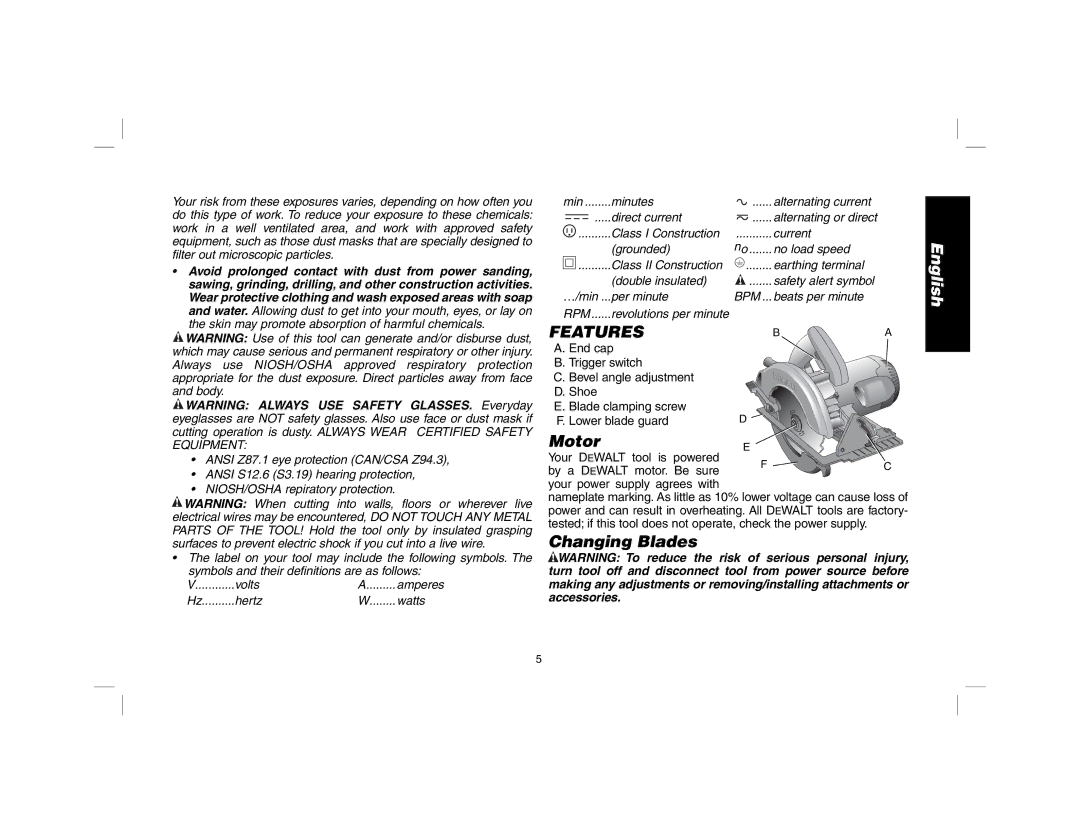
WARNING: To reduce the risk of serious personal injury, turn tool off and disconnect tool from power source before making any adjustments or removing/installing attachments or accessories.

Inspect carbon brushes regularly by unplugging tool, removing the end cap and withdrawing the brush assembly. Keep brushes clean and sliding freely in their guides. Always replace a used brush in the same orientation in the holder as it was prior to removal. Carbon brushes have varying symbols stamped into their sides, and if either brush is worn down to the line closest to the spring, the brushes must be replaced. Use only identical DEWALT brushes. New brush assemblies are available at your local service center. Always replace the end cap after inspecting or servicing brushes. The tool should be allowed to “run in” (run at no load without a blade) for 5 minutes before use to seat new brushes.

While “running in” DO NOT TIE, TAPE, OR OTHERWISE LOCK THE TRIGGER SWITCH ON. HOLD BY HAND ONLY.

Shoe Adjustment

WARNING: To reduce the risk of serious personal injury, turn tool off and disconnect tool from power source before making any adjustments or removing/installing attachments or accessories.

Your shoe has been factory set to assure that the blade is perpen- dicular to the shoe. If after extended use, you need to re-align the blade follow the directions below:

ADJUSTING FOR 90 DEGREE CUTS

1.Return the saw to 0 degrees bevel.

2.Place the saw on its side, and retract the lower guard.

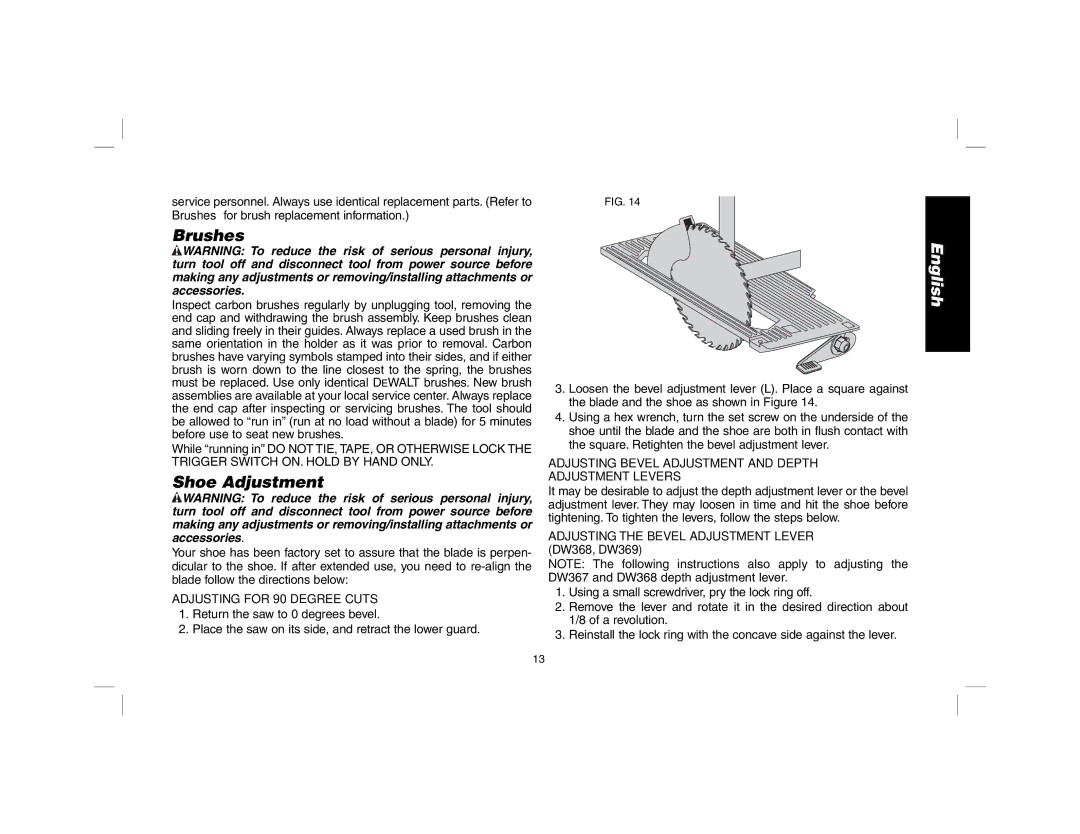
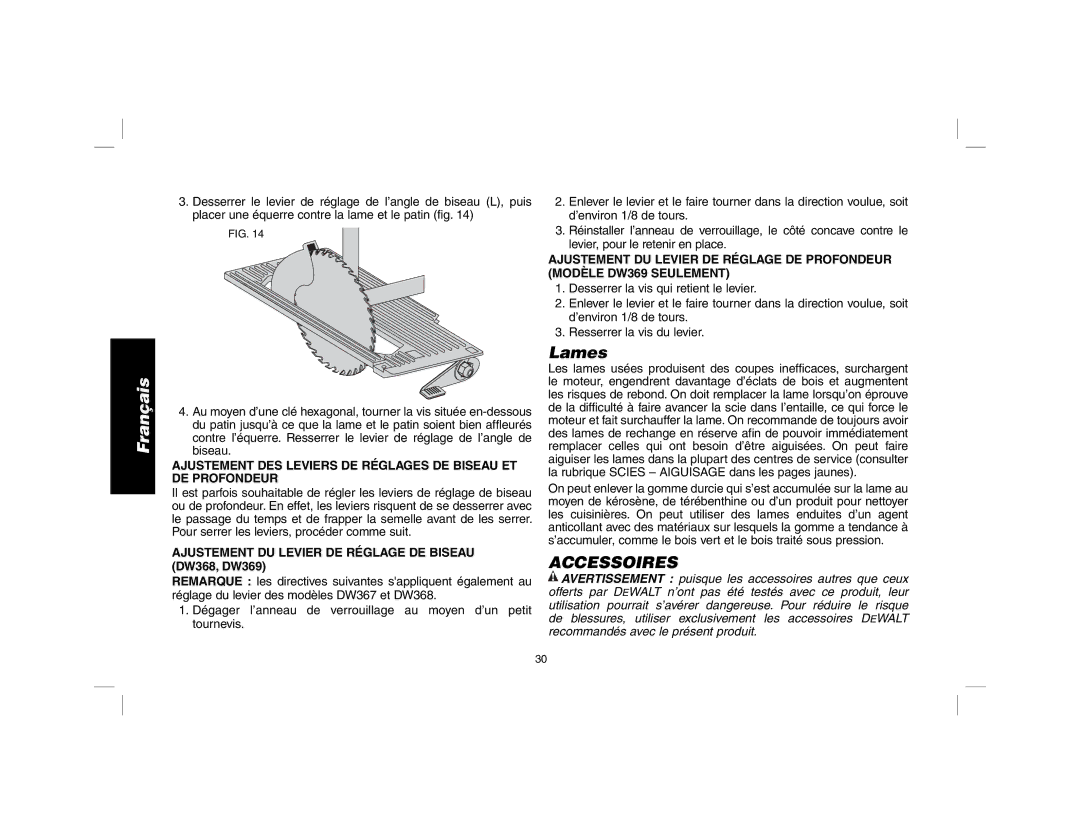
FIG. 14

3.Loosen the bevel adjustment lever (L). Place a square against the blade and the shoe as shown in Figure 14.

4.Using a hex wrench, turn the set screw on the underside of the shoe until the blade and the shoe are both in flush contact with the square. Retighten the bevel adjustment lever.

ADJUSTING BEVEL ADJUSTMENT AND DEPTH ADJUSTMENT LEVERS

It may be desirable to adjust the depth adjustment lever or the bevel adjustment lever. They may loosen in time and hit the shoe before tightening. To tighten the levers, follow the steps below.

ADJUSTING THE BEVEL ADJUSTMENT LEVER (DW368, DW369)

NOTE: The following instructions also apply to adjusting the DW367 and DW368 depth adjustment lever.

1.Using a small screwdriver, pry the lock ring off.

2.Remove the lever and rotate it in the desired direction about 1/8 of a revolution.

3.Reinstall the lock ring with the concave side against the lever.

English

13

Image 15
Contents DW367, DW368, DW369 4 184 mm Circular Saws Page Work Area Definitions Safety GuidelinesGeneral Safety Instructions Electrical SafetyTool USE and Care Personal SafetyService Additional Safety Instructions for Circular SawsCauses and Operator Prevention of Kickback Features MotorChanging Blades To Replace the Blade To Install the Blade FIGLower Blade Guard Bevel Angle Adjustment Cutting Depth AdjustmentOperation Kerf Indicator FigSwitch Fig Bevel DetentWorkpiece Support Kickback CuttingRepairs MaintenanceCleaning Lubrication Electric Brake DW369 OnlyAdjusting the Bevel Adjustment Lever DW368, DW369 Shoe AdjustmentAdjusting for 90 Degree Cuts Adjusting Bevel Adjustment and Depth Adjustment LeversAccessories Three Year Limited WarrantyBlades DAY Money Back Guarantee Zone DE Travail Définitions lignes directrices en matière de sécuritéRègles de sécurité Généralités Conserver CES DirectivesUtilisation ET Entretien DE L’OUTIL Sécurité PersonnelleEntretien Causes DU Rebond ET Mesures Préventives Français Composants Moteur Remplacement des lamesInstallation DE LA Lame FIG Remplacement DE LA LamePROTÈGE-LAME Inférieur Réglage de la profondeur de coupe figRéglage de l’angle de biseau fig Réglage et d’enlever ou d’installer tout accessoireInterrupteur fig Indicateur de trait de scie figDispositif de détente de l’angle de biseau fig FonctionnementSupport de la piéce Mauvais Réglage DE Profondeur CoupageEffet de rebond Supports InadéquatsNettoyage EntretienBalais LubrificationFrein électrique Modèle DW369 seulement ReparationsAccessoires LamesAjustement DU Levier DE Réglage DE Biseau DW368, DW369 Contrat D’ENTRETIEN Gratuit D’UN AN Garantie limitée de trois ansLES Remplacer AU Besoin Montures Combinées Durabilité ExtrêmeFrançais Área DE Trabajo Definiciones Normas de SeguridadReglas generales de seguridad Guarde Estas InstruccionesUSO Y Cuidado DE Herramientas Seguridad PersonalServicio Rebote Y Medidas Preventivas Utilice Siempre Equipo DE Seguridad Certificado Cambio de hojas CaracterísticasPara Instalar LA Hoja FIG Hoja Para Cambiar LA HojaProtector Inferior DE LA Hoja Regulación del ángulo de bisel Regulación de la profundidad de corteIndicador de c ort e Fi g Dispositivo de reténCorte FuncionamientoInterruptor Fig Como apoyar la pieza de trabajoSoportes Inadecuados DE LA Pieza DE Trabajo Efecto de ReboteHojas Desafiladas O Sucias MantenimientoRegulación Inapropiada DE Profundidad Torsión DE LA Hoja MAL Alineamiento DE LA HojaReparaciones LimpiezaLubricacion Freno Electrico Modelo DW369 solamenteRegulación DE LA Palanca DE Ajuste DEL Bisel DW368, DW369 Regulación de la zapataAccesorios HojasAÑO DE Servicio Gratuito Póliza de GarantíaGarantía limitada por tres años ExcepcionesInformación Tecnica DW367, DW368, DW369 Herramientas Electricas Page Page Ewalt Industrial Tool Co., 701 Joppa Road, Baltimore, MD
Related manuals
Manual 7 pages 2.35 Kb

DW369, DW367 specifications

The DeWalt DW367 and DW369 are two powerful tools in the extensive lineup of DeWalt’s woodworking and construction equipment. Designed with durability and performance in mind, these models deliver impressive features and advanced technologies to cater to both professional contractors and DIY enthusiasts.

The DeWalt DW367 is a lightweight, cordless saw designed for versatility and ease of use. One of its primary features is its high-performance 18V battery, which offers extended run time and rapid charging capabilities. This allows users to work longer without the interruption of frequent battery changes. The DW367 is equipped with a powerful motor that generates sufficient speed and torque, enabling it to cut through various materials, including wood, metal, and composites, with precision.

One of the standout technologies integrated into the DW367 is its ergonomic design. The saw comes with a comfortable grip that reduces fatigue during prolonged use, making it ideal for extensive projects. Additionally, the built-in LED light illuminates the cutting area, ensuring accuracy and visibility even in low-light conditions. The tool also features a tool-free blade change system, allowing users to switch blades quickly and efficiently without the need for additional tools.

On the other hand, the DeWalt DW369 is engineered for more demanding tasks. This model boasts advanced electronics that provide overload protection, preventing the motor from overheating and extending the tool's lifespan. It also offers a higher cutting capacity, making it suitable for thicker materials and more intricate cuts.

A notable characteristic of the DW369 is its adjustable bevel and depth cut features. These allow users to make precise bevel cuts and adjust the depth of the cut according to the material being worked with. This flexibility is essential for professionals who require accuracy and versatility in their work.

Both models leverage DeWalt's commitment to safety, incorporating an electric brake that instantly stops the blade upon disengaging the switch, minimizing the risk of accidents. Furthermore, each tool comes with a robust housing that enhances durability, ensuring they can withstand the rigors of job site conditions.

In summary, the DeWalt DW367 and DW369 are exemplary tools that combine power, versatility, and safety. With their advanced features and reliable technologies, both models can meet the diverse needs of users, making them invaluable additions to any workshop or job site. Their focus on user comfort and operational efficiency speaks to DeWalt's dedication to quality and innovation in the power tools industry.