HP d3000 manual Setting the Zoom Control, To adjusts the optical zoom, To adjusts the digital zoom

Page 22

Setting the Zoom Control

Using a combination of 21 times optical zoom and 5 times digital zoom permits zoom photography at up to 105 times magnification. While the digital zoom can be a useful feature, the more an image is enlarged (zoomed), the more pixelated (grainier) the image will appear. Please refer to "Setting the Digital Zoom" on page 41 on how to setup digital zoom.

To adjusts the optical zoom:

1.Spin the Zoom lever to zoom in or zoom out an image.

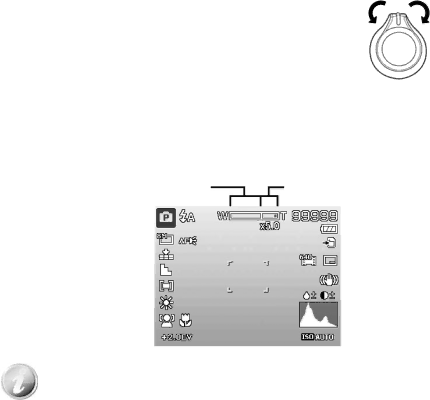
2.The zoom indicator appears on the LCD monitor.

Zoom lever

1.Spin the lever clockwise (right) to zoom in.

2.Spin the lever counterclockwise (left) to zoom out.

To adjusts the digital zoom:

1.Activate digital zoom. See "Setting the Digital Zoom" on page 41.

2.Spin the Zoom lever clockwise/counterclockwise optically zooms in/out to the maximum until it stops.

3.Release the Zoom lever.

Optical zoom 1X to 21X

Digital zoom 1X to 5X

Digital zoom is not activated in recording videos

21

Image 22
Contents D3000 Table of Contents About Folder and File Names Preface Safety and Handling PrecautionsAbout this Manual Using this Menu Battery InformationIntroduction Main FeaturesSystem Requirements Package Contents Front View Self-timer LED AF Assist Lamp Microphone LensCamera Views Back ViewTop View Bottom ViewRight View Camera ButtonsLeft View Navigation Control Camera Memory Internal memoryGetting Started Inserting the BatteryAttach the Camera Strap Please remove the lens cover before doing Power on Turning the Power On and OffInitial Settings Inserting an SD/SDHC/SDXC Memory CardHolding down or keys to change the values continuously Record Mode ModesUsing the LCD monitor LCD Monitor LayoutMovie Mode Screen Layout Playback mode of videos Playback mode of audio clips Changing the LCD Monitor Display Recording Images, Videos and VoicesTaking Images To adjusts the digital zoom Setting the Zoom ControlTo adjusts the optical zoom Digital zoom is not activated in recording videosTo set the Focus mode Using FlashSetting the Focus Mode To activate FlashMy Mode Using the Function MenuPhoto Size Quality Settings of Recording VideosRecording Videos EV CompensationInternet Mode Movie SizeWhite Balance ISOColor Mode MeteringMode dial Icon Mode DescriptionUsing Intelligent Scene To activate Intelligent SceneSetting the Scene Mode Using Kids Mode Using Soft Skin mode Using Sports ModeUsing Party Mode Using Food ModeUsing Blink Detection Mode Using Smile Capture ModeImage is set to low quality and VGA 640x480 size only Using Pre-composition Mode Using Self Portrait Using Voices RecordingUsing Love Portrait Using D-Lighting ModeUsing Photo Stitch Mode Using Continuous ShootingTo stitch the still image Using Manual Exposure To activate Manual ExposureUsing Shutter Priority Mode Using the Record MenuUsing Aperture Priority Mode Record MenuSetting the AF Lamp Setting the Drive ModeSetting the AF Area To set the Drive ModeSetting Saturation Setting SharpnessSetting Contrast To set Contrast Setting the Digital ZoomTo set Digital Zoom Setting Stabilizer Setting the Date StampSetting Auto Review To set Date StampPlayback To set 9-images modeTo set calendar mode Viewing in Single NavigationPlaying Videos Zooming imagesThumbnail icons Playing Voice Recording Volume cannot be adjusted during Pause modeVolume cannot be adjusted when you pause the voice memo Playing Voice MemoPlayback Menu Using the Delete ButtonDeleting an Image/Video/Audio To go to Playback MenuTo delete a single file DeleteTo delete an image/video/audio clip To delete attached voice memoTo delete all files To change slide show settingsSlide Show To view slideshowProtect Red-eye CorrectionTo activate Red-eye Correction Voice MemoTo record voice memo To activate Color Mode Trim To trim an imageStartup Image ResizeTo resize an image To set Dpof To reset DpofRadial Blur To set Dpof on a single image/all imagesSetting Power Save Using the Setup MenuSetting Sounds To go to Setup MenuSetting Language Setting LCD SaveSetting Date & Time Setting File NumberingSetting Battery Type Setting TV OutSetting LCD Brightness Setting Memory KitReset All Connecting the Camera to a PC Making ConnectionsPage Connecting the Camera to a Printer To set Print Select Setting the Print Mode MenuTo set Printer Settings To set Print All and Print IndexAppendix TroubleshootingSpecifications About Folder and File NamesFile Format Interface
Related manuals
Manual 3 pages 46.31 Kb