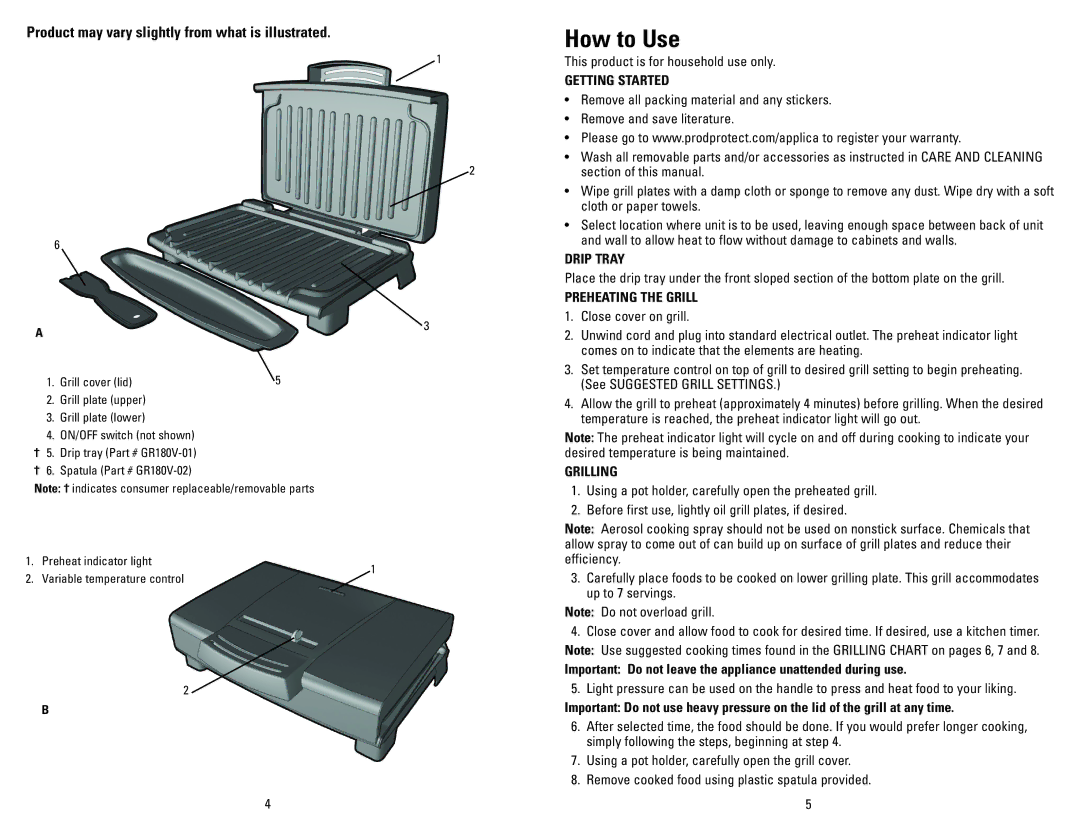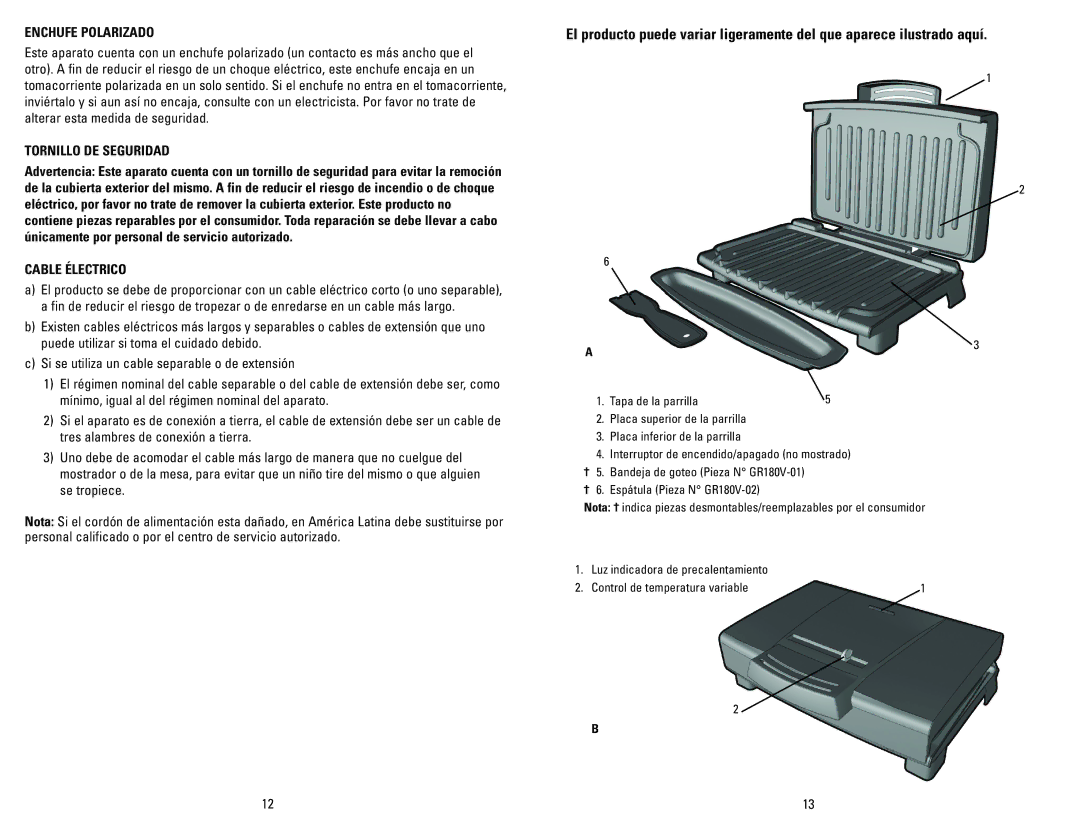
Product may vary slightly from what is illustrated. | How to Use | |||||
|
|
| 1 | |||
|
|
| This product is for household use only. | |||
|
|
|
| GETTING STARTED | ||
|
|
|
| • | Remove all packing material and any stickers. | |
|
|
|
| • | Remove and save literature. | |
|
|
|
| • | Please go to www.prodprotect.com/applica to register your warranty. | |
|
|
| 2 | • | Wash all removable parts and/or accessories as instructed in CARE AND CLEANING | |
|
|
|
| section of this manual. | ||
|
|
|
| • | Wipe grill plates with a damp cloth or sponge to remove any dust. Wipe dry with a soft | |
|
|
|
|
| cloth or paper towels. | |
|
|
|
| • | Select location where unit is to be used, leaving enough space between back of unit | |
| 6 |
|
|
| and wall to allow heat to flow without damage to cabinets and walls. | |
|
|
| DRIP TRAY | |||
|
|
|
| |||
|
|
|
| Place the drip tray under the front sloped section of the bottom plate on the grill. | ||
|
|
|
| PREHEATING THE GRILL | ||
|
|
| 3 | 1. | Close cover on grill. | |
A |
| 2. | Unwind cord and plug into standard electrical outlet. The preheat indicator light | |||
|
| |||||
|
|
|
|
| comes on to indicate that the elements are heating. | |
| 1. | Grill cover (lid) | 5 | 3. | Set temperature control on top of grill to desired grill setting to begin preheating. | |
|
| (See SUGGESTED GRILL SETTINGS.) | ||||
| 2. | Grill plate (upper) |
| 4. | Allow the grill to preheat (approximately 4 minutes) before grilling. When the desired | |
| 3. | Grill plate (lower) |
|
| temperature is reached, the preheat indicator light will go out. | |
| 4. ON/OFF switch (not shown) |
| Note: The preheat indicator light will cycle on and off during cooking to indicate your | |||
† | 5. Drip tray (Part # |
| desired temperature is being maintained. | |||
† | 6. Spatula (Part # |
| GRILLING | |||
Note: † indicates consumer replaceable/removable parts | 1. Using a pot holder, carefully open the preheated grill. | |||||
|
|
|
| 2. Before first use, lightly oil grill plates, if desired. | ||
|
|
|
| Note: Aerosol cooking spray should not be used on nonstick surface. Chemicals that | ||
|
|
|
| allow spray to come out of can build up on surface of grill plates and reduce their | ||
1. | Preheat indicator light | 1 | efficiency. | |||
2. | Variable temperature control | 3. Carefully place foods to be cooked on lower grilling plate. This grill accommodates | ||||
| ||||||
|
|
|
|
| up to 7 servings. | |
|
|
|
| Note: Do not overload grill. | ||
|
|
|
| 4. Close cover and allow food to cook for desired time. If desired, use a kitchen timer. | ||
|
|
|
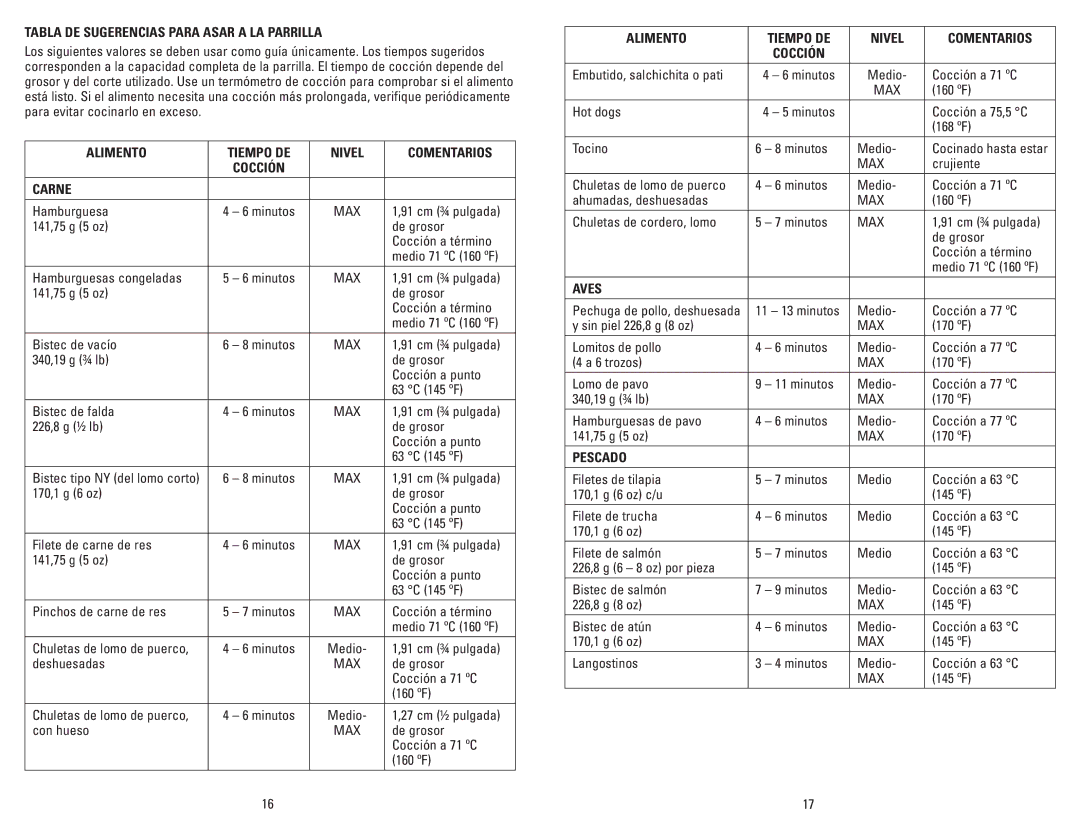
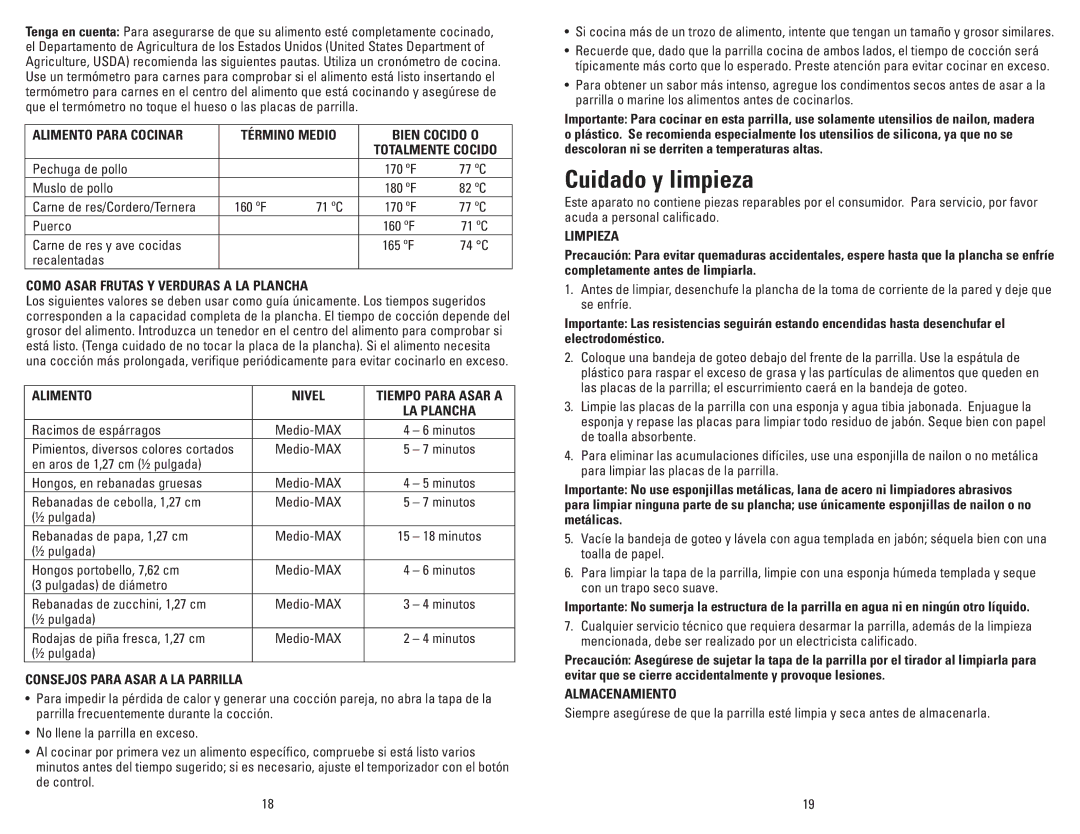
| Note: Use suggested cooking times found in the GRILLING CHART on pages 6, 7 and 8. | ||
|
|
|
| Important: Do not leave the appliance unattended during use. | ||
|
| 2 |
| 5. Light pressure can be used on the handle to press and heat food to your liking. | ||
| B |
|
| Important: Do not use heavy pressure on the lid of the grill at any time. | ||
|
|
|
| 6. After selected time, the food should be done. If you would prefer longer cooking, | ||
|
|
|
|
| simply following the steps, beginning at step 4. | |
7. Using a pot holder, carefully open the grill cover.
8. Remove cooked food using plastic spatula provided.
